Westinghouse W13ADAC handleiding
Handleiding
Je bekijkt pagina 10 van 41
10
|
English
OPERATION
WARNING
Always wear eye protection with side
shields marked to comply with ANSI Z87.1. Failure to do so
could result in objects being thrown into your eyes resulting
in possible serious injury.
WARNING
Do not use any attachments or ac-
cessories not recommended by the manufacturer of this
product. The use of attachments or accessories not recom-
mended can result in serious personal injury.
WARNING
Always disconnect the tool from the
power supply when assembling parts, making adjustments,
cleaning, or when not in use. This will prevent accidental
starting that could cause serious personal injury.
NOTICE
Before each use, inspect the entire product
for damaged, missing, or loose parts such as screws, nuts,
bolts, caps, etc. Tighten securely all fasteners and caps and
do not operate this product until all missing or damaged
parts are replaced. Please contact customer service.
CONNECTING TO POWER SUPPLY
This product is designed with a cord retainer that prevents the
extension cord from coming loose while in use.
1. Form a loop with the extension cord.
2. Put the loop of the extension cord on the extension cord holder.
3. Pull on the cord to reduce the slack and secure it over the hook.
4. Plug the power cord into the extension cord.
NOTE: Removing excess cord slack will help prevent the plug
from loosening from the extension cord.
STARTING AND STOPPING THE TOOL
To start the motor:
WARNING
Rotating tines can cause serious in-
jury. The tines will continue to turn for a few seconds after
operating the tool. Do not touch the rotating tines. Contact
with hot components can cause severe burns. Allow the tool
to cool before handling.
z Connect the tool to the power supply.
NOTICE
Always secure the extension cord to the unit
by using the power cord retainer. Failure to use the power
cord retainer may result in damage to the tool and/or exten-
sion cord.
z Press and hold the lock-out button and squeeze the switch lever.
NOTE: Hold the handle while squeezing the switch lever. Once the
tool is on, release the lock-out button.
To stop the motor:
z Release the switch lever.
DEPTH ADJUSTMENT
The height adjustment knob has four different depth settings.
Depth Setting Depth
1 -0.47 in. (-12 mm)
2 -0.31 in. (-8 mm)
3 -0.16 in. (-4 mm)
4 0.24 in. (6 mm)
Adjust the depth as needed. The appropriate depth is dependent
on the kind of lawn and the height of the grass.
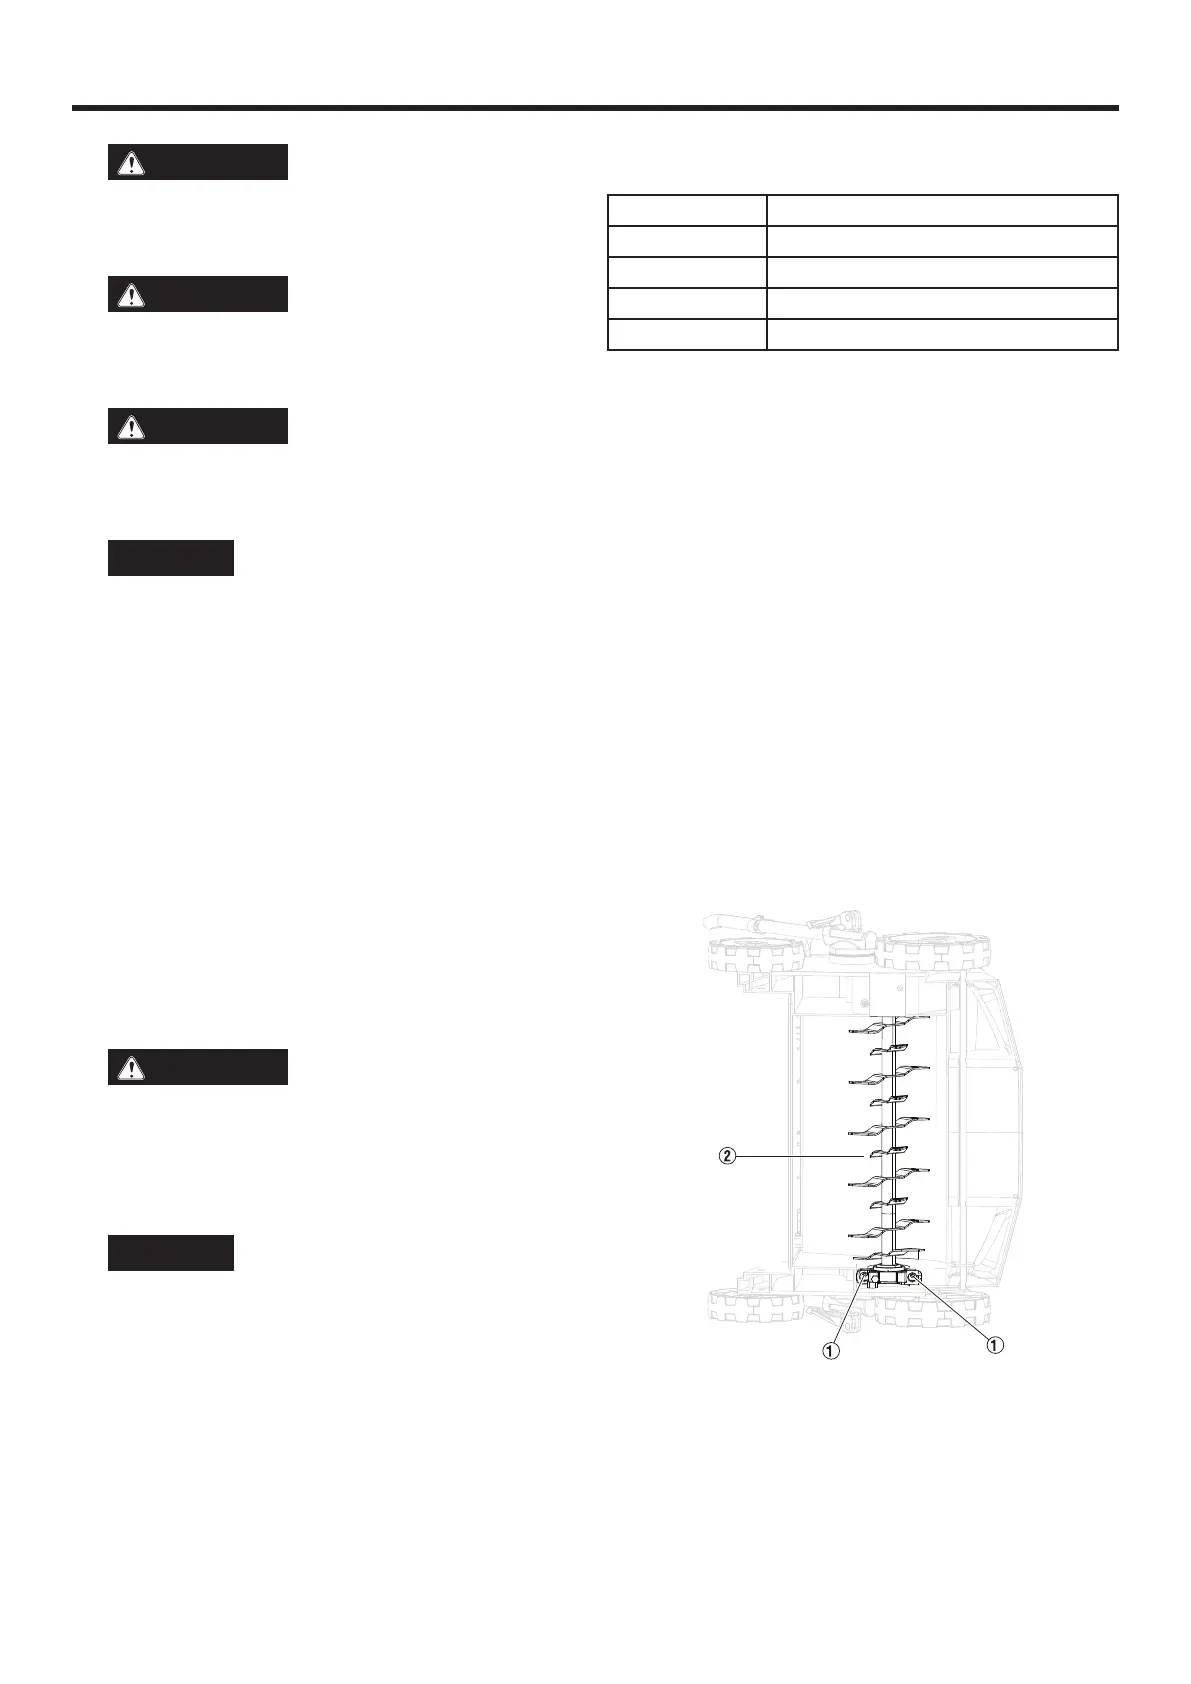
BLADE ASSEMBLY AND REPLACEMENT
See Figure 6.
z To replace the blade, use the wrench to remove the screws (1).
Retain the screws and flat washers.
z Remove the blade and blade housing from the motor housing.
z Remove the blade from the blade housing.
z Insert the replacement blade into the blade housing and secure
to the motor housing with the screws and flat washers.
NOTE: The scarifier blade and rake blade are interchangeable. Follow
these steps for switching the blades.
FIG. 6
Bekijk gratis de handleiding van Westinghouse W13ADAC, stel vragen en lees de antwoorden op veelvoorkomende problemen, of gebruik onze assistent om sneller informatie in de handleiding te vinden of uitleg te krijgen over specifieke functies.
Productinformatie
| Merk | Westinghouse |
| Model | W13ADAC |
| Categorie | Niet gecategoriseerd |
| Taal | Nederlands |
| Grootte | 4056 MB |


