Waterpik WP-490 handleiding
Handleiding
Je bekijkt pagina 4 van 51
76
ENGLISH
76
ENGLISH
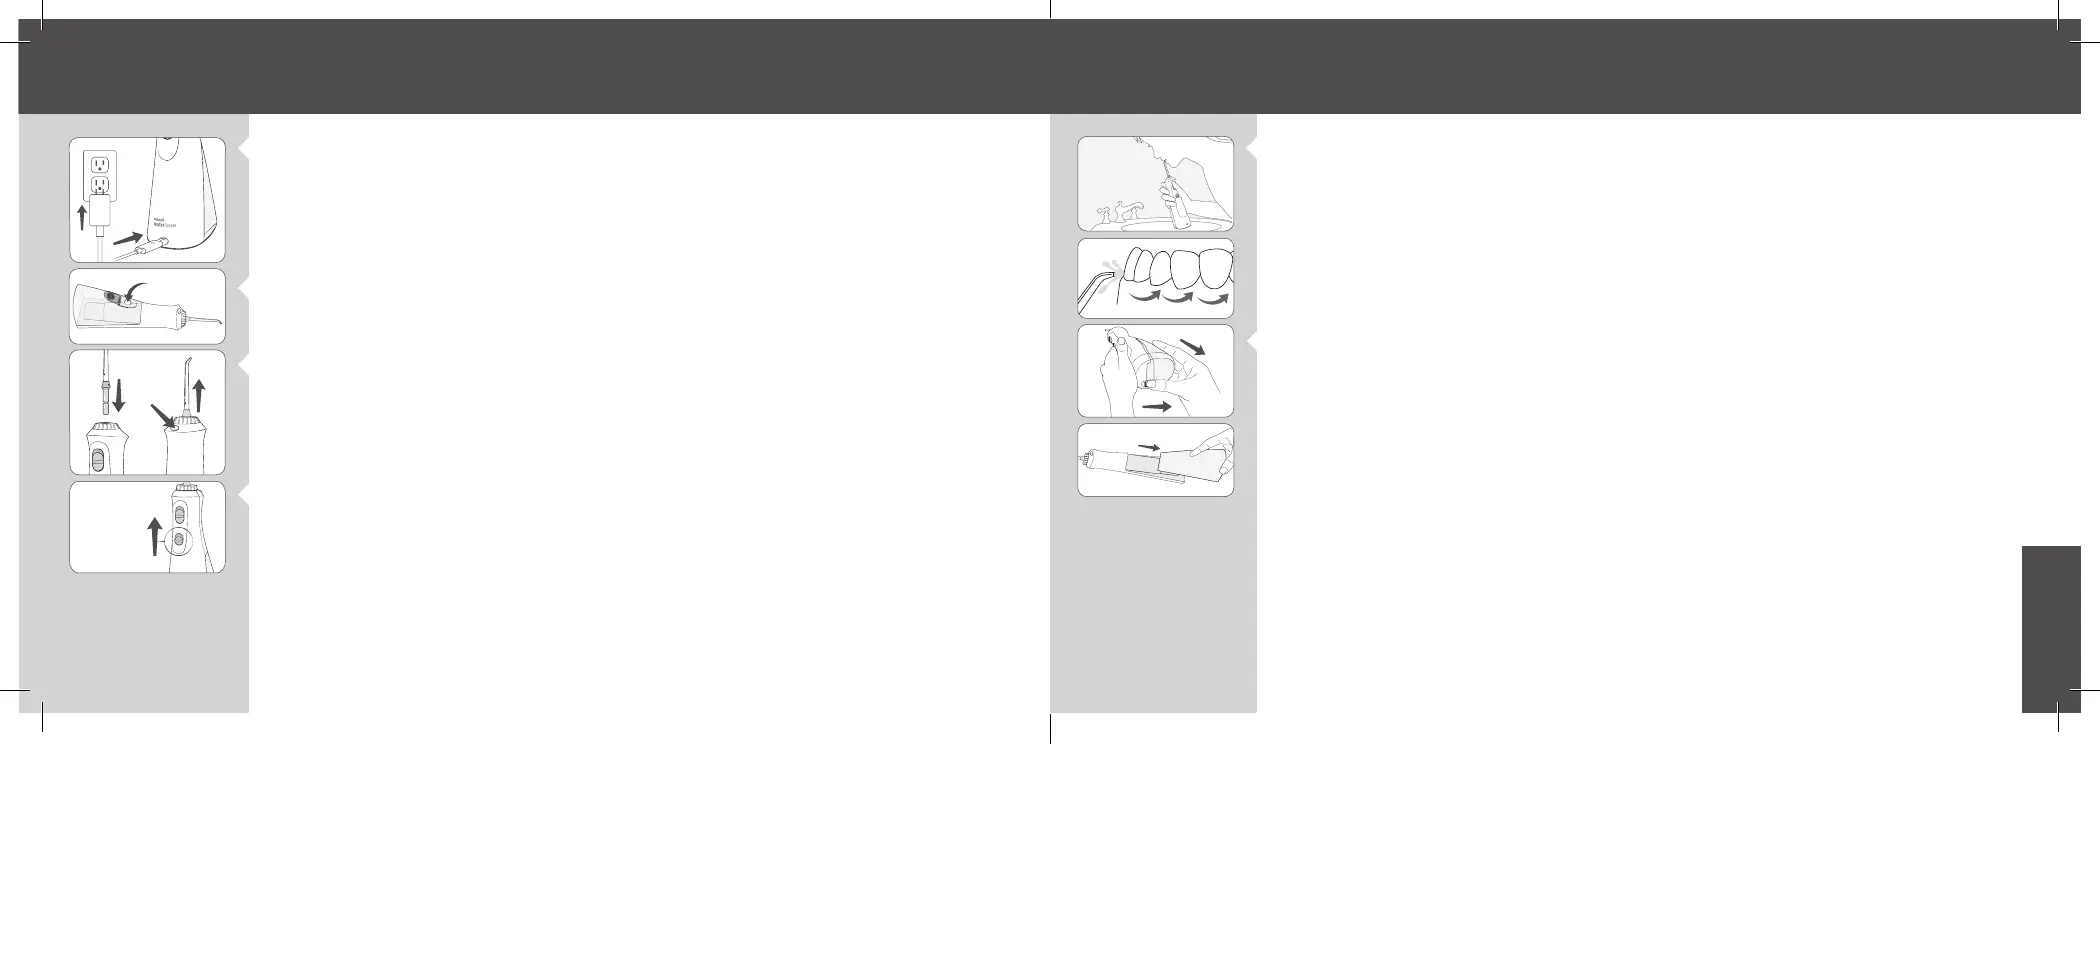
Charging Unit Prior to First Use
Charge Unit For 24 Hours Prior To First Use. A user supplied USB charger with the following specications is required to charge this
product: USB Type-A, Rated Output: 5.0 VDC, 1.0 A. Plug the USB charger into a wall outlet and connect the charging cable to the
unit. Make sure you slide the switch into the OFF (0) position before charging. The unit will not charge if the switch is in the ON (I)
position. See “Cleaning and Troubleshooting Your Waterpik® Water Flosser” for guidance on how to look aer your battery.
Filling the Reservoir
Disconnect charging cable from the unit prior to lling the reservoir and product use. Li ip top on reservoir and ll the reservoir
with lukewarm water.
Inserting and Removing Tips
Insert tip into the center of the knob at the top of the Water Flosser handle. The colored ring will be ush with the end of the knob if
the tip is correctly locked into place.
To remove the tip from the handle, press the tip eject button and pull tip from the handle.
CAUTION: Do not press tip eject button while unit is running.
Adjusting the Pressure Setting
You can adjust the pressure setting on your Water Flosser by simply sliding the pressure switch on the handle.
Recommended Technique
Lean low over sink and place the tip in mouth. Aim the tip toward teeth, and turn the unit ON (|).
For best results, start with the back teeth and work toward the front teeth. Glide tip along gumline and pause briey between teeth.
Continue until you have cleaned the inside and outside of both the upper and lower teeth.
Direct the jet stream at a 90-degree angle to your gumline. Slightly close lips to avoid splashing but allow water to ow freely from
mouth into the sink. Keep unit upright during use for best results.
When Finished
Turn the unit OFF (0). Empty any liquid le in the reservoir.
If desired, the reservoir may be removed from the power handle by pulling the reservoir release latch while sliding the reservoir down
towards the base of the unit.
To replace the reservoir on the power handle, simply slide it up towards the top of the unit. The reservoir will snap into place when
fully engaged.
GETTING STARTED
Fill
I
O
II
I
Pressure
Setting
1.
2.
Remove
I
O
II
I
I
O
II
I
I
O
II
I
Eject
Insert
Bekijk gratis de handleiding van Waterpik WP-490, stel vragen en lees de antwoorden op veelvoorkomende problemen, of gebruik onze assistent om sneller informatie in de handleiding te vinden of uitleg te krijgen over specifieke functies.
Productinformatie
| Merk | Waterpik |
| Model | WP-490 |
| Categorie | Niet gecategoriseerd |
| Taal | Nederlands |
| Grootte | 5189 MB |