Handleiding
Je bekijkt pagina 10 van 16
10
Refrigerator
Adjustable Humidity Zone™ Drawer(s)
The moisture control on your refrigerator produce drawer(s) gives you the ability to
change the amount of moisture or humidity in a drawer, and the clear top section allows
you to see into a drawer without opening it.
The moisture control is located underneath the front trim. Slide the control to a higher
setting for storing deli items or produce with leaves, such as lettuce, spinach, or cabbage.
Slide the control to a lower setting for storing fruits and vegetables with skins, such as
apples, corn, or tomatoes. See “Food Storage Guide” for more information on storing foods properly.
To remove drawer, roll the drawer out to the stop. Then, on each side of the drawer, locate the black leveler on the glides
and lift up until the drawer disengages from the glides. Pull the drawer out the rest of the way. To replace the drawer,
extend the glides out to the stop. Next, place the drawer onto the glides and push it back until the drawer engages the
hook. Lower the front part of the drawer, grasp the glides/drawer and lightly squeeze until the drawer snaps
onto the glides. Then slide the drawer back until it stops.
M
O
IS
T
U
R
E
C
ON
T
R
OL
L
O
W
H
I
GH
MOISTURE C
ONTROL
LOW
HIGH
Freezer
Automatic Ice Maker
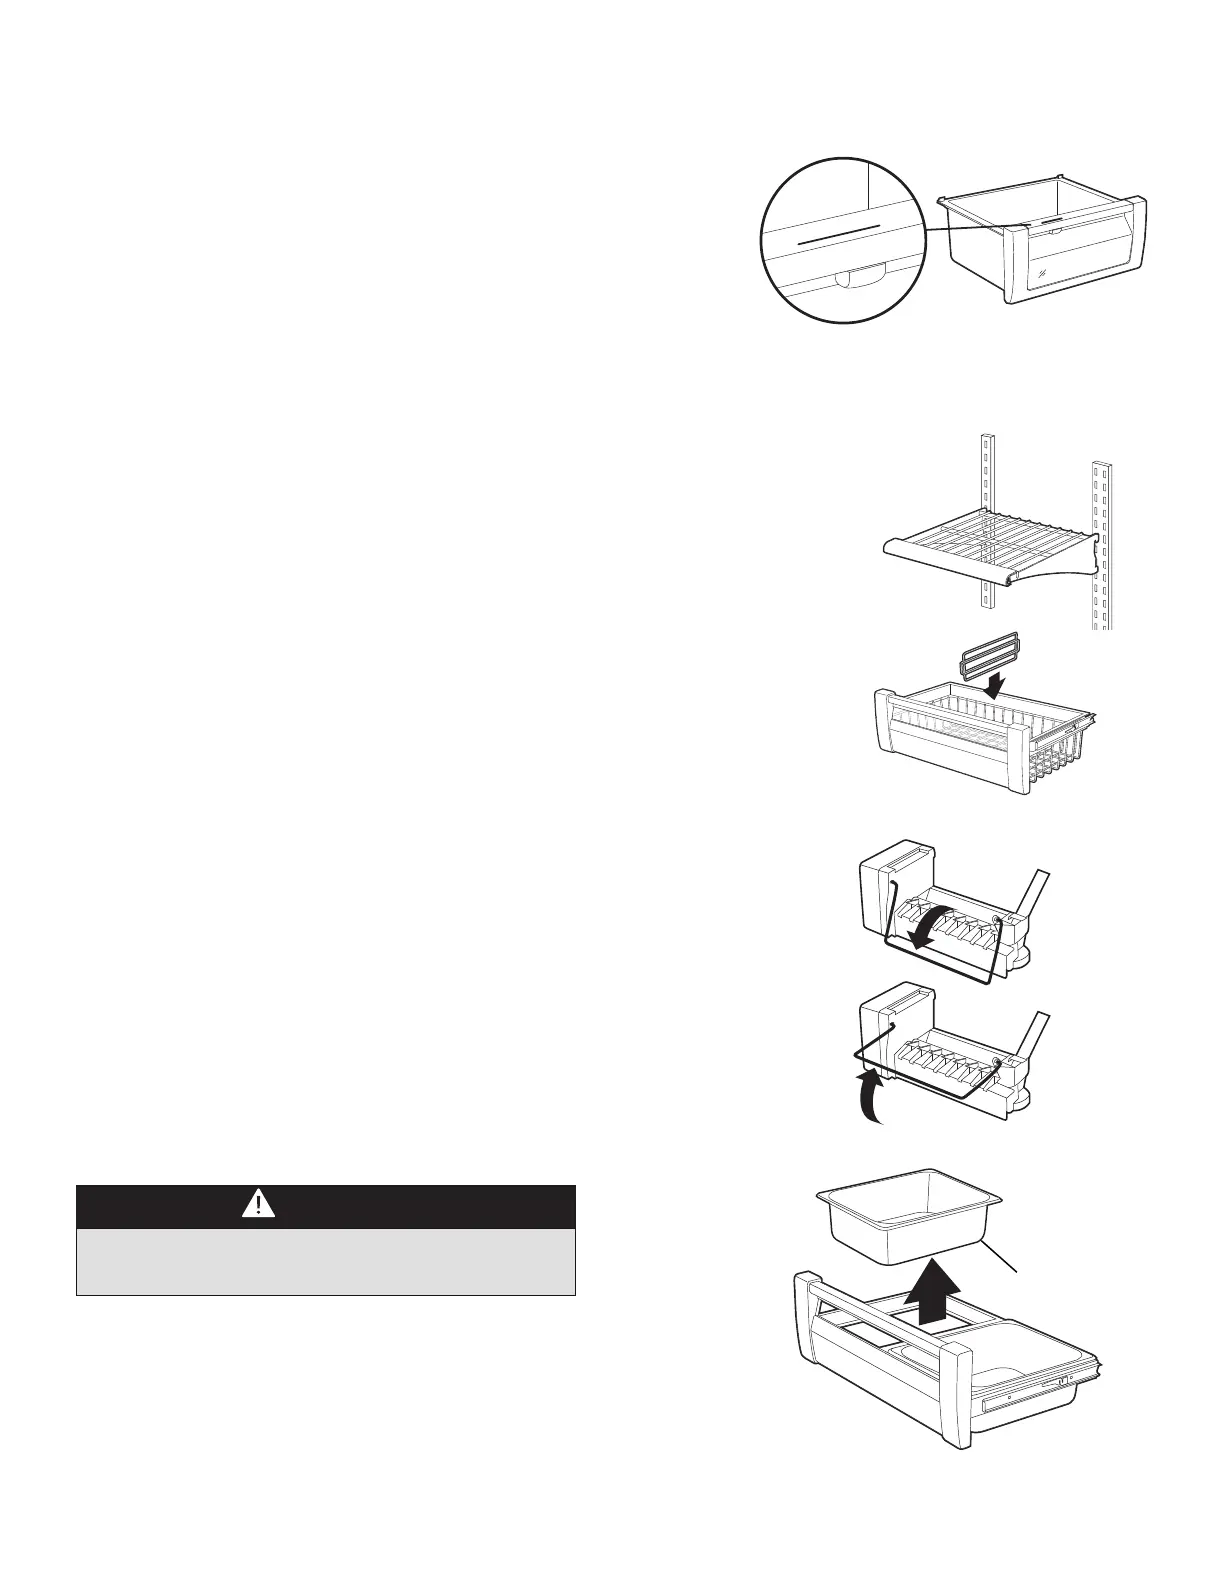
Wire Shelf Adjustment
You can easily adjust your freezer’s shelves. To remove a shelf, simply tilt it up at the front,
releasing the hooks from the shelf support. Then, pull the shelf straight out. To replace, guide the
rear hooks of the shelf into the slots in the shelf supports. Then, tilt the shelf up at the front until
the hooks drop into the slots. Next, lower the front of the shelf to a level position.
The ice maker and slide-out ice drawer on your refrigerator are not adjustable, but the ice drawer
slides forward for easy access to ice.
After the refrigerator reaches normal temperature, the ice maker lls with water and begins
operating. Under normal conditions, the ice maker will produce seven to nine batches of ice per 24
hour period.
Note: Allow 24 to 48 hours after installation before looking for ice in your ice drawer. You should discard
the rst three full drawers of ice produced by your refrigerator, and should also throw out the rst drawer
full of ice your refrigerator produces after extended periods of non-use.
During ice production, the ice maker arm raises and lowers. When the ice bin is full, the ice maker arm
automatically turns the ice maker o . To manually stop ice production, raise the ice maker arm. You
will hear a de nite click when you have the arm in the right position. The ice maker won’t produce any
more ice until you lower the ice maker arm.
CAUTION
To avoid damage to ice maker, observe the following:
• DO NOT force ice maker arm down or up past stop position.
• DO NOT place or store anything in ice bucket.
On
Position
Ice Maker
Arm
O
Position
Wire Basket Adjustment
You can easily adjust your freezer’s wire baskets by moving the dividers. To remove a divider,
simply grasp it in the center, and pull the divider straight up. To replace, guide the divider
around the basket wires in the desired location, then push the divider down until it stops.
Ice Bin Adjustment
Ice bins can be adjusted to match the way you use your freezer. The ice bin on the left-
hand side is used for collecting ice from the ice maker. Once the left-hand ice bin is full,
the bins can be reversed so additional ice is made. If the ice maker is not operating, the
ice bin can be used for cold storage.
Ice Bin below
icemaker
Bekijk gratis de handleiding van Viking VCFB5304RSS, stel vragen en lees de antwoorden op veelvoorkomende problemen, of gebruik onze assistent om sneller informatie in de handleiding te vinden of uitleg te krijgen over specifieke functies.
Productinformatie
| Merk | Viking |
| Model | VCFB5304RSS |
| Categorie | Vriezer |
| Taal | Nederlands |
| Grootte | 1902 MB |


