Vestil VAN-J handleiding
Handleiding
Je bekijkt pagina 6 van 11
Rev. 2/26/2018 VAN-J, MANUAL
Copyright 2017 Vestil Manufacturing Corp. Page 6 of 11
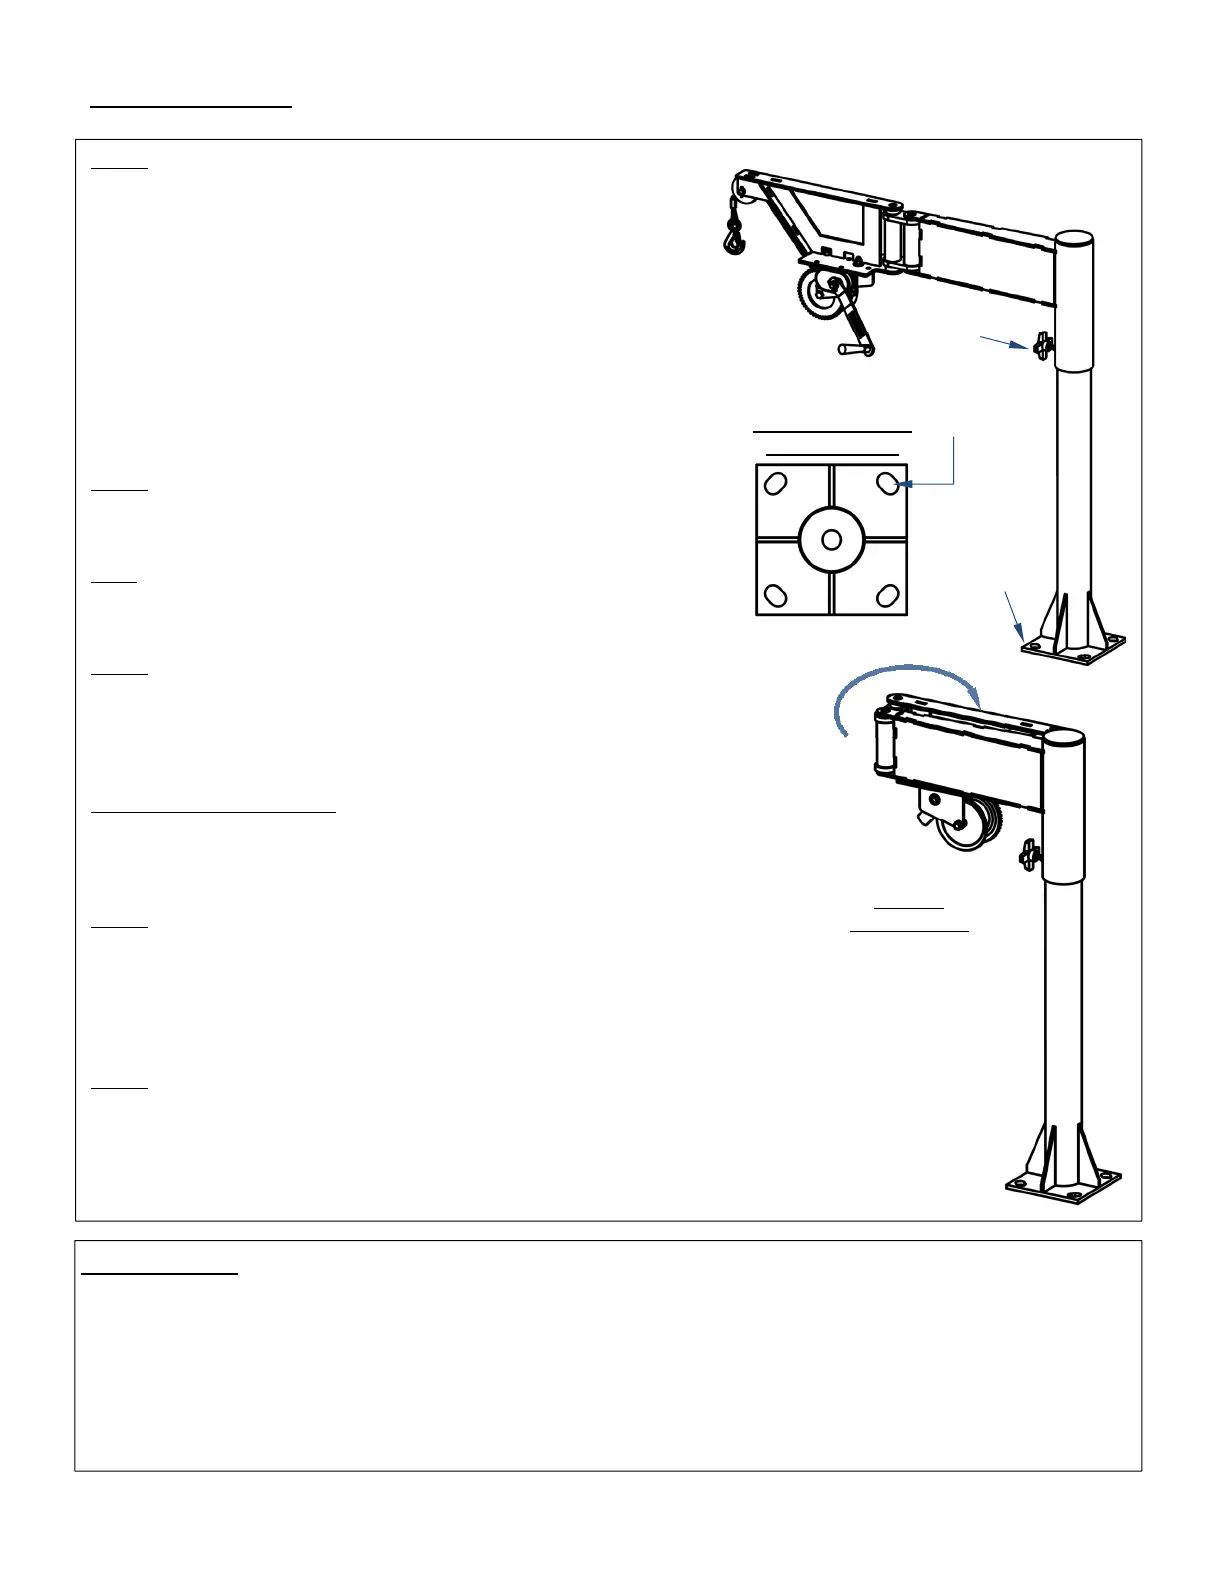
Installing the crane:
Refer to the exploded parts diagrams on pages 2-4.
Step 1: Contact the vehicle manufacturer to determine the
appropriate place to install the crane as well as the hardware that
should be used to fasten the crane to the vehicle. (Bolt slots in the
mounting plate are
7
/
8
” x 1
1
/
4
” to accept bolts up to
3
/
4
” in diameter).
When choosing an installation site, consider the following factors:
a. The vehicle must be able to support the combined weight of
the crane and a load weighing 125% of the capacity, i.e.
400 lb. x 1.25 = 500 lb.
b. The installation location must also be able to withstand the
dynamic forces exerted on it by the jib as the vehicle
moves.
c. The boom must be able to rotate freely, i.e. without running
into the sides of the vehicle.
Step 2: Put the jib into storage configuration. Fold the boom against
itself and wrap a strap around it. The jib should remain completely
assembled and in storage configuration during the installation.
Step 3: Using the mounting plate as a template, mark the locations
of the bolt holes on the vehicle surface. Drill
9
/
16
” holes in the
locations of the markings for the anchoring hardware.
Step 4: Align the bolt holes in the mounting plate with the holes
drilled in step 3. One person should stabilize the jib while the other
fastens the mounting plate to the vehicle using the hardware and
any backing or stiffeners recommended by the vehicle
manufacturer.
Step 5 [DC and AC models]: Prepare the winch for operation.
a. [AC units] Connect the power cord to the power supply. On
b. [DC units]: Connect the power supply cord and pendant control cable to
the winch.
Step 6: Lower and raise the cable hook.
a. Manual units: Wind the handle clockwise to raise the hook or
counterclockwise to lower the hook.
b. Powered units: press the up and down buttons on either the toggle switch
(AC units) or the handheld pendant controller (DC units). Watch the cable.
Confirm that it smoothly winds off of and onto the winch spool.
Step 7: Perform a load test on the jib by using it to lift a test weight equal to
125% of the rated capacity (500 lb.). Inspect both the crane and the vehicle
after performing the load test. Look for cracks, bends, and other forms of
damage at and around the installation site. Repair the site, if necessary, and
perform another load test to confirm that problems are resolved.
Boom
Mast
receiver
Angle
adjustment
pin
Function Tests:
Verify that the jib operates normally by performing the tests below. If an issue is discovered, tag the crane “Out of
Service”. Restore the crane to normal operating condition before returning it to service.
1. Test the mast bearing: Rotate the boom in both directions. Make sure that it rotates smoothly. Listen for unusual
noises. If the crane wobbles or is unusually noisy as it rotates, remove the boom from the mast and grease the
bearing at the top of the mast. If lubrication does not resolve the problem, the bearing might need to be replaced.
Contact the factory to discuss the problem and to order replacement parts.
2. Test the winch: Lower and raise the load hook. Make sure that the hook moves at a constant rate. The cable
should not bind as the winch operates.
Mounting
plate with
bolt slots
Overhead View of
Mounting Plate
7
/
8
” x 1
1
/
4
”
bolt slot
Knob
Storage
Configuration
Bekijk gratis de handleiding van Vestil VAN-J, stel vragen en lees de antwoorden op veelvoorkomende problemen, of gebruik onze assistent om sneller informatie in de handleiding te vinden of uitleg te krijgen over specifieke functies.
Productinformatie
| Merk | Vestil |
| Model | VAN-J |
| Categorie | Niet gecategoriseerd |
| Taal | Nederlands |
| Grootte | 2080 MB |


