Vestil LAD-1 handleiding
Handleiding
Je bekijkt pagina 8 van 11
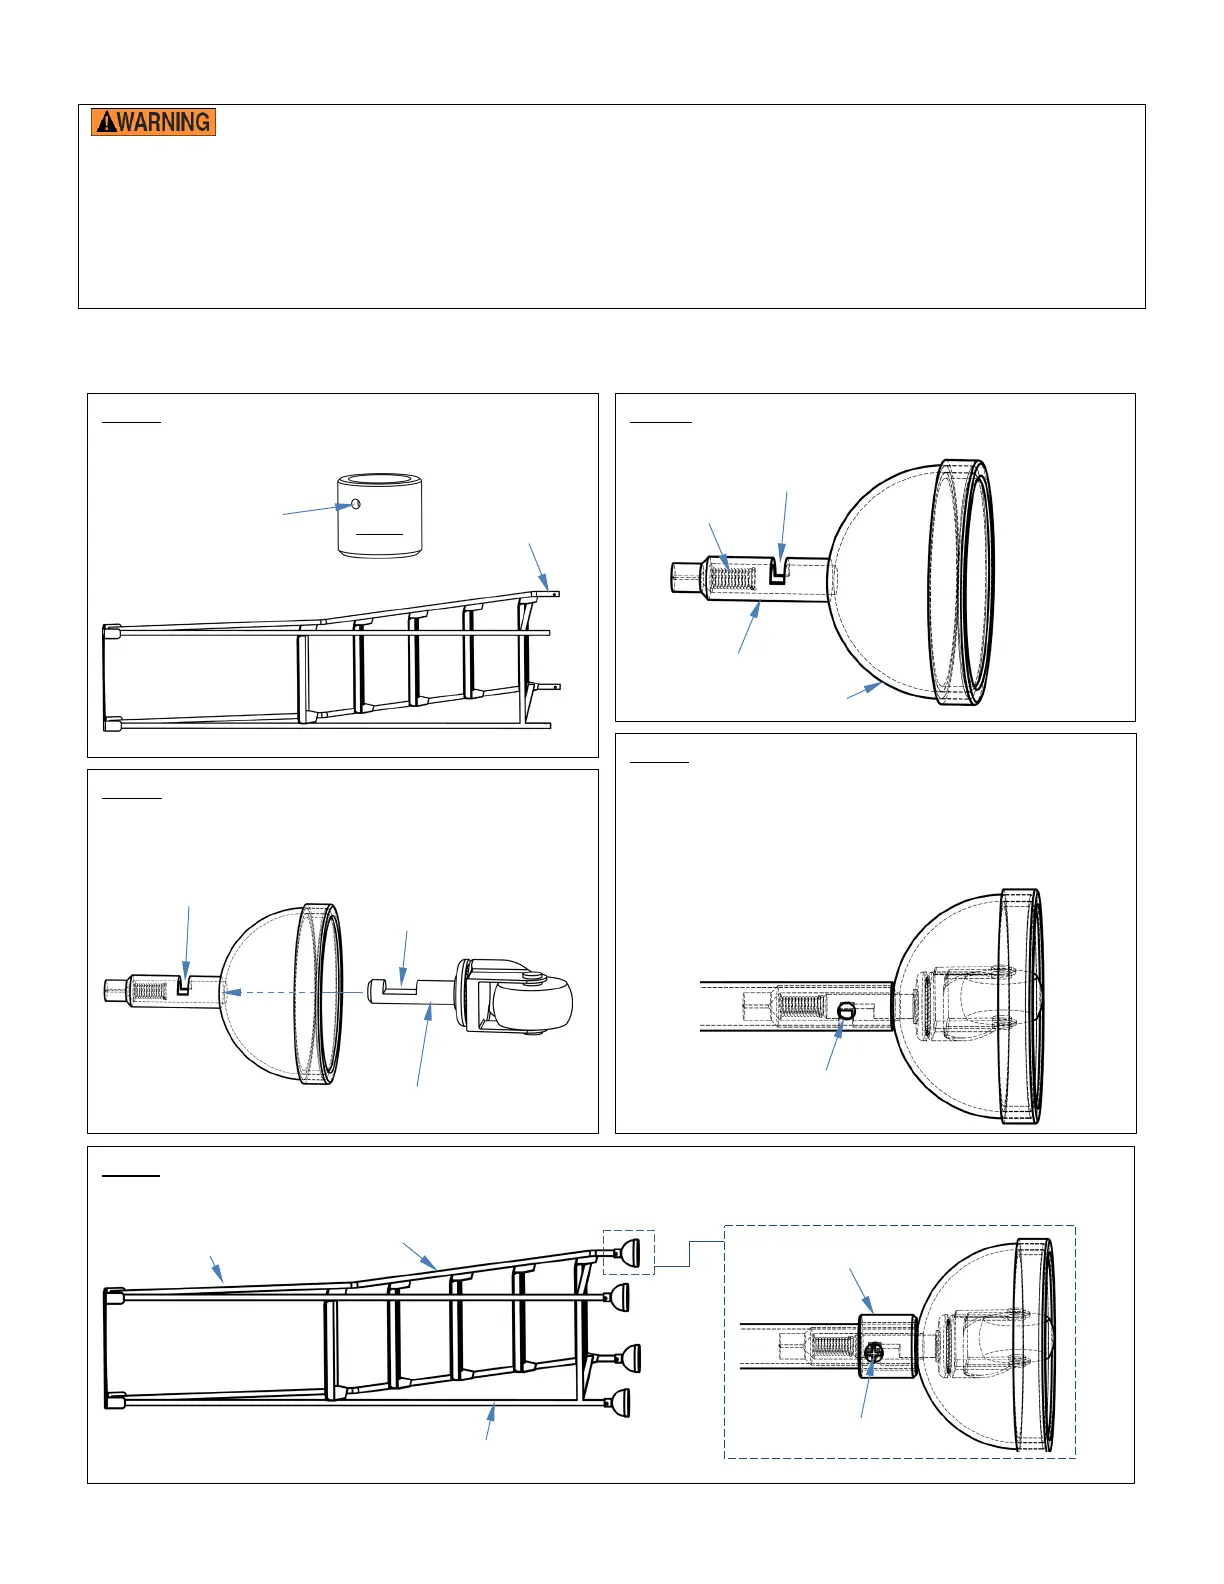
Table of Contents Rev. 11/19/2019 LAD (1-5 STEPS), MANUAL
Table of Contents Copyright 2019 Vestil Manufacturing Co. Page 8 of 11
ASSEMBLING THE LADDER (AT LEAST 2 PEOPLE ARE NEEDED)
Improper assembly might make this ladder unsafe to use.
• Visually inspect all ladder components immediately after delivery and before assembling the ladder. Look for
damage that might have occurred during shipping. DO NOT assemble or use the ladder if you notice any damage to
one or more of the steps or to other frame elements of the ladder such as the handrails, side rails, rear rails, and legs.
These features are identified in the diagrams on this page. Using the ladder despite weakness of a frame member
could result in serious personal injuries.
• DO NOT assemble the ladder by yourself. Work with at least 1 other person to assemble the ladder.
• Read the entire instruction manual before assembling this ladder.
The following tools are necessary to assemble the ladder: #2 Phillips screwdriver.
Numbers in the diagrams and in parentheses () refer to part numbers or item numbers from the bills of materials on
pages 3, 4, 5, 6, & 7. Refer to the appropriate exploded view and bill of materials for your ladder.
Step 1: Lay the ladder on its side. Slide a collar—top
first—onto each leg (4 total).
Step 2: Insert a spring into the stem of each caster
guard.
Spring
Caster guard
Guard stem
Step 3: Insert a caster into each caster guard. Press
the caster stem against the spring until the slot in the
caster stem aligns with the slot in the guard stem.
Top
Collar
Step 4: Insert a caster assembly (caster guard, spring,
and caster) into each leg. Notice that there is a hole
near the base of each leg. The slots in the caster stem
and guard stem need to align with the holes in the legs.
Press the caster against the spring to align the slots
with these holes.
Hole for
set screw
Slot for set
screw
Slot in caster stem
for set screw
Caster stem
Leg
Slot in guard stem
for set screw
Step 5: On each leg, slide the collar (installed in step 1) to the end of the leg and align the set screw hole with the
hole in the leg. Wind a set screw through the holes in the collar and leg and into the slots. Tighten the screw with a
Phillips screwdriver.
Hole in base of leg aligns with
slots in guard and caster
Collar
Set screw
Rear rail
Side rail
Handrail
Bekijk gratis de handleiding van Vestil LAD-1, stel vragen en lees de antwoorden op veelvoorkomende problemen, of gebruik onze assistent om sneller informatie in de handleiding te vinden of uitleg te krijgen over specifieke functies.
Productinformatie
| Merk | Vestil |
| Model | LAD-1 |
| Categorie | Niet gecategoriseerd |
| Taal | Nederlands |
| Grootte | 3038 MB |


