Vestil HPRO-48-36-2 handleiding
Handleiding
Je bekijkt pagina 5 van 7
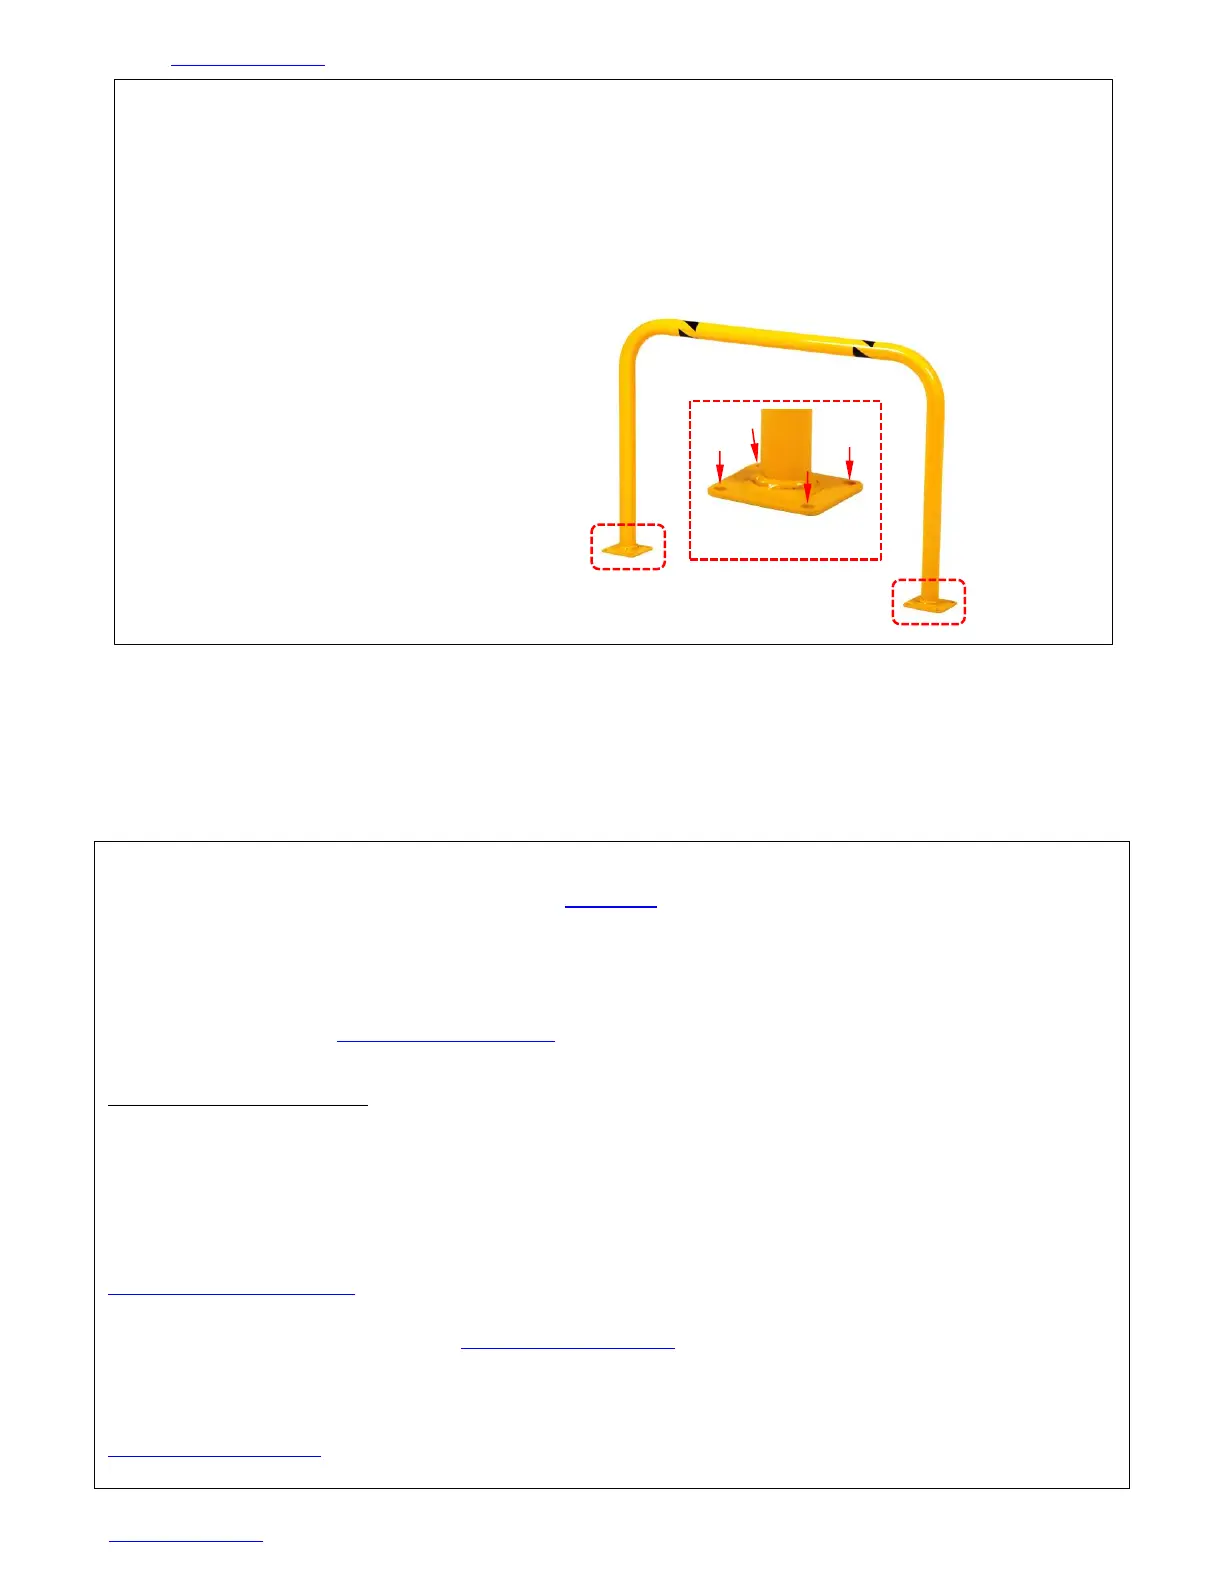
Table of Contents Rev. 1/23/2025 HPRO, MANUAL
Table of Contents Copyright 2024 Vestil Manufacturing Co Page 5 of 7
INSTALLING THE GUARD
Each machinery guard includes 2 mounting plates for attaching the guard to a surface. There
are 4 bolt slots in each mounting bracket that are sized for receiving 3/4” (diameter) hardware. Your
building engineer should determine the necessary length of the anchor bolts—or other selected
fastener—used to attach the guard to the selected surface.
To install the guard:
1) Begin by setting the machinery guard in position at the installation site.
2) Mark the concrete with the locations of all 4 bolt holes in each mounting bracket. See arrows ( )
in diagram.
3) Drill holes where the surface is marked using
an appropriately-sized drill bit. Drill to the
depth specified in the installation
instructions for your fasteners. If applicable,
set anchors in the drilled holes.
4) Set the guard in place, i.e. align bolt holes
in the mounting plates with the holes you
just drilled into the surface.
5) Install fasteners (e.g. anchor bolts) through
the bolt holes in the mounting plate and
tighten them.
RECORD OF SATISFACTORY CONDITION (the “RECORD)
After installing the guard, make a record of its appearance. Take videos and/or photos of
the guard, both mounting plates, anchoring hardware and the anchoring surface around the
guard, and of each label. Collect your photos and/or videos and all annotations in a file. This
file is a record of the guard in satisfactory condition.
INSPECTING AND MAINTAINING THE GUARD
Compare your observations to your RECORD to determine whether the guard is in
satisfactory condition. Remove the guard from service unless it is in satisfactory condition.
Cosmetic changes, like recently damaged paint/powder coat, are not changes from
satisfactory condition. However, touchup paint must be applied to all affected areas as soon
as damage occurs. Exposed metal rusts and rust could eventually compromise the integrity of
the metal. Contact TECHNICAL SERVICE to order replacement parts. Contact information
appears on the cover page of this instruction manual.
At least once per month:
1. Check the surface of the product for dirt or other matter. Clean the bollard with a mild soap
and water solution.
2. Examine fasteners/anchoring hardware. Replace damaged, worn, or corroded hardware.
Confirm that the guard is solidly anchored to the ground (concrete) or other installation
surface. If the guard wobbles, tighten loose fasteners. Install the guard in another location if
wobble cannot be eliminated in the current location. At the new installation site, apply the
INSTALLING THE GUARD instructions on p. 5 (above).
3. Check all labels. Replace labels that are missing, damaged, and/or not easily readable
from a reasonable distance. See LABELING DIAGRAM on p. 6.
4. Examine the whole structure for significant rusting, metal erosion, rot, etc. If rusting is purely
superficial, remove it with a metal bristle brush or steel wool. Clean the affected area with a
mild soap and water solution, allow it to dry, and then apply touchup paint. Contact the
TECHNICAL SERVICE department to discuss any questions you have regarding the condition of
your guard.
Install 3/4”
(diameter)
fasteners of
appropriate
length
through bolt
holes
(arrows) in
mounting
bracket
Mounting bracket
Bekijk gratis de handleiding van Vestil HPRO-48-36-2, stel vragen en lees de antwoorden op veelvoorkomende problemen, of gebruik onze assistent om sneller informatie in de handleiding te vinden of uitleg te krijgen over specifieke functies.
Productinformatie
| Merk | Vestil |
| Model | HPRO-48-36-2 |
| Categorie | Niet gecategoriseerd |
| Taal | Nederlands |
| Grootte | 1380 MB |


