Vestil H-150-LD handleiding
Handleiding
Je bekijkt pagina 11 van 14
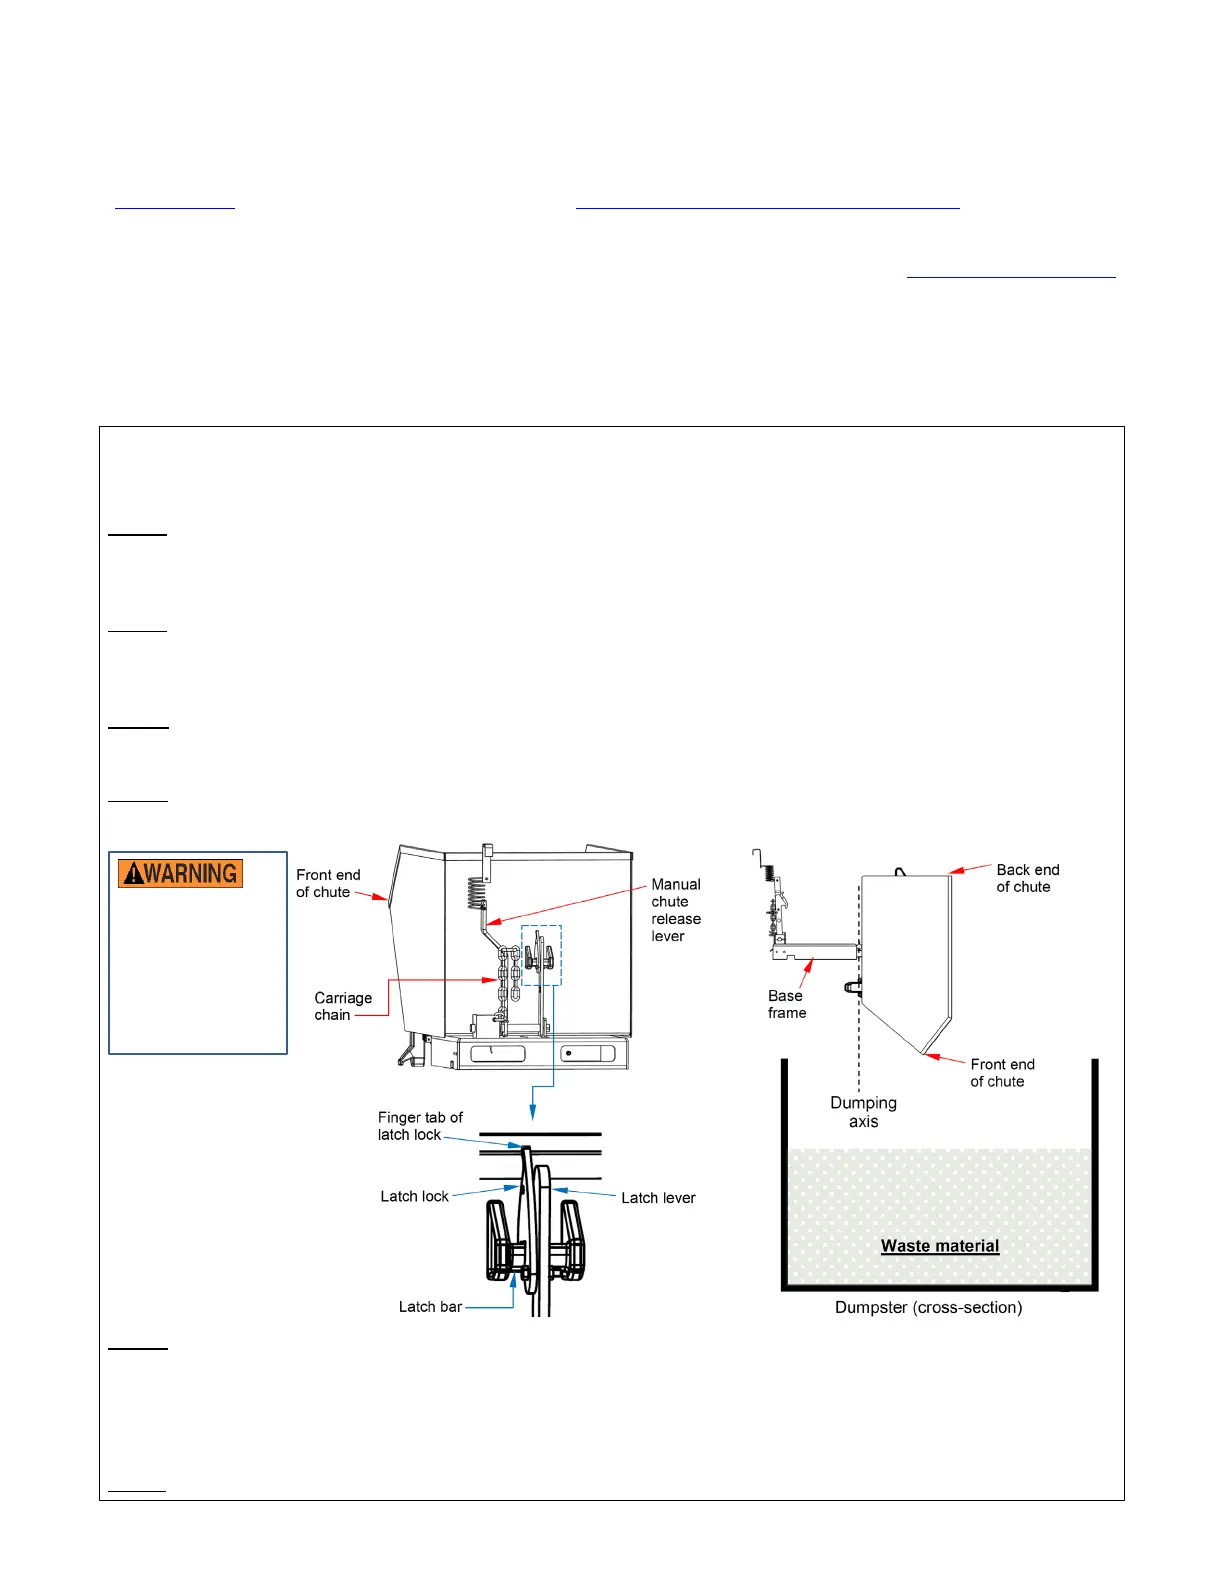
Table of Contents Rev. 10/23/2020 H-Hoppers MANUAL
Table of Contents Copyright 2020 Vestil Manufacturing Corp. Page 11 of 14
NATIONAL STANDARDS
US OSHA Rule 1910.178 (29 CFR 1910.178; the “Rule”) classifies this device as a “front- end attachment”
whenever it is mounted on a lift truck. The Rule incorporates American National Standard ANSI/ITSDF B56.1 (the
“Standard”). The Standard is published by the Industrial Truck Standards Development Foundation on its website
(www.itsdf.org) where it is freely downloadable at http://www.itsdf.org/cue/b56-standards.html
. Before putting
this device into service, acquire a copy of the Standard. Apply all relevant parts of Part II: For the User. If
instructions provided in this manual apparently conflict with the Standard, then apply the instructions in the
Standard. Vestil requests that you immediately share any conflicts you discover with its
TECHNICAL SERVICE
personnel. Contact information is provided on the cover page of this manual.
LOADING THE CHUTE
Verify that the hopper chute is securely latched and locked to the base frame before filling it with refuse.
Standard H-series hoppers are suitable for use indoors and outdoors and in most industrial and commercial
settings. They are designed for use with rider forklift trucks. Put only non-hazardous wastes in the chute.
USING THE HOPPER
These hoppers have a low profile and chutes rotate through a 90° dump angle. To dump the hopper chute, a
forklift operator must simply unlock the release lever and pull the release cable.
Step 1: Mount the hopper on the forks of your lift truck. Drive forward until the forks contact the ends of the fork
slots. Securely attach the hopper to the fork carriage with the carriage chain by wrapping the free end of the chain
around part of the carriage. Then, connect the quick link at the end of the chain to a link in the chain. There
should be little to no slack in the chain.
Step 2: Store the handle of the release cable within reach of the forklift operator. For example, the handle could
be hooked to the frame of the roll cage.
NOTE: Make sure that there is slack in the cable. If the cable is taut, bumps or sudden stops while driving might
cause the chute to be released.
Step 3: Raise the forks and tilt the mast back/towards the cab. Only raise the forks a few inches above the
ground. Drive the forklift to the trash dumpster. Pull the finger tab until the latch lock disengages the latch bar.
See diagrams included in Step 4 below. Elevate the hopper above the sides of the dumpster.
Step 4: Pull the release cable to release the chute and dump its contents. The chute will pivot about the dump
axis. If necessary, tilt the mast forward/away from the cab while pulling the release cable to encourage the chute
to dump.
NEVER WRAP
THE RELEASE
CABLE AROUND
ANY PART OF
YOUR BODY,
ESPECIALLY AN
ARM OR HAND!
Step 5: Return the chute to the latched position. Tilt the forklift mast toward the cab; then back away from the
dumpster. Lower the forks until the hopper contacts the ground; then slowly lower the forks the rest of the way to
the ground until the chute latches to the base frame. Confirm that the chute is properly latched by raising the
forks. The chute should not rotate. If necessary, lower the forks completely and manually latch the chute to the
frame by pressing down on the back of the chute (see “H-series” diagram in Step 4). Alternatively, use the side of
the dumpster to pivot the chute back onto the base frame.
Step 6: Lock the latch. Press the latch lock forward until it firmly engages the latch bar.
Manual
chute
release
lever
Base
frame
Bekijk gratis de handleiding van Vestil H-150-LD, stel vragen en lees de antwoorden op veelvoorkomende problemen, of gebruik onze assistent om sneller informatie in de handleiding te vinden of uitleg te krijgen over specifieke functies.
Productinformatie
| Merk | Vestil |
| Model | H-150-LD |
| Categorie | Niet gecategoriseerd |
| Taal | Nederlands |
| Grootte | 4570 MB |


