Veritas Power Stitch 32 TITAN handleiding
Handleiding
Je bekijkt pagina 41 van 56
41
Zipper sewing
n
Attention
- The zipper foot can be adjusted to sew on either
side of the zipper. The edge of the foot guides the
zipper so that it is positioned straight.
- Zipper foot should be used for sewing straight
stitches only. It is possible that the needle could
hit the presser foot and break when sewing other
stitch patterns.
This foot can be set to sew on each side of the zipper, the edge of the foot guides the zipper to ensure
straight placement.
Using
the zipper foot.
1.5~3
0
v
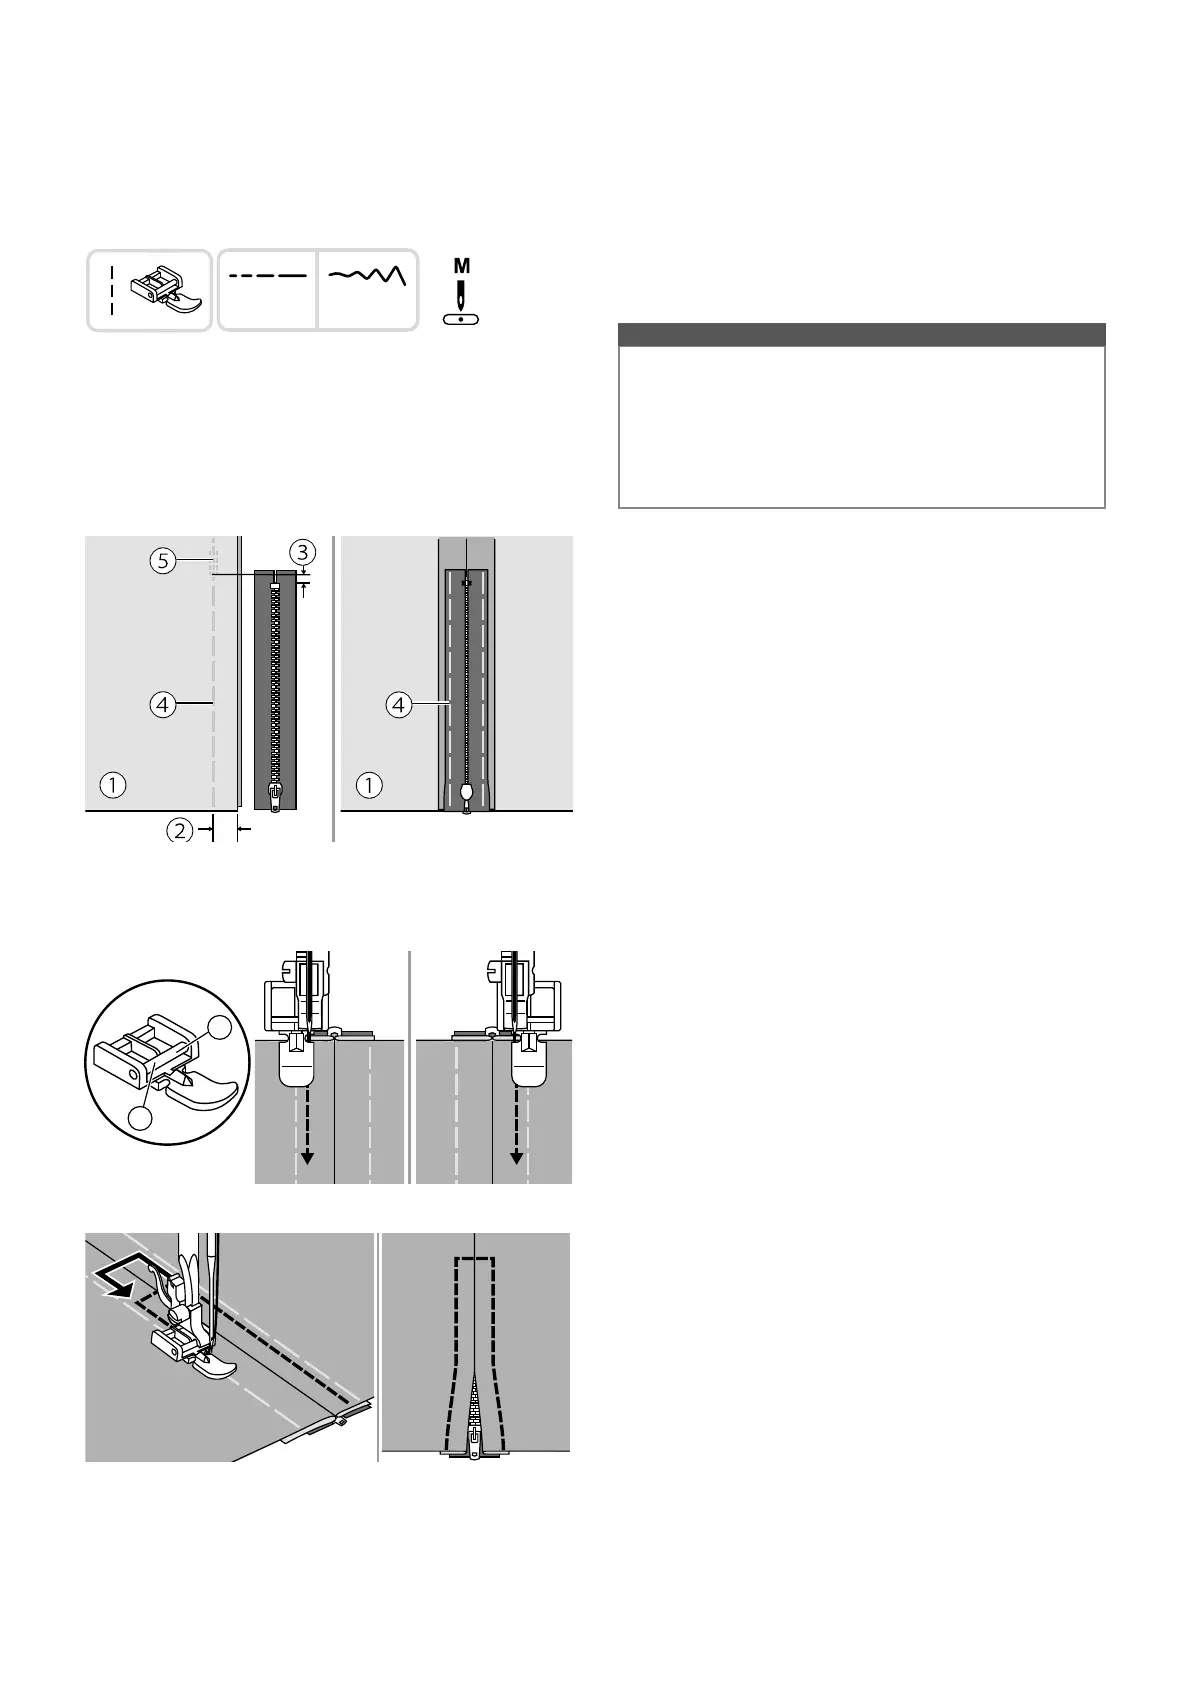
Inserting a centered zipper
Place the right sides of the fabric on top of each other
and sew to the end of the zip opening with a seam
allowance of approx. 2 cm. Secure the seam with a
few locking stitches. In the area of the zipper opening,
baste the seam with thread tension less than 2 and
with maximum stitch length.
Press open the seam allowance. Place the zipper face
down on the seam allowance with the teeth against
the seam line. Baste the zipper band to the fabric to
prevent it from slipping.
①
Back of the fabric (left)
②
2cm seam allowance
③
5mm distance to the lower end of the zip
④
Baste seam
⑤
Locking stitches
Attach the zipper foot.
①
When sewing the left side of the zipper, attach the
right side of the presser foot stay 1 to the holder.
②
When sewing the right side of the zipper, attach the
left side of the presser foot stay 2 to the holder.
The zipper must not be sewn through both layers of
fabric!
2
1
Stitching around the zipper. Remove the baste seams
and press the sewing piece.
Bekijk gratis de handleiding van Veritas Power Stitch 32 TITAN, stel vragen en lees de antwoorden op veelvoorkomende problemen, of gebruik onze assistent om sneller informatie in de handleiding te vinden of uitleg te krijgen over specifieke functies.
Productinformatie
| Merk | Veritas |
| Model | Power Stitch 32 TITAN |
| Categorie | Naaimachine |
| Taal | Nederlands |
| Grootte | 13180 MB |
