Handleiding
Je bekijkt pagina 74 van 267
2-46
Installing and Setting up the Machine > Embedded Web Server RX
Embedded Web Server RX
If the machine is connected to the network, you can configure various settings using Embedded Web Server RX.
This section explains how to access Embedded Web Server RX.
For details on Embedded Web Server RX, refer to the Embedded Web Server RX User Guide.
Settings that the administrator and general users can configure in Embedded Web Server RX are as follows.
NOTE
• The optional Network Interface Kit is necessary when connecting the machine to the PC on the network.
• To fully access the features of the Embedded Web Server RX pages, enter the User Name and Password and click
[Login]. Entering the predefined administrator password allows the user to access all pages, including Address
Book and Settings on the navigation menu. The factory default setting for the default user with administrator
privileges is shown below.
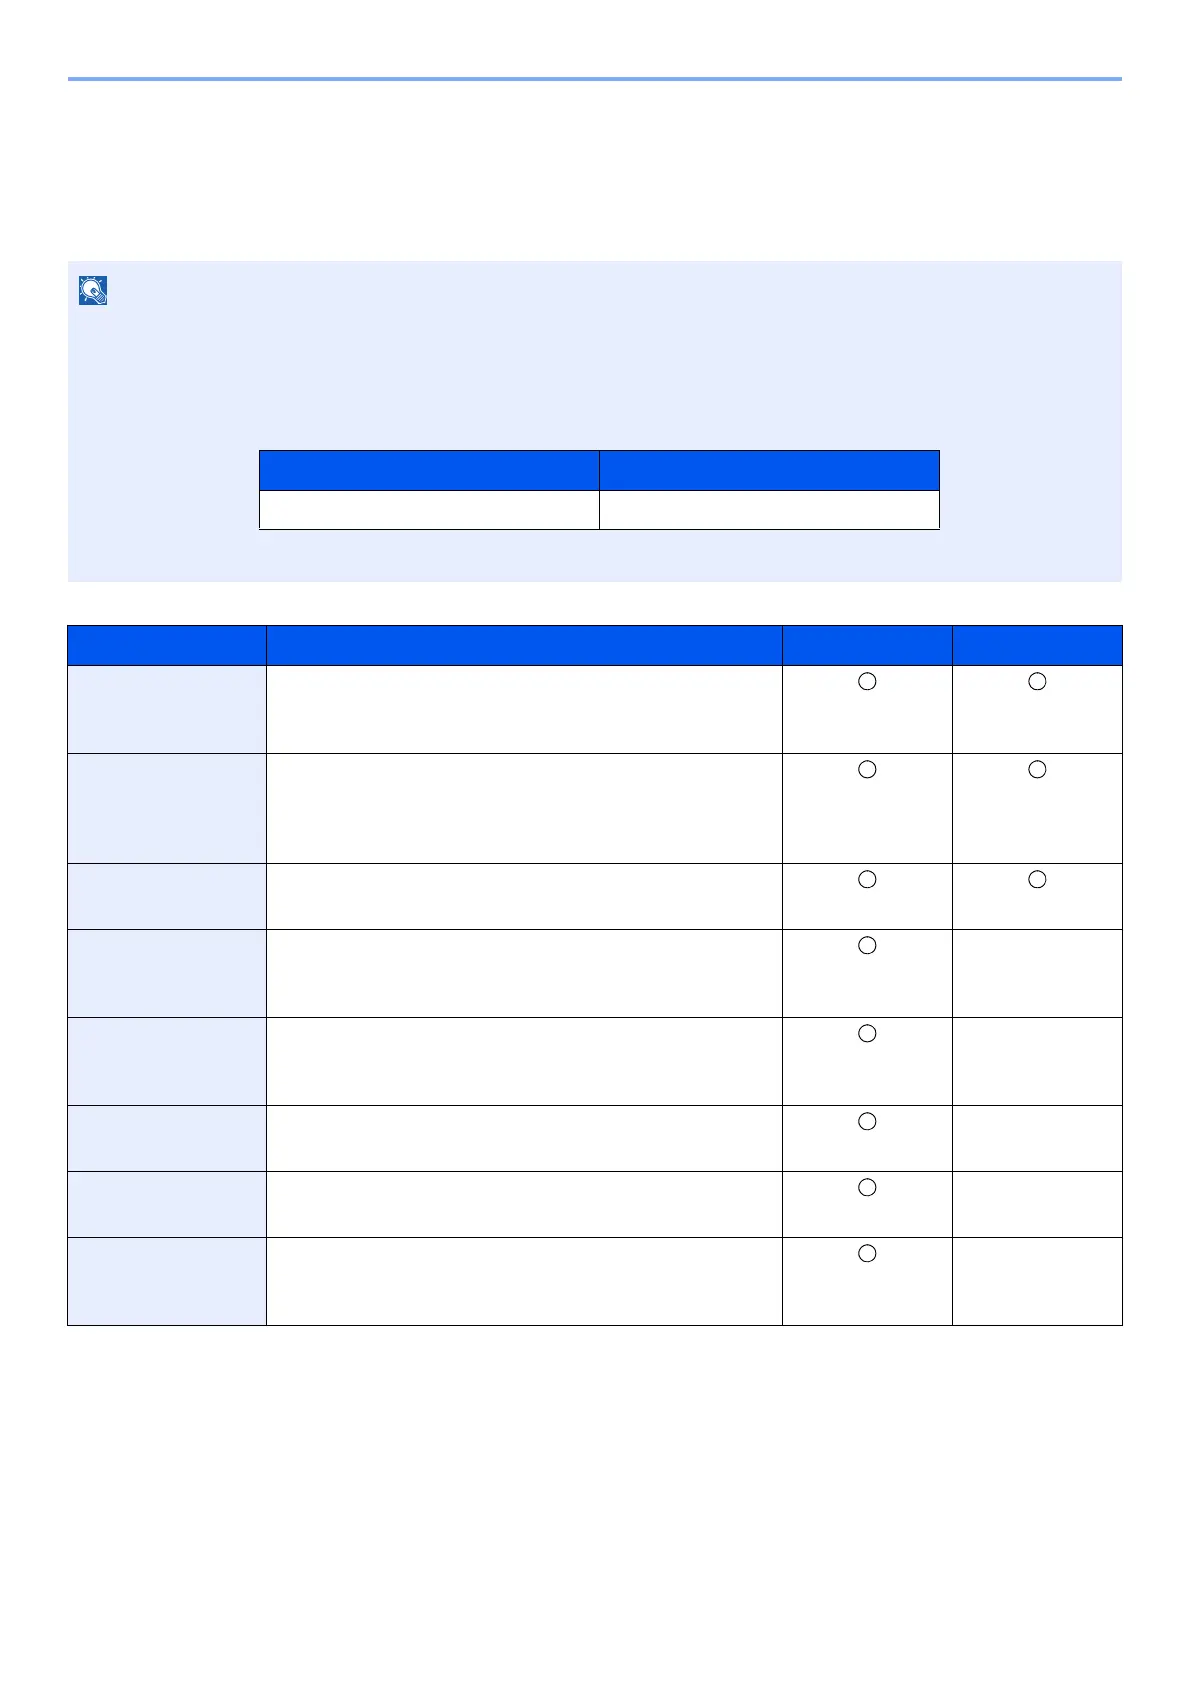
Setting Description Administrator General User
Device Information The machine's structure can be checked.
[Configuration], [Counter], [About Embedded Web Server
RX]
Job Status Displays all device information, including print and scan jobs,
scheduled jobs, and job log history.
[Printing Job Status], [Printing Job Log], [Sending Job
Status]
*1
, [Scheduled Jobs]
*1
, [Sending Job Log]
*1
*1 Displayed only when the optional FAX Kit is installed.
Address Book
*1
Create, edit, or delete addresses and address groups.
[Address Book], [One Touch Key]
Device Settings Configure the advanced settings of the machine.
[Paper/Feed/Output], [Original Document], [Energy Saver/
Timer], [Date/Time], [System]
—
Function Settings Configure the advanced function settings.
[Common/Job Defaults], [Copy], [Printer], [E-mail], [FAX]
*1
,
[Forward Rules]
*1
, [Operation Panel]
—
Network Settings Configure the network advanced settings.
[General], [TCP/IP], [Protocol]
—
Security Settings Configure the security advanced settings.
[Device Security], [Network Security], [Certificates]
—
Management
Settings
Configure the advanced management settings.
[Job Accounting], [Administrator Settings], [Notification/
Report], [SNMP], [Reset]
—
Login User Name Login Password
Admin
*1
*1 Upper case and lower case letters are distinguished (case sensitive).
Admin
*1
Bekijk gratis de handleiding van UTAX 2256, stel vragen en lees de antwoorden op veelvoorkomende problemen, of gebruik onze assistent om sneller informatie in de handleiding te vinden of uitleg te krijgen over specifieke functies.
Productinformatie
| Merk | UTAX |
| Model | 2256 |
| Categorie | Printer |
| Taal | Nederlands |
| Grootte | 31573 MB |
Caratteristiche Prodotto
| Kleur van het product | Zwart |
| Ingebouwd display | Ja |
| Gewicht | 26000 g |
| Breedte | 565 mm |
| Diepte | 527 mm |


