True Vapor Palisade handleiding
Handleiding
Je bekijkt pagina 22 van 40
22
© 2025 TRUE Fitness All Rights Reserved.
ground
screw
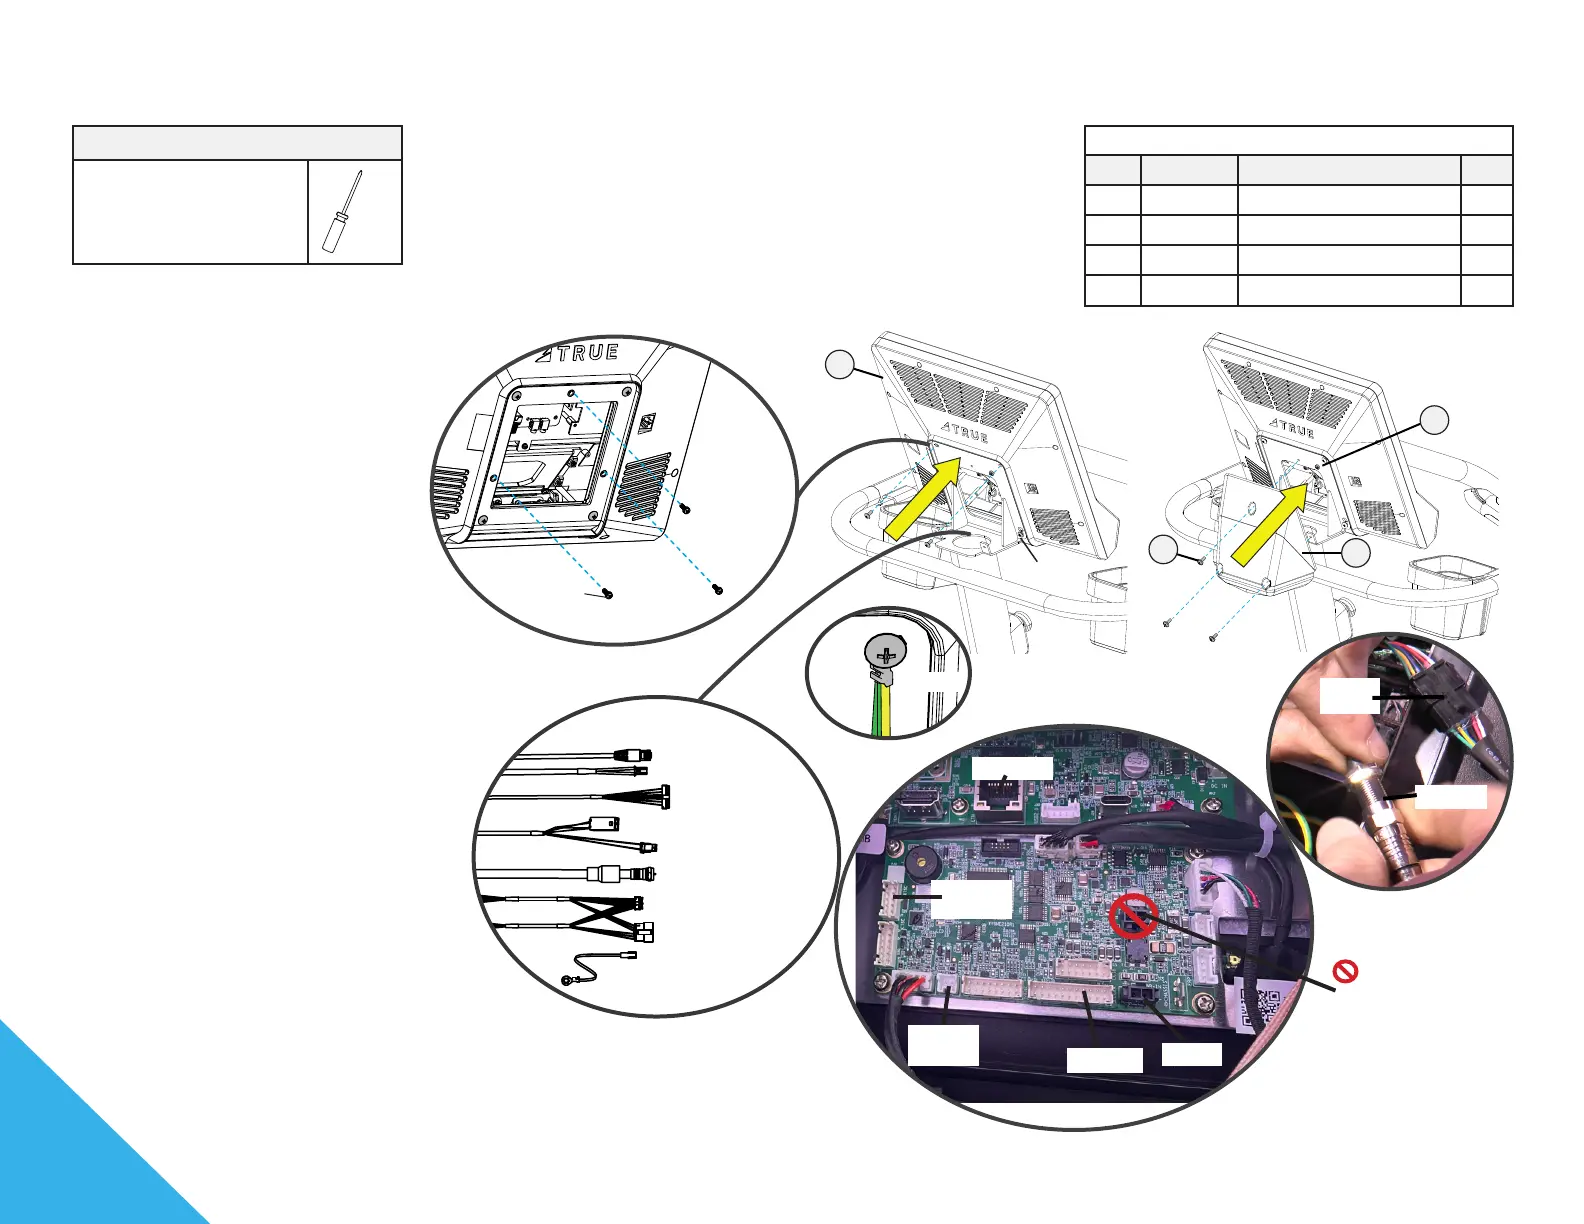
Step 8—Attach Console and Rear Console Cover
Tools Used in this Step
#2 Phillips Screwdriver
Parts Used in this Step
Item Part Description Qty
1 VC90110 COVER, CONSOLE REAR 1
2 VC90148 PHMS, M5-0.8 X 12MM, SS 3
3 VC90175 PHMS, M5-0.8 X 6MM, ZP 1
4 N/A CONSOLE 1
2
1
4
3
00567700
remove
and set
aside these
screws,
they are not
used in this
installation
00567800
I/O data
network
coaxial
power
do not
connect
power here
heart
rate
button
control
A. If the console has three
preassembled screws (00567700),
remove these screws.
Remove and set aside the top two
preassembled screws (00567800).
Slightly loosen the bottom two
screws but leave them installed. All
four screws will be used to secure
the console to the mast in step C.
B. Connect the console and base
cables: network, coaxial, heart
rate, button control, e-stop key, I/O
data, power, and ground (attach
the ground cables using the
preassembled ground screw).
NOTE: The LED console without a
PVS does not use the coaxial cable.
Tuck the coaxial and network cables
down the console mast.
Tuck excess cable length inside the
console mast to avoid pinching the
cables.
C. Using a #2 Phillips screwdriver,
secure the console to the console
mast using the four screws
(00567800).
D. Using a #2 Phillips screwdriver,
attach the rear console cover.
e-stop
key
NOTE: Depending on the installation,
PVS power may not be used.
button control
network
ground
coaxial
e-stop key
power
heart rate
PVS power
I/O data
ground
Bekijk gratis de handleiding van True Vapor Palisade, stel vragen en lees de antwoorden op veelvoorkomende problemen, of gebruik onze assistent om sneller informatie in de handleiding te vinden of uitleg te krijgen over specifieke functies.
Productinformatie
| Merk | True |
| Model | Vapor Palisade |
| Categorie | Niet gecategoriseerd |
| Taal | Nederlands |
| Grootte | 8151 MB |


