TP Link Tapo TC42 handleiding
Handleiding
Je bekijkt pagina 10 van 22
8
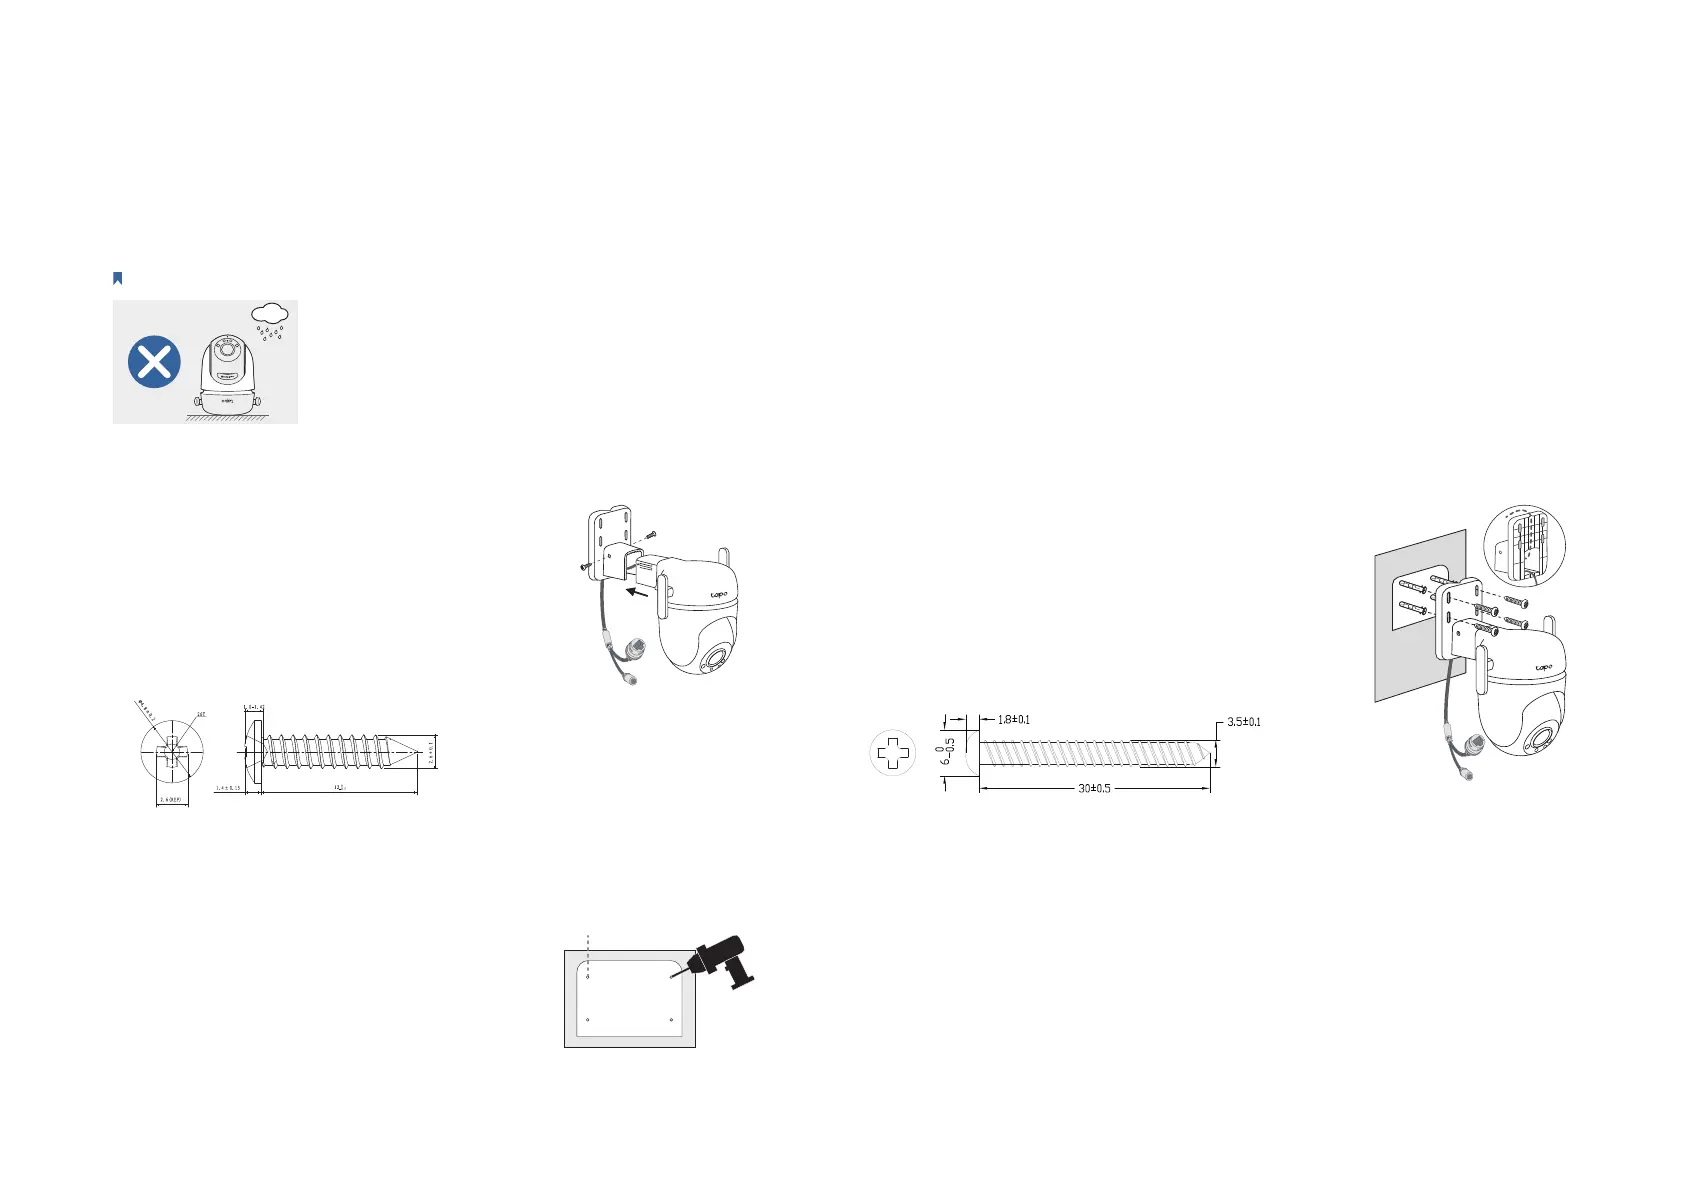
Mount Your Camera
When you nish adding your camera in the Tapo app, you can mount it on a wall or ceiling with the provided mounting template and screws. You can
also mount it on the pole with mounting loops. Follow the steps below to mount your new camera.
Note: The camera is not waterproof when set on a table or shelf. Mount the camera via Option 1-3 when installing outdoors.
Option 1: Wall Mount
Route the camera power cord and
Ethernet cable through the
opening of the bracket. Use two
bracket screws to ax the bracket
and camera.
1. Ax the Camera and Bracket
Stick the mounting template to
the desired mounting place. Drill
four screw holes according to
the template.
2. Drill Holes
Φ=6 mm (15/64 in.)
Insert four mounting anchors into
the holes, then use the mounting
screws to ax the camera and
bracket over the anchors.
3. Mount the Camera
Note: Adjust the antenna vertically
for the best Wi-Fi signal.
Bekijk gratis de handleiding van TP Link Tapo TC42, stel vragen en lees de antwoorden op veelvoorkomende problemen, of gebruik onze assistent om sneller informatie in de handleiding te vinden of uitleg te krijgen over specifieke functies.
Productinformatie
| Merk | TP Link |
| Model | Tapo TC42 |
| Categorie | Bewakingscamera |
| Taal | Nederlands |
| Grootte | 2547 MB |


