TP Link HX510 handleiding
Handleiding
Je bekijkt pagina 12 van 164
7
Chapter 2
Connect the Device
2. 1. Position the Device
• The device should not be located in a place where it will be exposed to moisture or
excessive heat.
• Place the device in a location where it can be connected to multiple devices as well as
to a power source.
• Make sure the cables and power cord are safely placed out of the way so they do not
create a tripping hazard.
• Keep the device away from devices with strong electromagnetic interference, such
as Bluetooth devices, cordless phones and microwaves.
• The device can be placed on a shelf or desktop.
Generally, the device is placed on a horizontal surface, such as on a shelf or desktop.
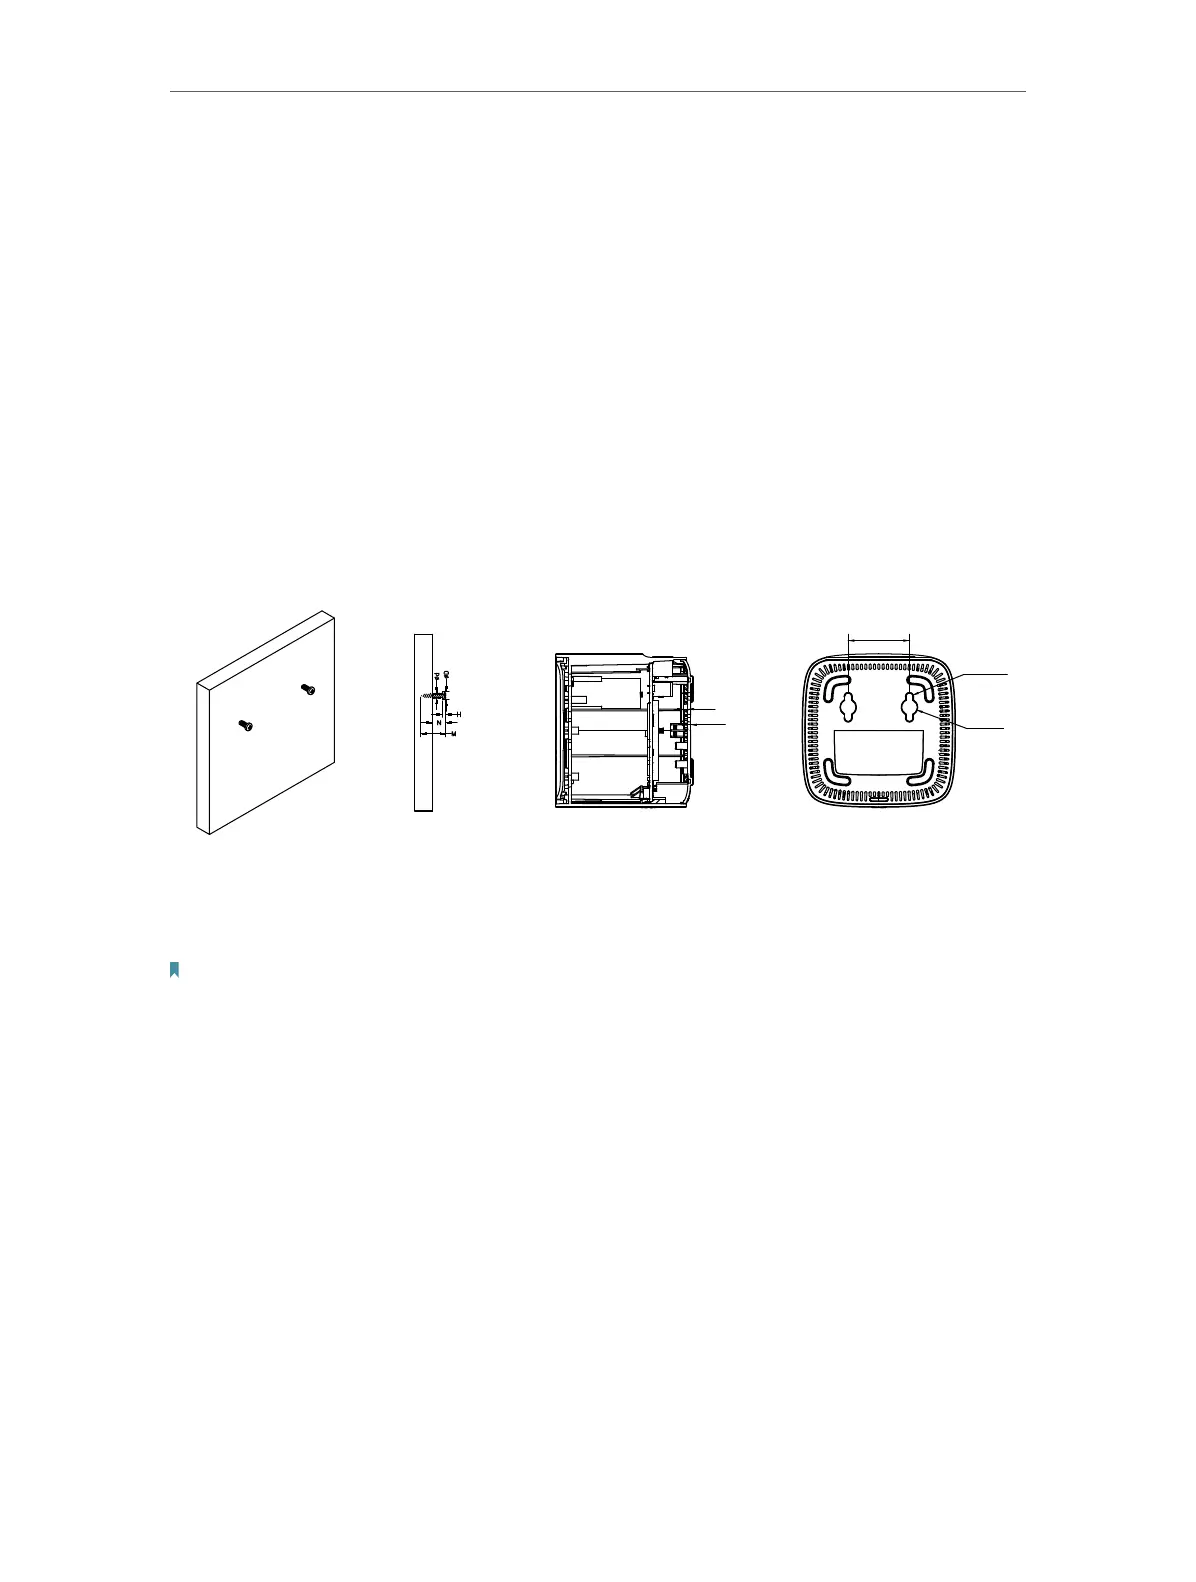
The device also can be mounted on the wall as shown in the following image.
NOTE:
4.67 mm < D < 9.85 mm
d < 4.5 mm
H < 3 mm
4.8 mm < N
20 mm ≤ M
n 10
n 4.5
40
1.8
3
Note:
The diameter of the screw should be between 4.67 mm and 9.85 mm, and the center distance of two screws is 40 mm.
The screws should be at least 20 mm in length to hold the device, and the screw head raised above the wall surface
should be about 4.8 mm.
2. 2. Connect Your Device
If you want to set up this device as a regular router or as the Main AP for Mesh Wi-Fi
system, follow the steps below to connect your device.
Bekijk gratis de handleiding van TP Link HX510, stel vragen en lees de antwoorden op veelvoorkomende problemen, of gebruik onze assistent om sneller informatie in de handleiding te vinden of uitleg te krijgen over specifieke functies.
Productinformatie
| Merk | TP Link |
| Model | HX510 |
| Categorie | Niet gecategoriseerd |
| Taal | Nederlands |
| Grootte | 19107 MB |
Caratteristiche Prodotto
| Kleur van het product | Wit |
| Breedte | 120 mm |
| Diepte | 120 mm |
| Hoogte | 96.5 mm |
| LED-indicatoren | Ja |


