Handleiding
Je bekijkt pagina 5 van 53
English - 4 -
(**) Limited Models Only
Introduction
Thank you for choosing our product. You’ll soon be
enjoying your new TV. Please read these instructions
carefully. They contain important information which will
help you get the best from your TV and ensure safe
and correct installation and operation.
High Dynamic Range (HDR)
/ Hybrid Log-Gamma (HLG)
Using this feature the TV can reproduce greater
dynamic range of luminosity by capturing and then
combining several dierent exposures. HDR/HLG
promises better picture quality thanks to brighter, more
realistic highlights, more realistic colour and other
improvements. It delivers the look that lmmakers
intended to achieve, showing the hidden areas of dark
shadows and sunlight with full clarity, colour and detail.
HDR/HLG content is supported via native and market
applications (except Netix, Prime Video), HDMI, USB
input and over DVB-S broadcasts.
Stand Installation &
Wall Mounting
Assembling / Removing the stand(s)
Preparations
Take out the stand(s) and the TV from the packing
case and put the TV onto a work table with the screen
panel down on a clean and soft cloth (blanket, etc.).
• Use a at and rm table bigger than the TV.
• Do not hold the screen panel part.
• Make sure not to scratch or break the TV.
Assembling the stand(s)
• Place the stand(s) on the stand mounting pattern(s)
on the rear side of the TV.
• Insert the screws provided and tighten them gently
until the stand(s) is(are) properly tted.
Removing the stand(s) from the TV
Be sure to remove the stand(s) in the following way
when using the wall mount bracket or repacking the TV.
• Put the TV onto a work table with the screen panel
down on a clean and soft cloth. Leave the stand(s)
protruding over the edge of the surface.
• Unscrew the screws that x the stand(s).
• Remove the stand(s).
When using the wall mount bracket
Your TV is also prepared for a VESA-compliant wall
mount bracket. If it is not supplied with your TV, contact
your local dealer to purchase the recommended wall-
hanging bracket.
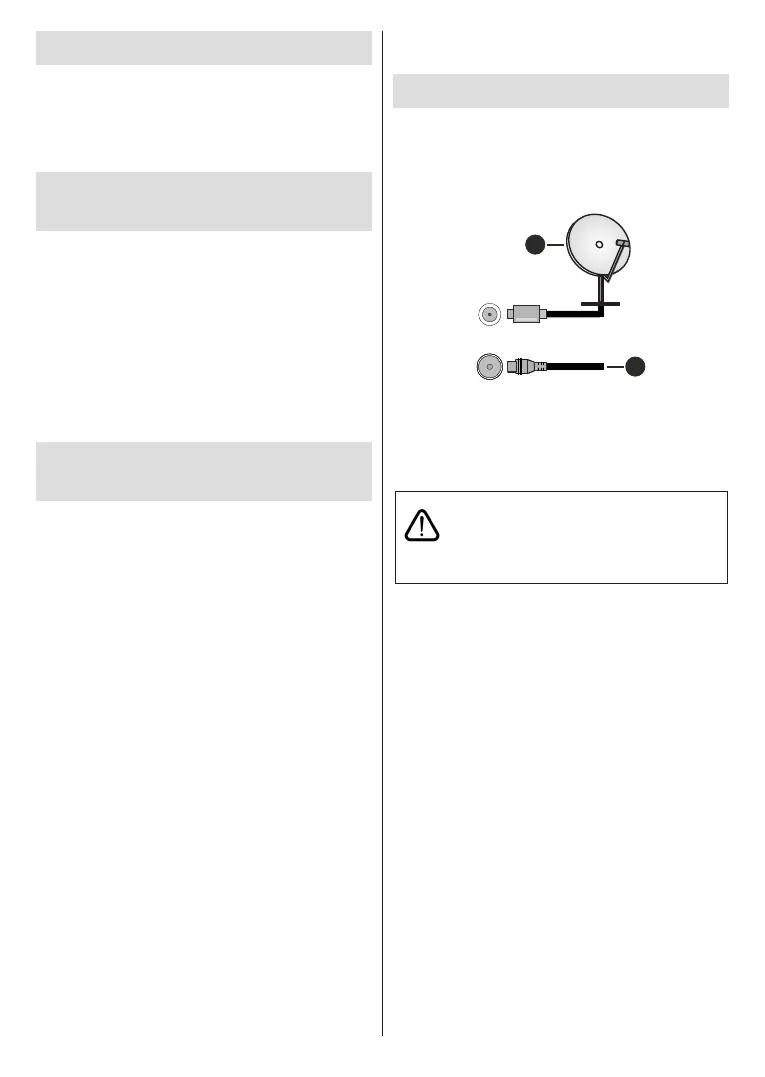
Antenna Connection
Connect the aerial or cable TV plug to the aerial input
(ANT) socket or satellite plug to the satellite input (LNB)
socket located on the rear side of the TV.
Rear side of the TV
1
2
LNB
ANT
1. Satellite(**)
2. Aerial or cable
Note:
• Youmayalsoconnectdevicesthatcanreceivebroadcast
signalssuchasaSetTopBox.
If you want to connect a device to the TV,
make sure that both the TV and the device
are turned o before making any connection.
After the connection is done, you can turn
on the units and use them.
Bekijk gratis de handleiding van Toshiba 40QV3F63DAZ, stel vragen en lees de antwoorden op veelvoorkomende problemen, of gebruik onze assistent om sneller informatie in de handleiding te vinden of uitleg te krijgen over specifieke functies.
Productinformatie
| Merk | Toshiba |
| Model | 40QV3F63DAZ |
| Categorie | Televisie |
| Taal | Nederlands |
| Grootte | 7298 MB |


