Thames & Kosmos Kids First: Crystals, Rocks & Minerals handleiding
Handleiding
Je bekijkt pagina 19 van 36
The geode takes
shape
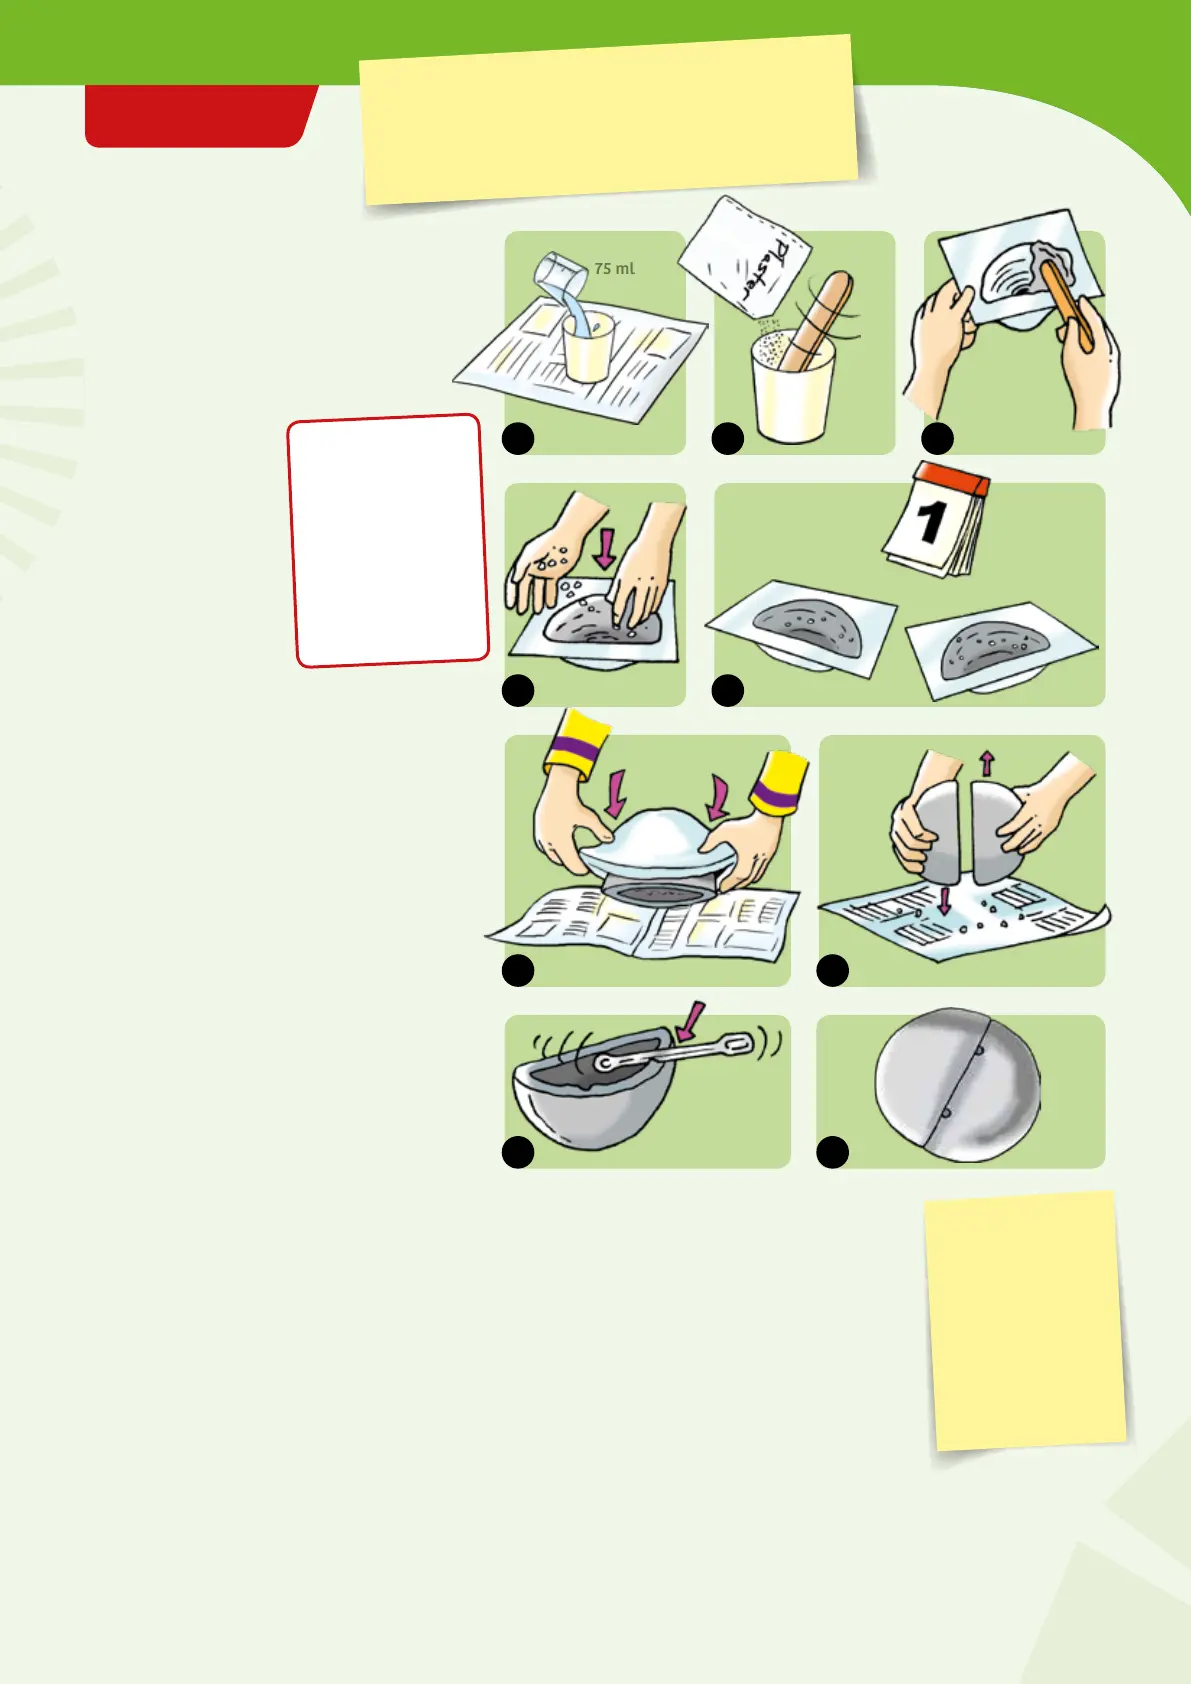
YOU WILL NEED
› Plastic geode mold
› Plaster gypsum
› Wooden spatula
› Large measuring cup
› Measuring spoon
› Alum seed crystals
from Experiments
and
› Sandpaper
› All-purpose glue
› Empty yogurt cup
› Black ink or watercolor paint
HERE’S HOW
1. Cover your work surface with old
newspapers. Pour 75 ml of cold water into
the empty yogurt container.
2. Fill the large measuring cup with gypsum,
and mix it with the water; stir thoroughly
with the wooden spatula, until there are no
more clumps of gypsum.
3. Pour the plaster mixture into the molds.
Spread the mixture up along the walls to
create a cavity in the middle. This will be
easy as long as the mixture is thick enough.
The walls of the geode shouldn’t be too
thin, or the geode will break after it
hardens. The upper edge in particular has to
be at least 5 mm (0.2 in) thick, because you
will be setting the other half on it later on.
4. Before the plaster has hardened, sprinkle
half of the seed crystals that you already
grew into various locations in the hollow
area of your geode half, and press them
lightly into the plaster. Repeat steps 1
through 4 to make the second geode half.
5. Let the geode halves dry for a whole day.
6. Carefully remove the geodes halves from
their molds.
1 2 3
4 5
6 7
8 9
Caution: Plaster can
cause dust. Do not
inhale dust or powder.
Do not place the
materials in the
mouth. Do not apply
to the body. Wash
hands after use.
Follow the safety
information on page 6
before and during use.
TIP !
If you want the
geode to be dark
gray on the
outside, add a few
drops of ink or
black watercolor
paint to the water.
7. Smooth the edges of the geode halves with the
sandpaper, and check to see that their edges
line up by setting them against each other.
8. Use the measuring spoon to scrape two small
holes in one geode half, spaced about 2 cm (1
in) apart. The hole diameter should be just
large enough for the thin pipette tube to fit
into it. You will later add the crystal growing
solution through these holes.
9. Glue together the two halves with the all-purpose glue, leaving the
holes unobstructed. Let the geode dry well. To make the joint
between the two halves as unnoticeable as possible, you can smooth
it a little more with the sandpaper, or spread more plaster on it.
75 ml
Homemade Crystals
EXPERIMENT 7
TIP !
Read the instructions through carefully first, get
everything ready, and be speedy while you work,
because otherwise the plaster will harden too quickly.
Bekijk gratis de handleiding van Thames & Kosmos Kids First: Crystals, Rocks & Minerals, stel vragen en lees de antwoorden op veelvoorkomende problemen, of gebruik onze assistent om sneller informatie in de handleiding te vinden of uitleg te krijgen over specifieke functies.
Productinformatie
| Merk | Thames & Kosmos |
| Model | Kids First: Crystals, Rocks & Minerals |
| Categorie | Niet gecategoriseerd |
| Taal | Nederlands |
| Grootte | 30537 MB |