Handleiding
Je bekijkt pagina 13 van 25
GB
13
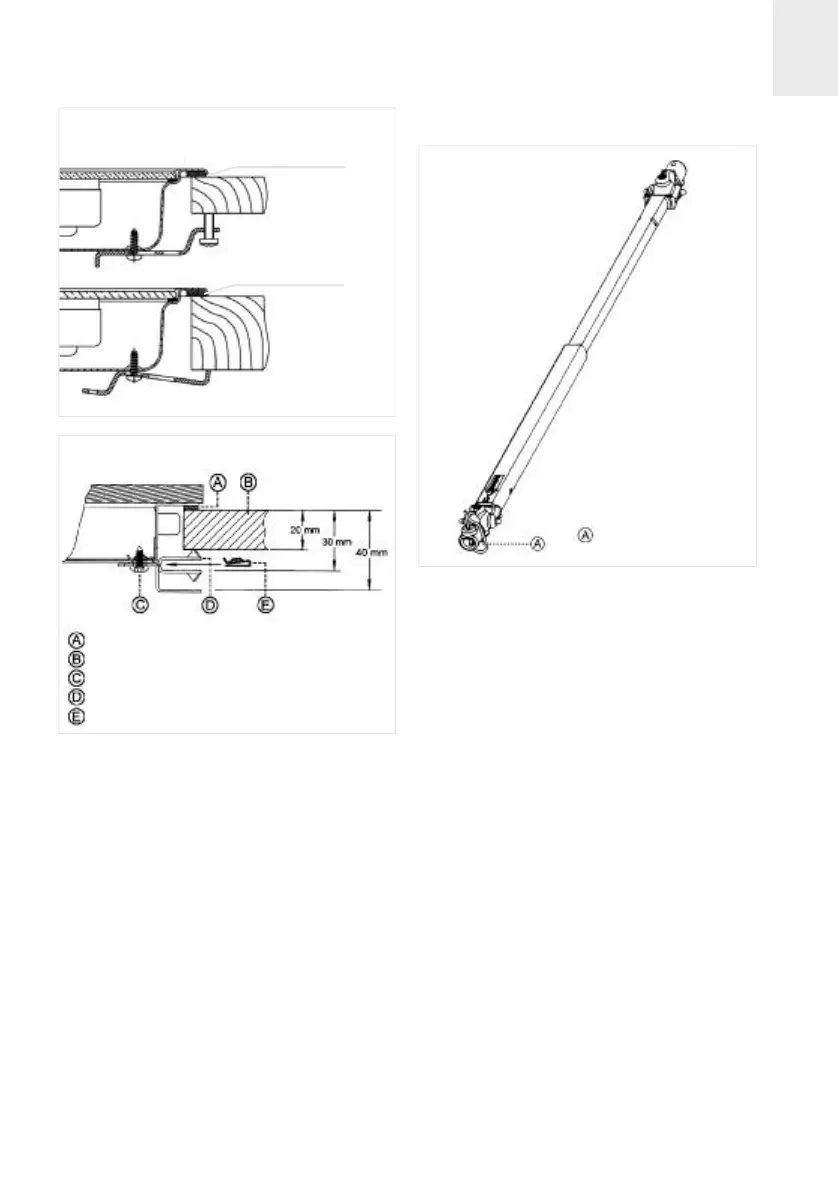
Hob model CGC 4G AI AL is mounted by
inserting the quick nuts into the holes
where the screws go (see fig. 5) and then
attaching the appropriate clip, depending
on the worktop’s thickness (20, 30 and 40
mm) and tightening the screws until it is
firmly fastened.
If an oven is being installed beneath the
hob, avoid the power cable coming into
contact with very hot components.
ATTACHING THE HOB TO THE OVEN
OR THE CONTROL PANEL
The hob has four cardan telescopic shafts
for this purpose. (See fig. 6).
The way to join them is as follows:
1 Turn off the electricity.
2 Detach the cardan telescopic shafts a
few centimetres.
3 Remove the four pins from the ends (A).
4 Put the oven part-way into its space,
taking care not to drag the cardan teles-
copic shafts coming from the hob, and
leaving enough space to put in the other
ends of the telescopic shafts into the
shafts in the rear part of the control
panel, and then replace the pins.
5 To make the electric connection betwe-
en the two appliances, attach the hob’s
connector to the oven’s connector.
6 Complete the definitive positioning of the
oven, ensuring that the cardan telescopic
shafts are firmly in position and that the
telescopic pipes are well-aligned when
inserted so that moving is quite simple.
7 Place the hob controls’ caps in the oven,
as described in the oven’s instruction
manual. The caps that need to be pla-
fig. 5
Sealing washer
Worktop
Screw
Fixing clip
Rapid screw
Model CGC 4G AI AL:
fig. 6
Pins
fig. 4
Sealing washer
Sealing washer
Models CG.1 4G AI AL:
Bekijk gratis de handleiding van Teka CG.1 60 4G AI AL, stel vragen en lees de antwoorden op veelvoorkomende problemen, of gebruik onze assistent om sneller informatie in de handleiding te vinden of uitleg te krijgen over specifieke functies.
Productinformatie
| Merk | Teka |
| Model | CG.1 60 4G AI AL |
| Categorie | Fornuis |
| Taal | Nederlands |
| Grootte | 4165 MB |


