Supermicro A2SAN-L handleiding
Handleiding
Je bekijkt pagina 23 van 103
23
Chapter 2: Installation
DESIGNED IN USA
A2SAN-L
REV:1.02
BAR CODE
JGP1
BT1
JCOM1: COM1/COM2
JCOM2: COM3/COM4
CPU1
FAN1
JPME2
JPF1
LAN1LAN2
JD1
LVDS1
I-SATA1
JHDMI1
LED1
JLCDPWR1
JF1
JIP1
JPH1
AUDIO FP
USB6(3.1)
X
X
X
USB2/3
USB0/1
VGA
JF1
ONPWR
RST
X
HDD LED
PWR LED
SPEAKER
JD1:
USB4/5(3.0)
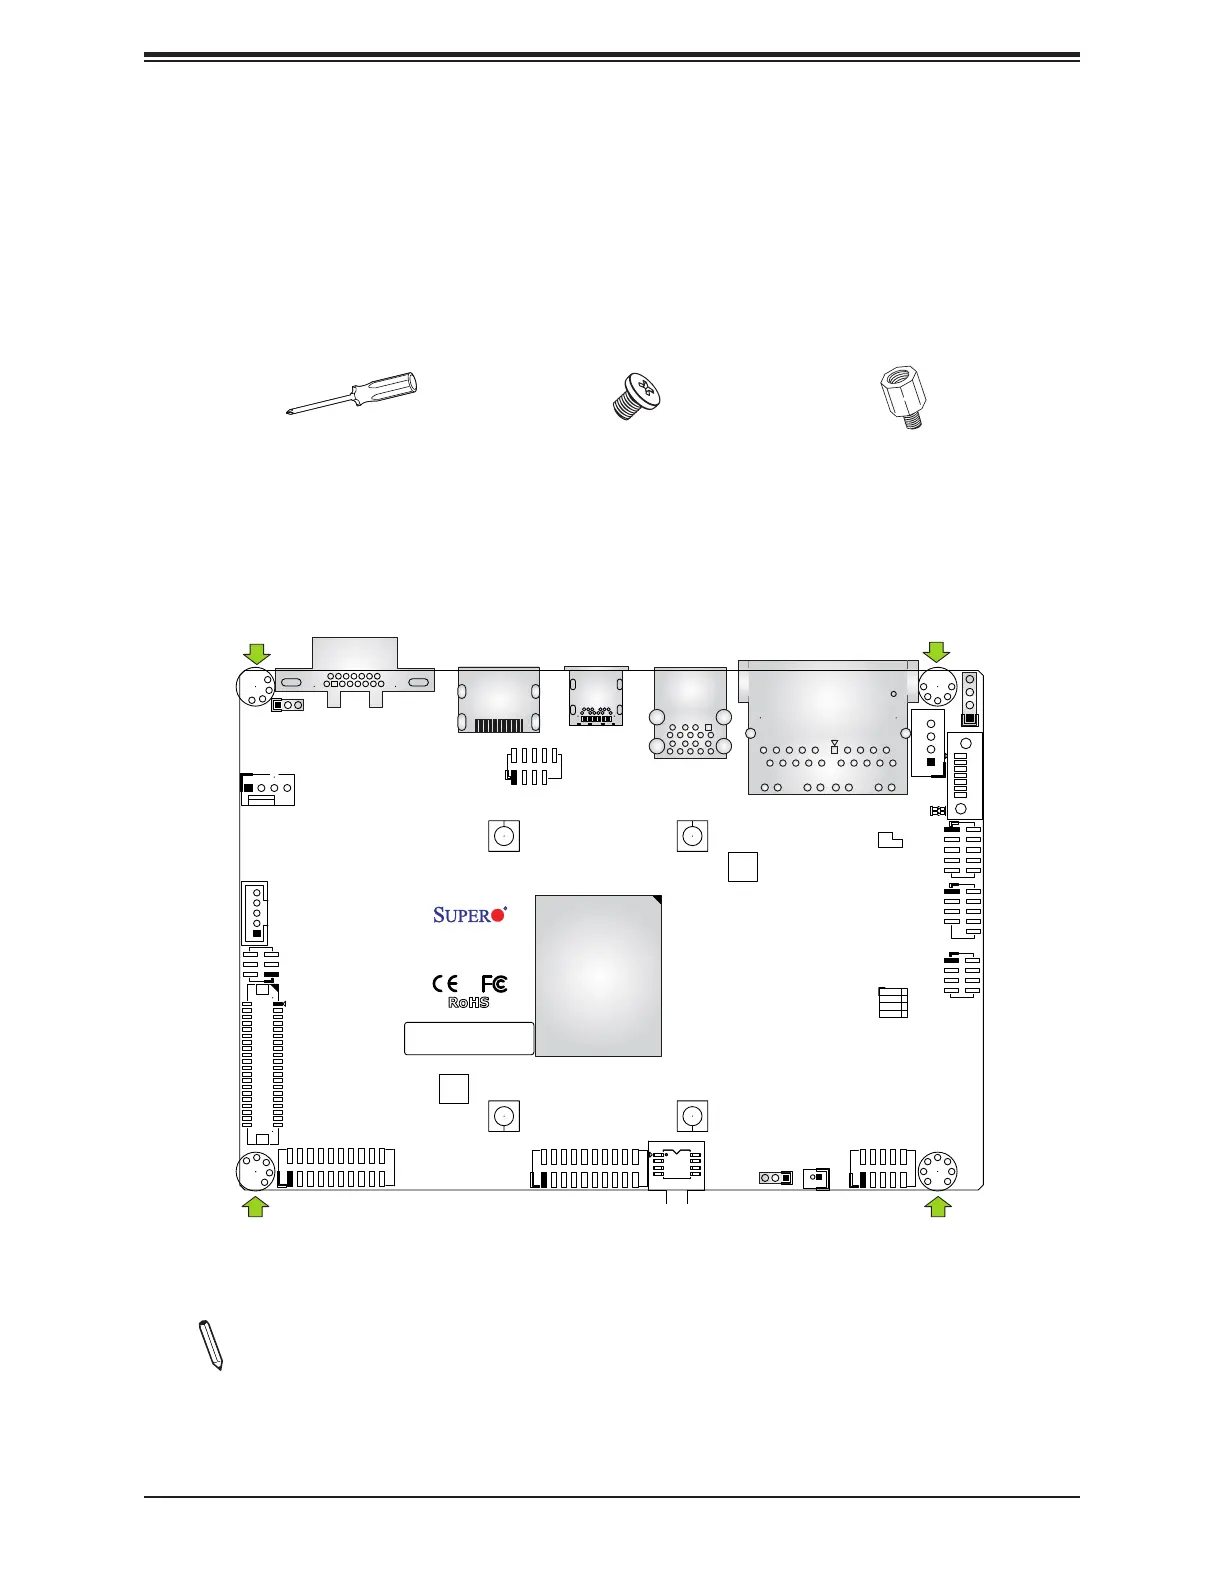
2.2 Motherboard Installation
All motherboards have standard mounting holes to t different types of chassis. Make sure
that the locations of all the mounting holes for both the motherboard and the chassis match.
Although a chassis may have both plastic and metal mounting fasteners, metal ones are
highly recommended because they ground the motherboard to the chassis. Make sure that
the metal standoffs click in or are screwed in tightly.
Location of Mounting Holes
Note: 1) To avoid damaging the motherboard and its components, please do not use
a force greater than 8 lb/inch on each mounting screw during motherboard installation.
2) Some components are very close to the mounting holes. Please take precautionary
measures to avoid damaging these components when installing the motherboard to
the chassis.
Phillips Screwdriver (1)
Standoffs (4)
Only if Needed
Phillips Screws (4)
Tools Needed
Bekijk gratis de handleiding van Supermicro A2SAN-L, stel vragen en lees de antwoorden op veelvoorkomende problemen, of gebruik onze assistent om sneller informatie in de handleiding te vinden of uitleg te krijgen over specifieke functies.
Productinformatie
| Merk | Supermicro |
| Model | A2SAN-L |
| Categorie | Niet gecategoriseerd |
| Taal | Nederlands |
| Grootte | 13897 MB |
Caratteristiche Prodotto
| Breedte | 146 mm |
| Diepte | 101.6 mm |
| Aantal processorkernen | 2 |
| Type stroombron | ATX |
| Aantal USB 2.0-poorten | 4 |


