Stanley STN-SP12 handleiding
Handleiding
Je bekijkt pagina 4 van 168
4
ENGLISH
(Translation from the original instructions)
EN
IT
BG
CS
EL
ES
ET
HU
NO
environment.
After using the sprayer, carefully wash hands, face and clothes.
Do not leave the sprayer out in bad weather conditions.
The user is responsible for the fact that the sprayer
is maintained at optimal operating conditions so the
sprayer can function in a proper and safe way. Parts and
accessories of the equipment must be replaced when they
no longer assure a correct function of the sprayer.
4.1 Prohibitions
It is forbidden to modify the sprayer’s parts.
It is forbidden to apply devices or accessories to
the sprayer without the authorization of Stanley
Black&Decker.
It is forbidden to use solvents, such as alcohol, gasoline
solvents or thinner, for the cleaning of the sprayer.
5 Transport and handling instructions
The transport of the sprayer must be realized using all the
necessary cautions in order to avoid damages.
When transporting the sprayer please make sure the switch on/
off is always off.
During transport, the tank must always be empty or, if not possible,
safely xed in order to avoid accidental outpours of liquid.
During transport and storing, do not put the sprayer on or under
other material.
When moving the sprayer, it is recommended to avoid bumps,
which could damage the product.
6 Instructions for use
6.1 Setting of sprayer
→ (g. 1)
Insert the locking nut D1 onto delivery hose D.
Insert delivery hose D onto hose holder D2
Insert the hose holder D2 into the housing of the base A
(SXSPBS12E) B (SXSPBS16E).
Screw the locking nut D1 onto the base all the way down
and tighten rmly.
→ (g. 2)
Unscrew the locking nut D1 from the handle E.
Insert the locking nut D1 onto the delivery hose D.
Insert the delivery hose D onto the hose holder D2.
Screw the locking nut D1 onto the handle E.
Screw the lance F (SXSPBS12E) G (SXSPBS16E) onto
the handle E.
Screw the brass sprayer F1 onto the lance F
(SXSPBS12E) G (SXSPBS16E).
→ (g. 3)
Insert lter Q into the appropriate housing inside the tank.
→ (g. 4)
Hook the shoulder straps H to the sprayer body as shown
in the picture (SXSPBS12E).
→ (g. 5)
Hook the padded backrest H to the sprayer body as
shown in the picture (SXSPBS16E).
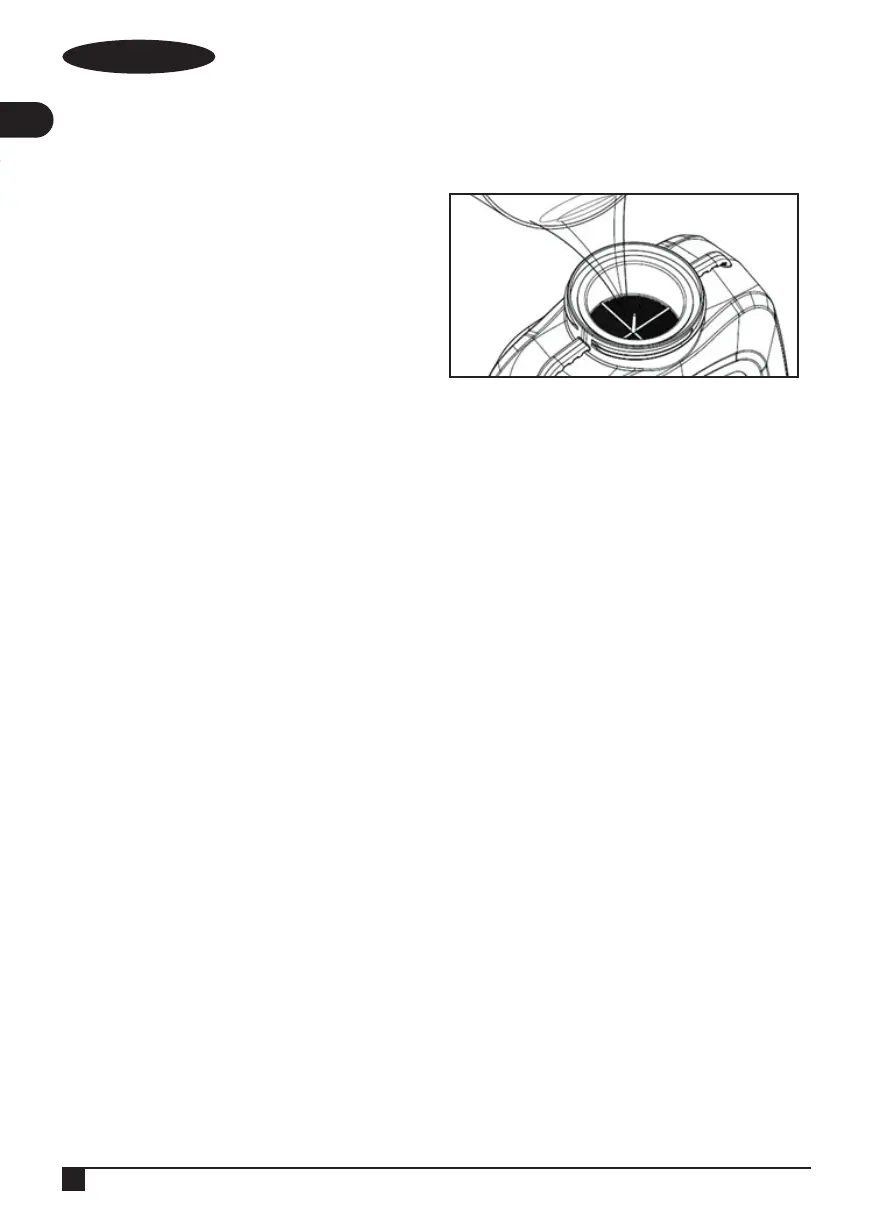
6.2 Filling of the tank
Prepare the solution in a specic container.
Unscrew the cap of the tank and pour the prepared solution
through the lter P. Carefully screw the cap back in place.
Warning! Do not prepare the solution in the sprayer tank but
always in a separate container.
Warning! Do not ever pour the solution into the tank without the
use of the lter.
6.3 Positioning of the sprayer
Put the sprayer on a at surface at a useful height, in order to put the
sprayer on your shoulders easily, with the straps previously adjusted.
If you need to adjust the straps, put the sprayer on a at and
raised surface, remove your arms from the shoulder straps and
adjust the length using the buckles.
6.4 Sprayer start-up
→ (g. 6)
Turn on the pump by turning the knob W clockwise.
The red-colored led Z indicates that the machine is on.
The four green-colored leds T indicate the battery
charging status.
- 4 leds = 100% battery
- 3 leds = 75% battery
- 2 leds = 50 % battery
- 1 led = 25 % battery
If the battery is low, recharge it following the instructions
in section 6.2.
Move the lever on the handle to start spraying
Use the electronic pressure regulator W to manage the
desired working pressure.
When releasing the handle lever, the pump stops
automatically interrupting the spraying of the liquid
Warning! The sprayer is equipped with electronic board with
voltage control that keeps the set pressure constant throughout
the life of the battery.
Warning! Never let the sprayer work when the tank is empty.
Warning! Avoid discharging the battery completely; when the
battery is getting low, you need a full recharge.
Completely recharge the battery before storing the sprayer for a long time.
6.5 Nozzle regulation
This sprayer is supplied with adjustable nozzle F1.
Bekijk gratis de handleiding van Stanley STN-SP12, stel vragen en lees de antwoorden op veelvoorkomende problemen, of gebruik onze assistent om sneller informatie in de handleiding te vinden of uitleg te krijgen over specifieke functies.
Productinformatie
| Merk | Stanley |
| Model | STN-SP12 |
| Categorie | Niet gecategoriseerd |
| Taal | Nederlands |
| Grootte | 26415 MB |

