Speed Queen AFNE9BMB handleiding
Handleiding
Je bekijkt pagina 8 van 12
6. Turn water on and check for leaks.
7. If leaks are found, retighten the hose couplings.
8. Continue tightening and rechecking until no leaks are found.
FLW2446N_SVG
HOT
COLD
9
8
7
4
3
2
1
5
6
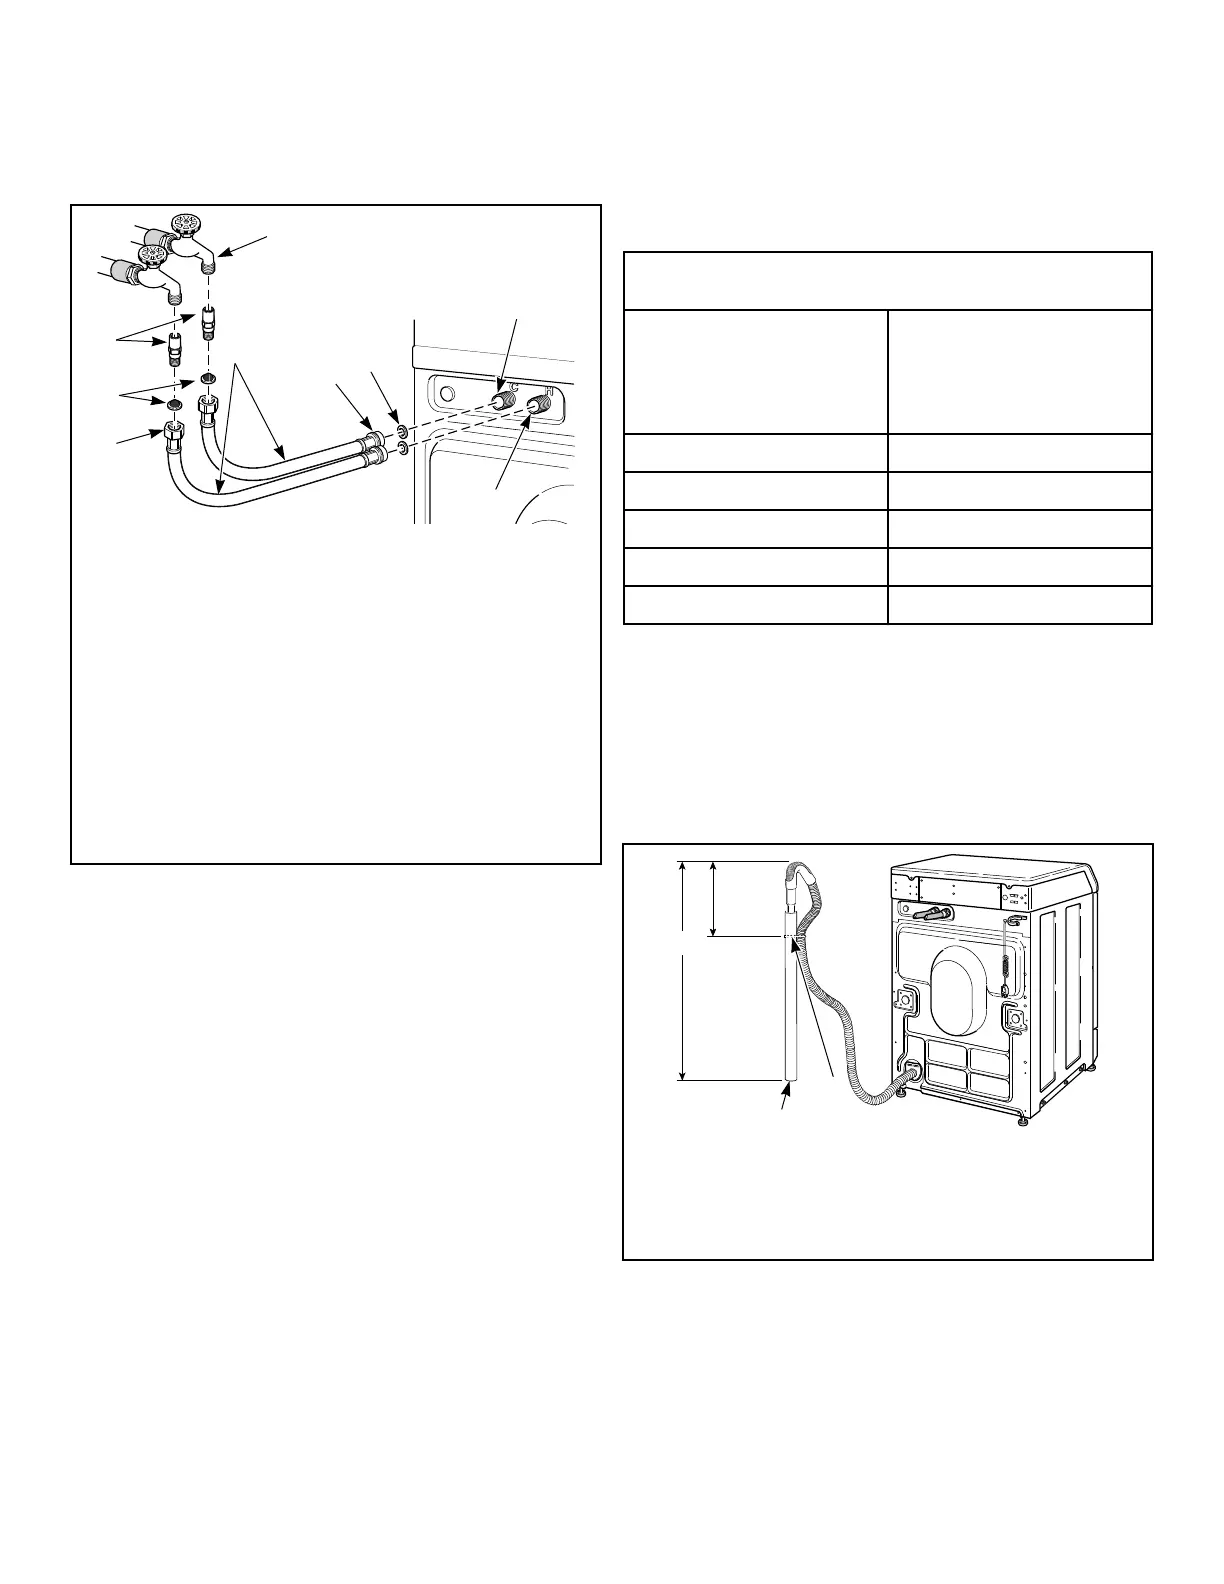
1. Tap
2. Fill Hoses
3. Install this end of hose to valve connections at rear of
washer
4. Plain Rubber Washer
5. Cold Water Connection
6. Hot Water Connection
7. Install this end of hose to water supply tap (Black colored
or hex nut shaped coupling for BSPP thread)
8. Filter Screens
9. Dual Check Valves
Figure 8
IMPORTANT:
Hoses and other natural rubber parts deteriorate after
extended use. Hoses may develop cracks, blisters or
material wear from the temperature and constant high
pressure they are subjected to.
All hoses should be checked on a monthly basis for
any visible signs of deterioration. Any hose showing
the signs of deterioration listed above should be re-
placed immediately. All hoses should be replaced ev-
ery five years.
IMPORTANT: Turn off water supply taps after check-out
and demonstration. Owner should turn off water supply
whenever there will be an extended period of non-use.
Connect Drain Hose to Drain
Receptacle
Remove the drain hose from its shipping position on the rear of
the washer by unhooking the hose from the retainer clamp and by
removing the shipping tape.
Install the drain hose into the drain receptacle (standpipe, wall or
laundry tub) following the instructions below.
IMPORTANT: Drain receptacle must be capable of han-
dling a minimum of 32 mm [1-1/4 inch] outside diame-
ter drain hose.
Drain Flow Rate
Drain Height
Flow Rate
liters per minute [gal-
lons per minute]
0.9 m [3 ft.] 27.7 [7.3]
1.5 m [5 ft.] 17.8 [4.7]
1.8 m [6 ft.] 13.4 [3.5]
2.1 m [7 ft.] 4.8 [1.3]
2.4 m [8 ft.] 0 [0]
Standpipe Installation
1. Place the drain hose into the standpipe.
2. Remove the beaded tie-down strap from accessories bag and
place around standpipe and drain hose and tighten strap to
hold hose to standpipe. Refer to Figure 9 . This will prevent
the drain hose from dislodging from drain receptacle during
use.
FLW2314N_SVG
3
1
2
1. 610 to 914 mm [24 to 36 in.] Recommended Height
2. Beaded strap from accessory bag
3. Standpipe 51 mm [2 in.] or 40 mm [1-1/2 in.]
Figure 9
Wall Installation
For installations of this type, the drain hose MUST be secured to
one of the fill hoses using the beaded strap from accessories bag.
Refer to Figure 10 .
Installation
©
Copyright, Alliance Laundry Systems LLC -
DO NOT COPY or TRANSMIT
8 Part No. 805184R3
Bekijk gratis de handleiding van Speed Queen AFNE9BMB, stel vragen en lees de antwoorden op veelvoorkomende problemen, of gebruik onze assistent om sneller informatie in de handleiding te vinden of uitleg te krijgen over specifieke functies.
Productinformatie
| Merk | Speed Queen |
| Model | AFNE9BMB |
| Categorie | Wasmachine |
| Taal | Nederlands |
| Grootte | 3437 MB |


