Handleiding
Je bekijkt pagina 29 van 164
29
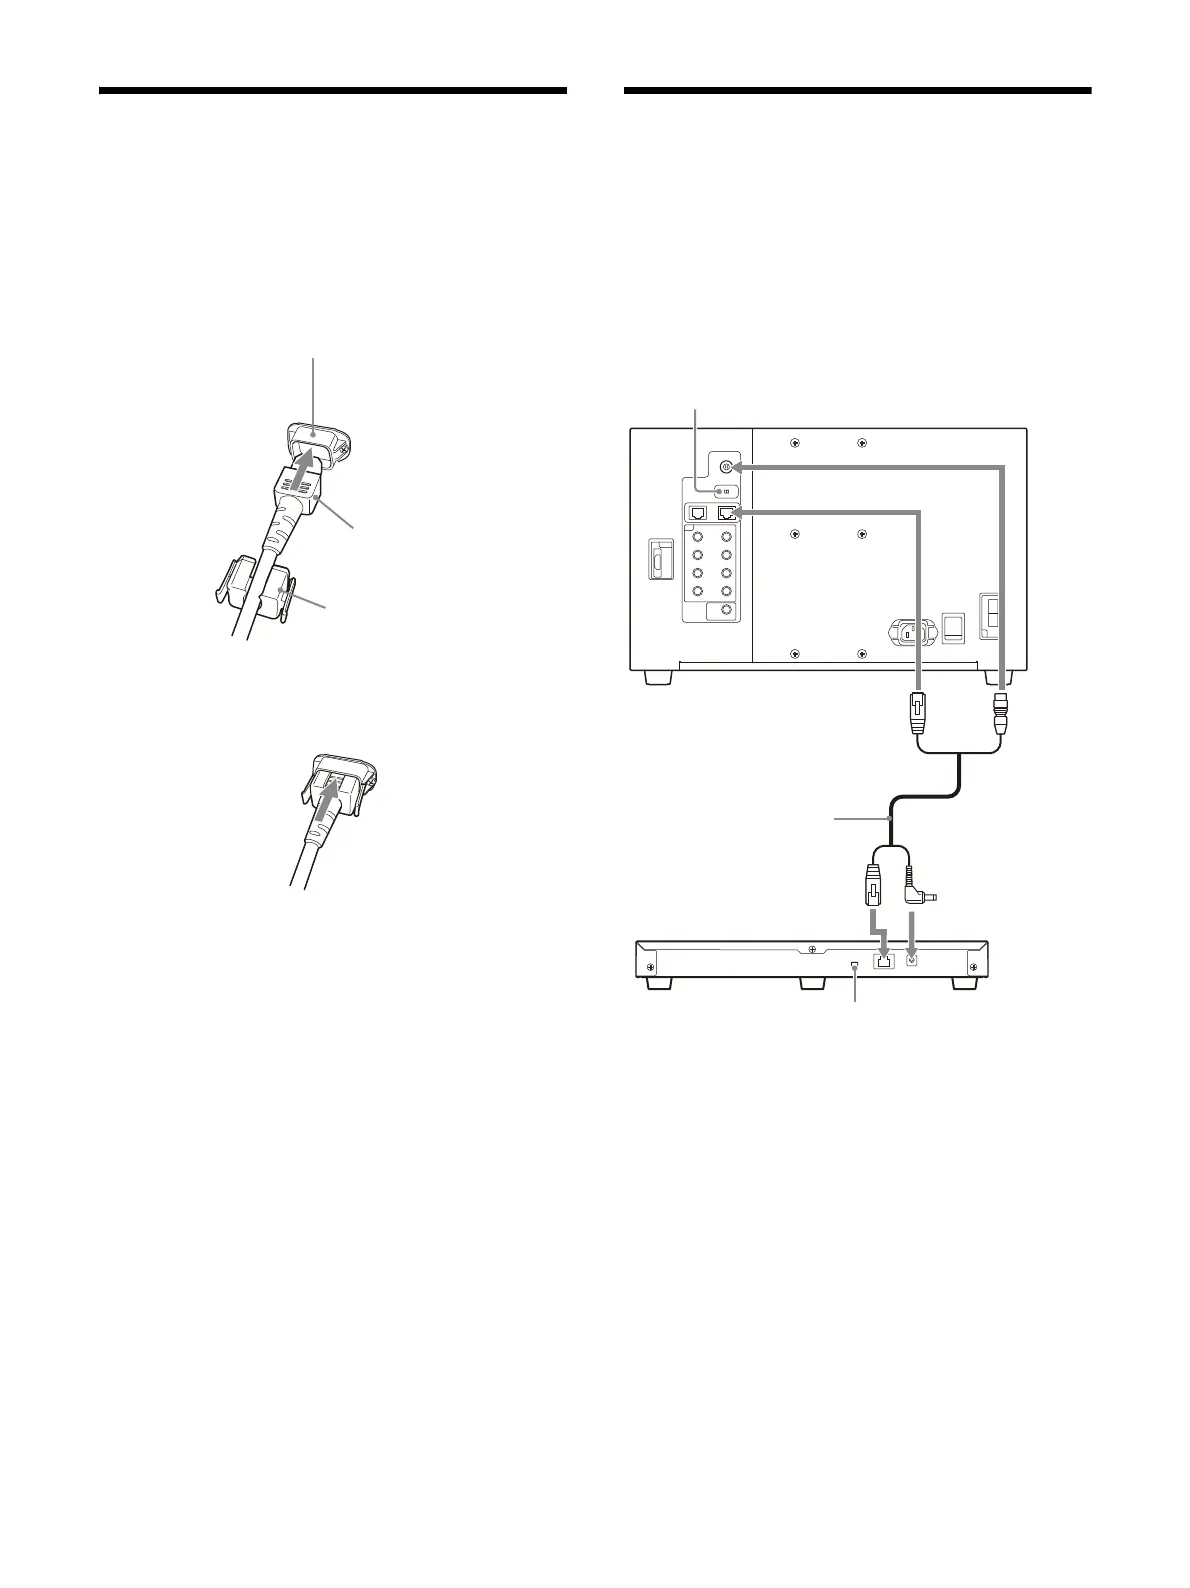
Connecting the AC Power
Cord
1
Plug the AC power cord into the AC IN socket
on the rear panel. Then, attach the AC plug
holder (supplied) to the AC power cord.
2
Slide the AC plug holder over the cord until it
locks.
To remove the AC power cord
Pull out the AC plug holder while pressing the
lock levers.
Connecting the controller
This section explains how to connect the monitor
BVM-HX1710/HX1710N and the controller BVMK-
R10. When connecting BVMK-R10, also refer to
the operating instructions of BVMK-R10.
For other monitor and controller combinations,
se
e the
operating instructions of the controller.
1
Turn off the power switch of the monitor.
2
Set the NETWORK switch of the monitor and
controller to PEER TO PEER.
3
Connect the LAN terminal of the monitor and
the LAN terminal of the controller by using
the cable supplied with BVMK-C1020 or this
unit, or the straight LAN cable of 100BASE-TX
(shielded type, sold separately).
4
Connect the DC 12V terminal of the controller
and the DC 12V OUT terminal of the monitor
by using the cable supplied with BVMK-
C1020 or this unit.
AC IN socket
AC power cord
AC plug holder
(supplied)
Monitor (BVM-HX1710/HX1710N)
DC 12V connector
LAN connector
BVMK-C1020, etc.
LAN connector
Controller (BVMK-R10, etc.)
NETWORK switch:
Set to PEER TO PEER.
DC 12V OUT
connector
NETWORK switch: Set to PEER TO PEER.
Bekijk gratis de handleiding van Sony Trimaster HX BVM-HX1710N, stel vragen en lees de antwoorden op veelvoorkomende problemen, of gebruik onze assistent om sneller informatie in de handleiding te vinden of uitleg te krijgen over specifieke functies.
Productinformatie
| Merk | Sony |
| Model | Trimaster HX BVM-HX1710N |
| Categorie | Monitor |
| Taal | Nederlands |
| Grootte | 17930 MB |


