SolaX Power T-Bat H9.0 handleiding
Handleiding
Je bekijkt pagina 13 van 24
4. Installation
4. Installation
18
19
4):MC0600×1+HV10230×4
4.4.5 Install BMS to Battery Module
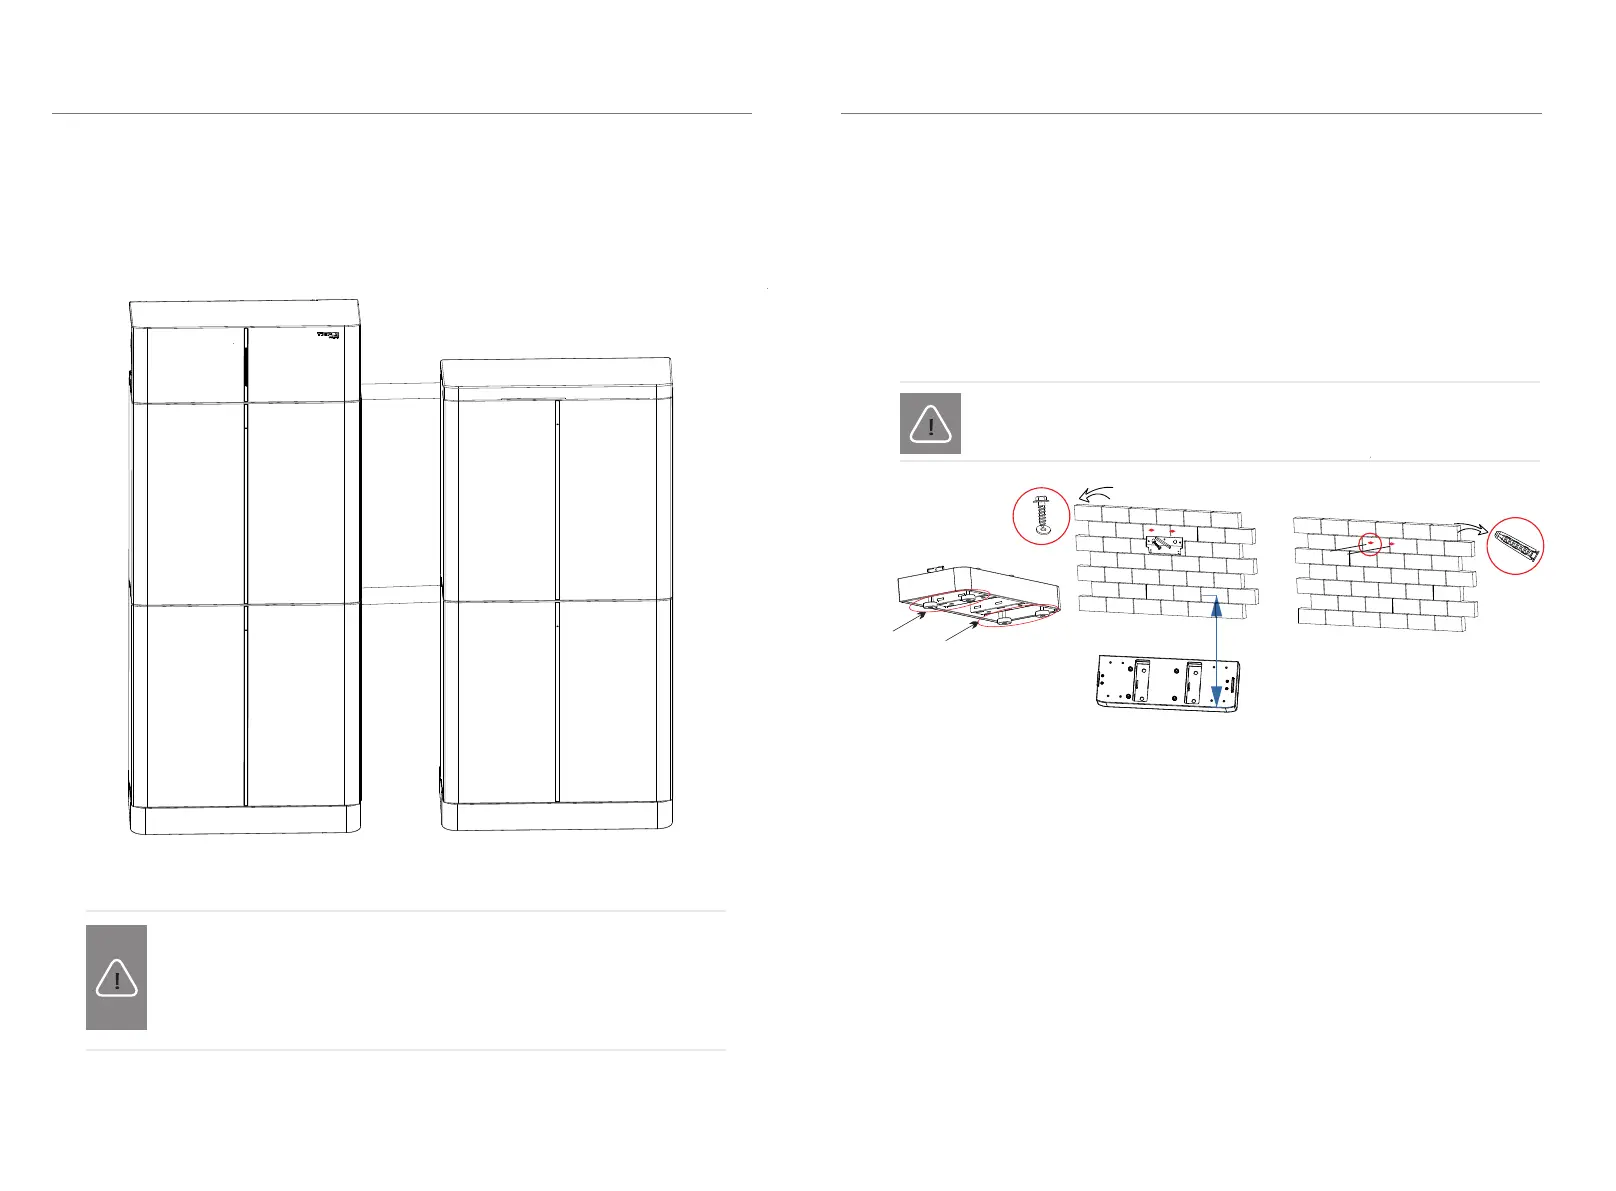
Make sure the wall is strong enough to withstand the weight of battery.
DANGER!
One T-BAT system can contain at most four batterymodules.
Connecting more than four battery modules will blow thefuse
and the battery module(s) will be damaged. Ensure the number of
battery module(s) meets this requirement.
Then place the base (193±2)mm away from the wall and mark the diagonal
hole position of the base.
(1
9
3
±
2)m
m
Step 1: Fix the base mounting
Firstly, adjust the height of the anchor bolt to make it parallel to the ground.
Note!
Base can be fixed after the balance of the battery is adjusted.mounting
Step 2: Match the battery with the wall bracket (May change without notice)
Lift the battery to the wall bracket, you need mark the location of the wall bracket.
Drill holes with 10 driller, make sure the holes are deep enough (at least
80mm) for installing and tightening the expansion tubes (N or K)
Hang the battery over the wall bracket, move the battery close to the wall and
Match it on the wall bracket
φ
Install the expansion tubes in the wall, and tighten the screws on the bracket
by using the screw driller.
Ÿ
Ÿ
Ÿ
Ÿ
Ÿ
Ÿ
Bekijk gratis de handleiding van SolaX Power T-Bat H9.0, stel vragen en lees de antwoorden op veelvoorkomende problemen, of gebruik onze assistent om sneller informatie in de handleiding te vinden of uitleg te krijgen over specifieke functies.
Productinformatie
| Merk | SolaX Power |
| Model | T-Bat H9.0 |
| Categorie | Niet gecategoriseerd |
| Taal | Nederlands |
| Grootte | 3706 MB |


