SolaX Power T-Bat H3.0 handleiding
Handleiding
Je bekijkt pagina 18 van 24
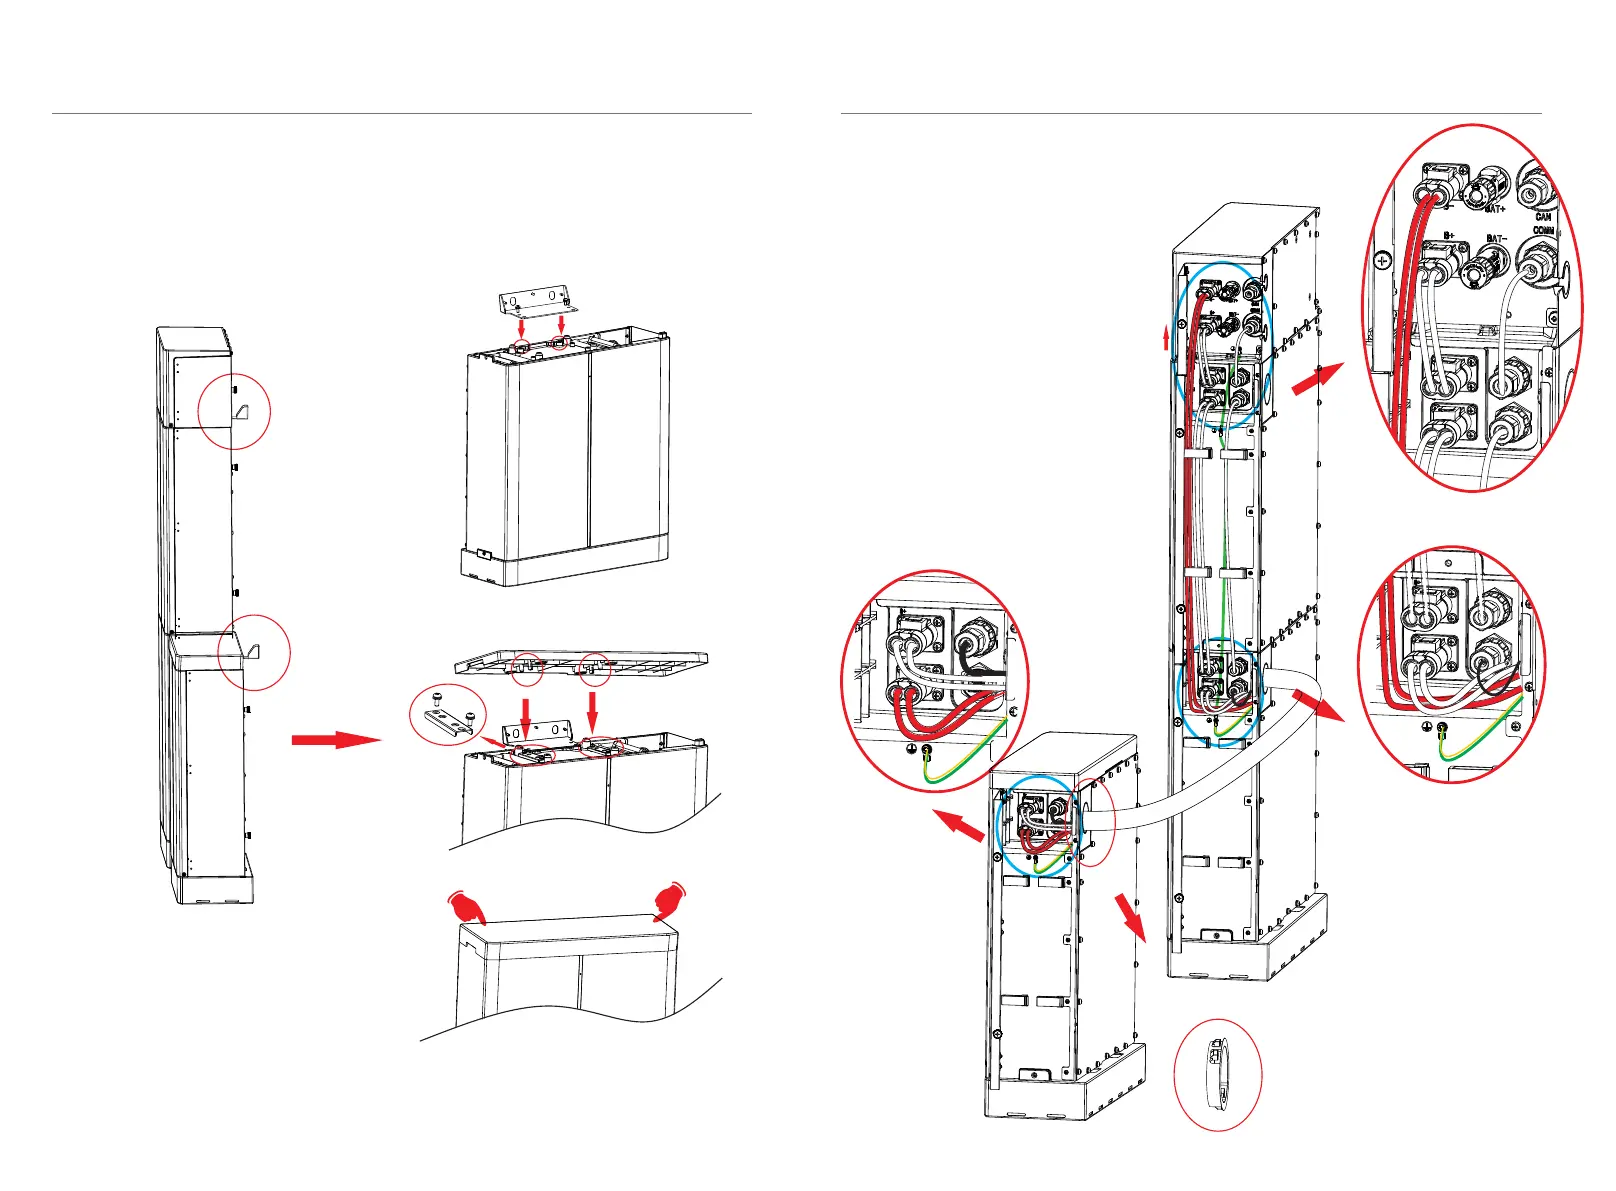
For three battery modules:
Install a fixed wall bracket on the battery modules.
Ø
Check to make sure the connections are securely locked.
BMS to Slave1:
B+ to B+ (C:120mm); COMM to
COM1 (E:200mm);
BMS to Slave3:
B- to B- (B3:1.8m); Get the cables
through corrugate pipe.
Slave1 to Slave2:
B- to B+ (A1:690mm); COM2 to
COM1 (B1:600mm)
Slave2 to Slave3:
B- to B+ (A2:1.2m); COM2 to
COM1 (B2:1.2m); Get the cables
through corrugate pipe.
Ø
4. Installation
4. Installation
28
29
Slave3
BMS
It (slave3 and slave4 if you need) is required to install the snap-fits to fix the cover plate.
(1)
(2)
(3)
Slave1
Slave2
The two ends of the corrugated pipe need
to be protected with guard rings.
Bekijk gratis de handleiding van SolaX Power T-Bat H3.0, stel vragen en lees de antwoorden op veelvoorkomende problemen, of gebruik onze assistent om sneller informatie in de handleiding te vinden of uitleg te krijgen over specifieke functies.
Productinformatie
| Merk | SolaX Power |
| Model | T-Bat H3.0 |
| Categorie | Niet gecategoriseerd |
| Taal | Nederlands |
| Grootte | 3706 MB |


