SolaX Power T-Bat H 17.3 handleiding
Handleiding
Je bekijkt pagina 12 van 22
4.5 Cable Connection
4. Installation
4. Installation
18
19
1. The only step of connecting power cable for T-BAT H 5.8 is connecting the
series-connected cable to “-” and “YPLUG” on the right side. The series-connected
cable is used to make a complete circuit.
-
YPLUG
RS485 II
-
YPLUG
RS485 II
-
YPLUG
RS485 II
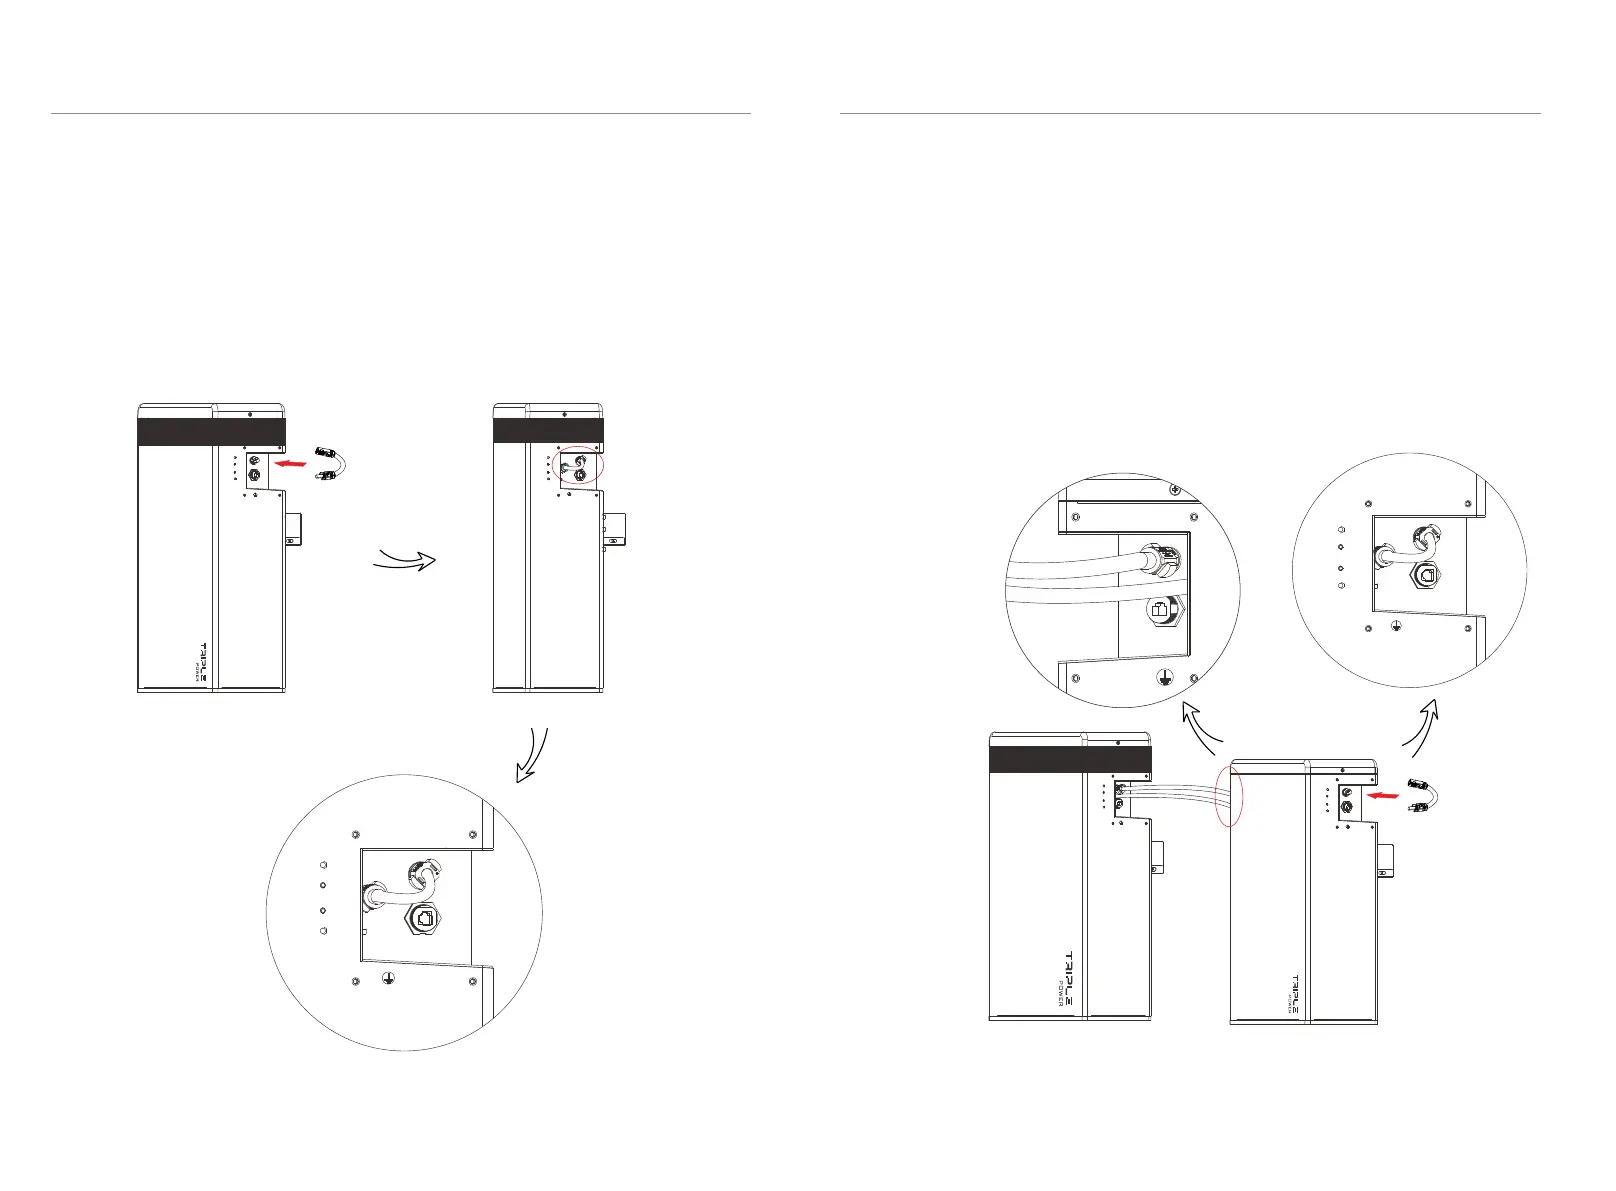
For T-BAT H 5.8 + 1~3 battery packs:
1. Connect “-” (Ⅴ for T-BAT H 5.8 or Ⅵ’ for HV11550) on the right side to “+” (Ⅱ’)
on the left side of the next battery pack.
2. Connect “YPLUG” (Ⅵ for T-BAT H 5.8 or Ⅶ’ for HV11550) on the right side to
“XPLUG” (Ⅰ’) on the left side of the next battery pack.
3. The rest battery packs are connected in the same way.
4. Insert the series-connected cable at “-” and “YPLUG” on the right side of last
battery pack to make a complete circuit.
-
YPLUG
RS485 II
-
YPLUG
RS485 II
4.5.1 Connecting Power Cables between Battery Packs
For T-BAT H 5.8:
XPLUG
+
RS485
-
YPLUG
RS485 II
Bekijk gratis de handleiding van SolaX Power T-Bat H 17.3, stel vragen en lees de antwoorden op veelvoorkomende problemen, of gebruik onze assistent om sneller informatie in de handleiding te vinden of uitleg te krijgen over specifieke functies.
Productinformatie
| Merk | SolaX Power |
| Model | T-Bat H 17.3 |
| Categorie | Niet gecategoriseerd |
| Taal | Nederlands |
| Grootte | 2974 MB |


