Silvercrest SFW 400 A2 handleiding
Handleiding
Je bekijkt pagina 9 van 204
■ 6
│
GB
│
IE
SFW 400 A2
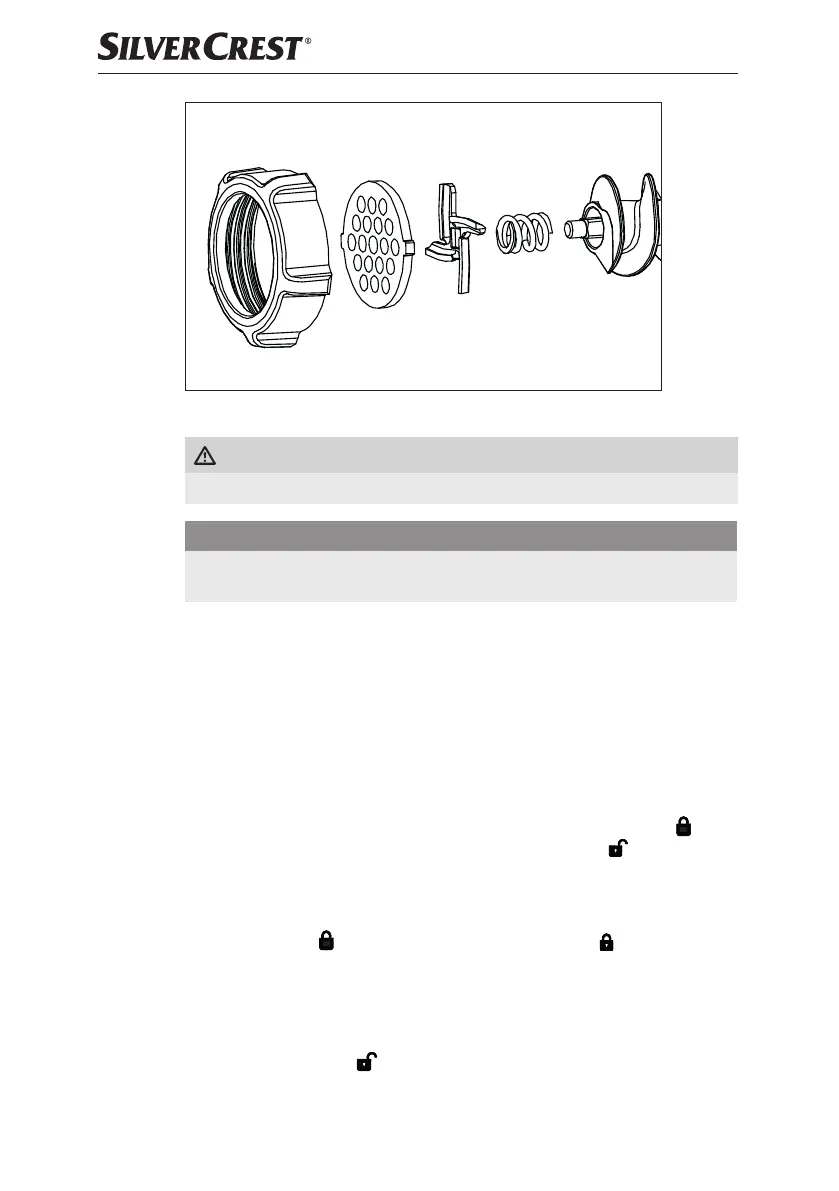
Fig. 1
WARNING! RISK OF INJURY!
► The cross blade 9 is very sharp! Risk of injury!
CAUTION - PROPERTY DAMAGE!
► The appliance will be damaged if the cross blade 9 is inserted the other
way around!
5) Select the required cutting disc 0/sausage disc e.
6) Place your selected cutting disc 0 into the meat grinder casing 6 so that
the fixings on the cutting disc 0 are located in the openings in the meat
grinder casing 6.
7) After everything has been correctly assembled, screw the ring clamp q
back on hand-tight.
8) The ready-assembled meat grinder ca sing 6 is connected by a bayonet
connector to the motor unit 5:
– Fit the meat grinder casing 6 into the motor unit 5 so that the
sym-
bol on the meat grinder casing 6 is aligned with the symbol on the
motor unit 5. The locking button t pushes in (fig. B).
– Press the meat grinder casing 6 in gently, at the same time turning the
feed tube on the meat grinder casing 6 to the middle position (fig. B),
so that the
symbol on the feed tube points to the symbol. When
the meat grinder casing 6 clicks into place, the locking button t pops
out again.
– Finally, place the feeding tray 3 on top of the feeding funnel.
– To dismantle it, press the locking button t and turn the feeding funnel to
the right (Fig. B)
. You can now pull the meat grinder casing 6 out.
IB_424939_SFW400A2_LB8_short.indb 6 10.03.2023 11:40:17
Bekijk gratis de handleiding van Silvercrest SFW 400 A2, stel vragen en lees de antwoorden op veelvoorkomende problemen, of gebruik onze assistent om sneller informatie in de handleiding te vinden of uitleg te krijgen over specifieke functies.
Productinformatie
| Merk | Silvercrest |
| Model | SFW 400 A2 |
| Categorie | Niet gecategoriseerd |
| Taal | Nederlands |
| Grootte | 15531 MB |


