Showtec IP Pixelstrip 40 handleiding
Handleiding
Je bekijkt pagina 13 van 24
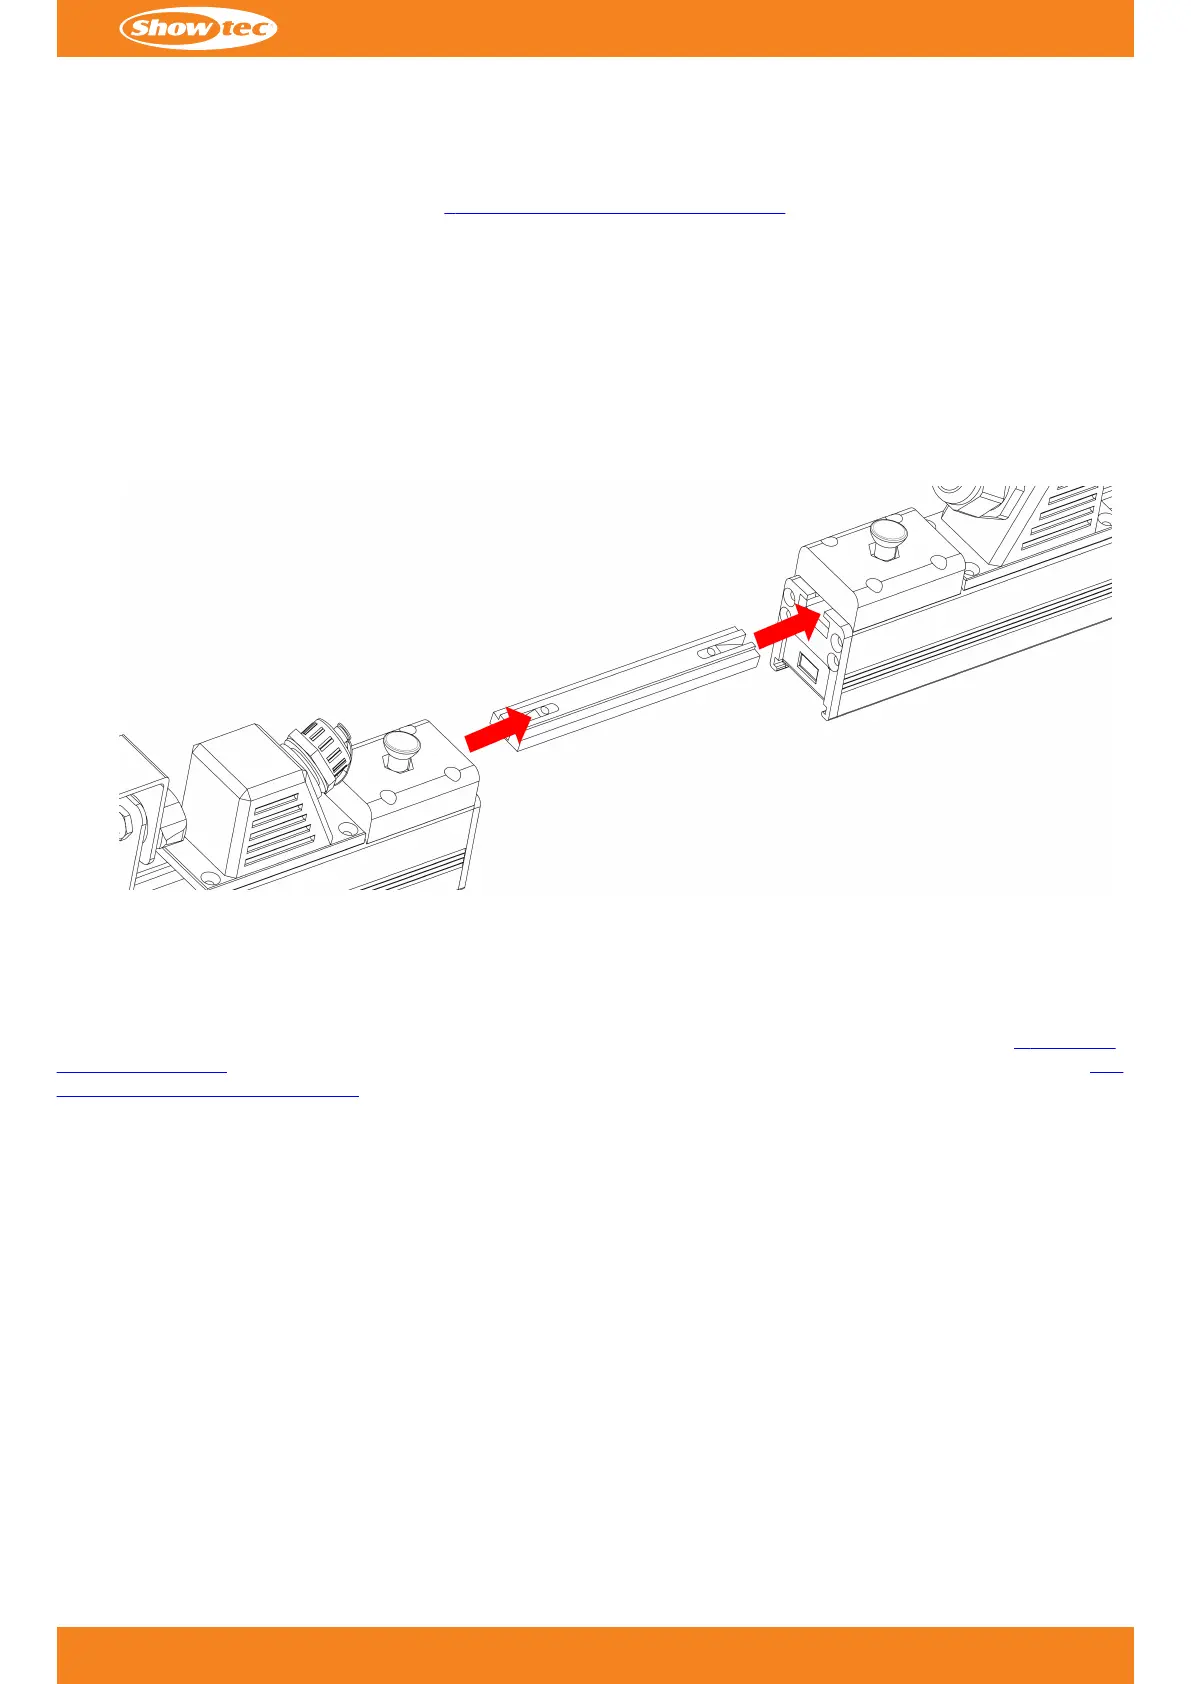
4.6. Connecting Multiple Pixelstrips
The IP Pixelstrip 40 can be connected to other IP Pixelstrip devices using alignment plates. The devices is
delivered with a straight alignment plate. Other alignments plates are also available to create more complex
configurations, including 3D setups (see 4.7. Creating a 3D Setup (Optional) on page 15).
To connect multiple IP Pixelstrip 40 devices, follow the steps below:
01) Slide the alignment plate into the opening for alignment plate (05) on the 1
st
device until the latch for01)
alignment plate (06) snaps into place.
02) Slide a 2
nd
device onto the alignment plate until the latch for alignment plate (06) of the 2
nd
device snaps02)
into place.
03) Connect the dedicated IP65 signal/power connector IN (07) of the 2
nd
device to the dedicated IP6503)
signal/power connector OUT (01) of the 1
st
device.
Figure 6
To disconnect a IP Pixelstrip 40 device, pull up the latch for alignment plate (06) on the device and remove the
alignment plate.
Note:
The 90° alignment plate, 120° alignment plate, X alignment plate and female alignment plate (see 1.1. Before
Using the Product on page 3) contain threaded holes which should only be used to create 3D layouts (see 4.7.
Creating a 3D Setup (Optional) on page 15). Do not use these holes as a single mounting point. Alignment
plates shall only be used to connect multiple IP Pixelstrip 40 devices and shall not be used for rigging or
mounting.
12
c
Product code: 44522
IP Pixelstrip 40
Bekijk gratis de handleiding van Showtec IP Pixelstrip 40, stel vragen en lees de antwoorden op veelvoorkomende problemen, of gebruik onze assistent om sneller informatie in de handleiding te vinden of uitleg te krijgen over specifieke functies.
Productinformatie
| Merk | Showtec |
| Model | IP Pixelstrip 40 |
| Categorie | Niet gecategoriseerd |
| Taal | Nederlands |
| Grootte | 2690 MB |


