Sangiorgio SG710 handleiding
Handleiding
Je bekijkt pagina 10 van 39
10
INSTALLATION
GENERAL INFORMATION
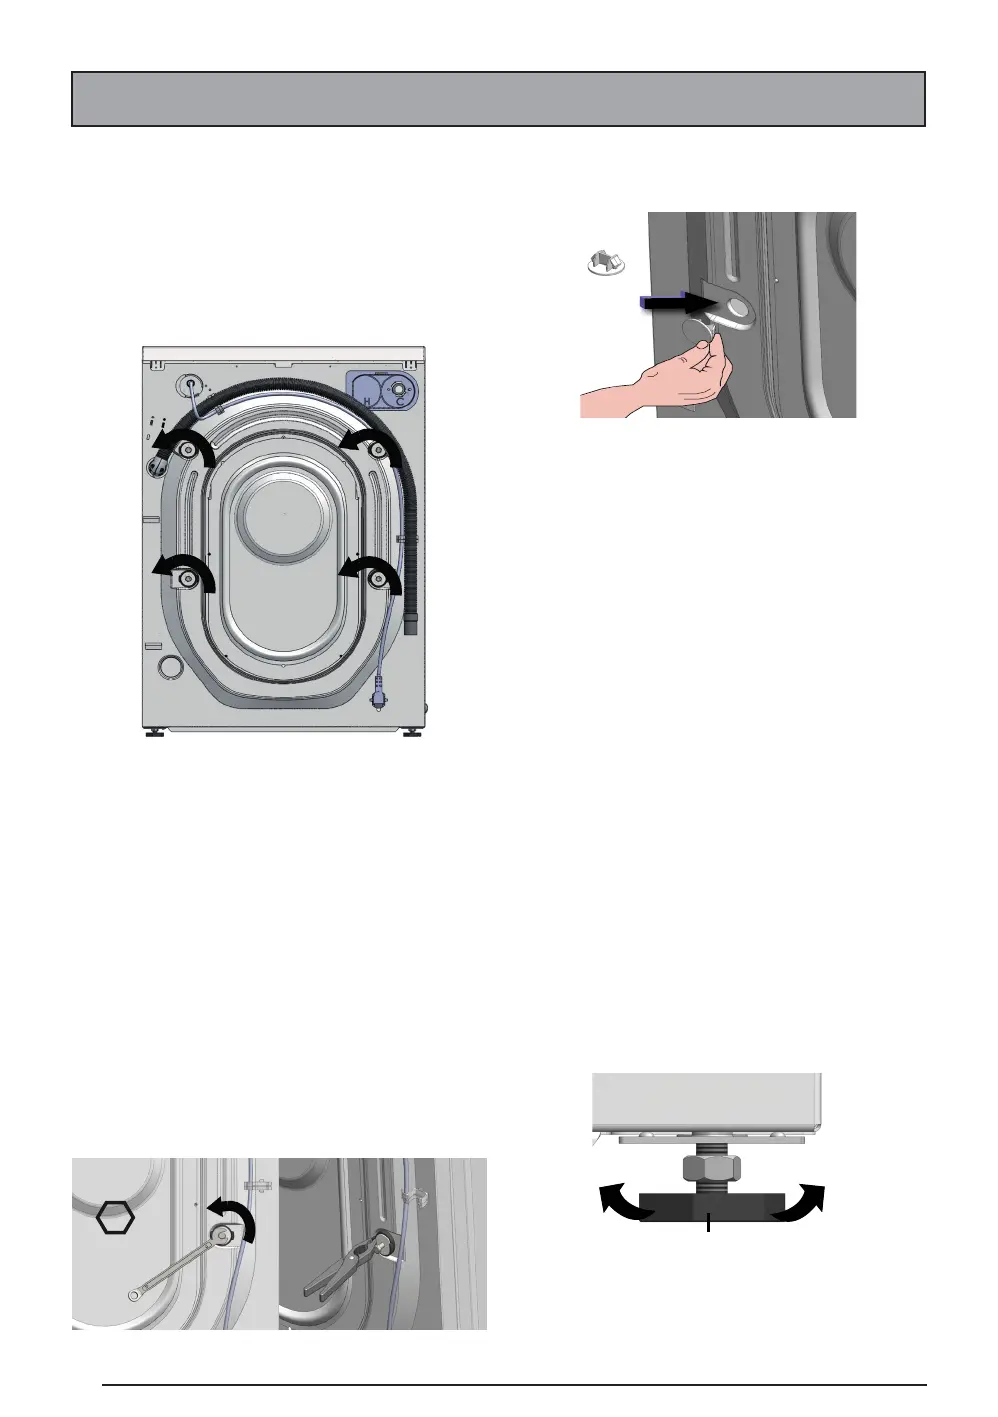
The assembled group of the appliance is
secured by 4 xing screws (which protect it
during handling and transport operations),
gure 1.
Figure 1
FIXING SCREWS REMOVAL
Before using the appliance, it is necessary
to remove the xing screws by turning
counter clockwise.
N.B. If the xing screws are not removed,
this will cause strong vibrations and irregular
movements during the washing cycle with
subsequent damages.
Once unscrewed, pull them out with spacer
bushes as shown in gure 2.
Figure 2
Seal the holes with the appropriate caps
provided as shown in gure 3.
Figure 3
x 4
POSITIONING OF APPLIANCE
In order to avoid damages or malfunctions, the
appliance must not be installed on roofs, bal-
conies, under canopies or in places where it
may be exposed to atmospheric agents.
Make sure the electrical cable and hoses (wa-
ter inlet and drain hoses) on the rear of the
appliance are not pressed.
To ensure the stability of the appliance, avoid-
ing strong vibrations during washing and
spinning cycles, it is necessary to put the ap-
pliance on a levelled, smooth, dry, solid sur-
face not raised from the oor level. In order
to balance any difference in levels of the oor,
it is possible to intervene on the feet modify-
ing the height by screwing and unscrewing in
accordance with the necessities as shown in
gure 4.
Figure 4
MOBILE
PIEDINO
12 mm
1
2
Cabinet
Foot
Bekijk gratis de handleiding van Sangiorgio SG710, stel vragen en lees de antwoorden op veelvoorkomende problemen, of gebruik onze assistent om sneller informatie in de handleiding te vinden of uitleg te krijgen over specifieke functies.
Productinformatie
| Merk | Sangiorgio |
| Model | SG710 |
| Categorie | Wasmachine |
| Taal | Nederlands |
| Grootte | 6005 MB |
Caratteristiche Prodotto
| Apparaatplaatsing | Vrijstaand |
| Soort bediening | Buttons, Rotary |
| Kleur van het product | Wit |
| Deurscharnieren | Links |
| Ingebouwd display | Ja |


