Handleiding
Je bekijkt pagina 26 van 66
26
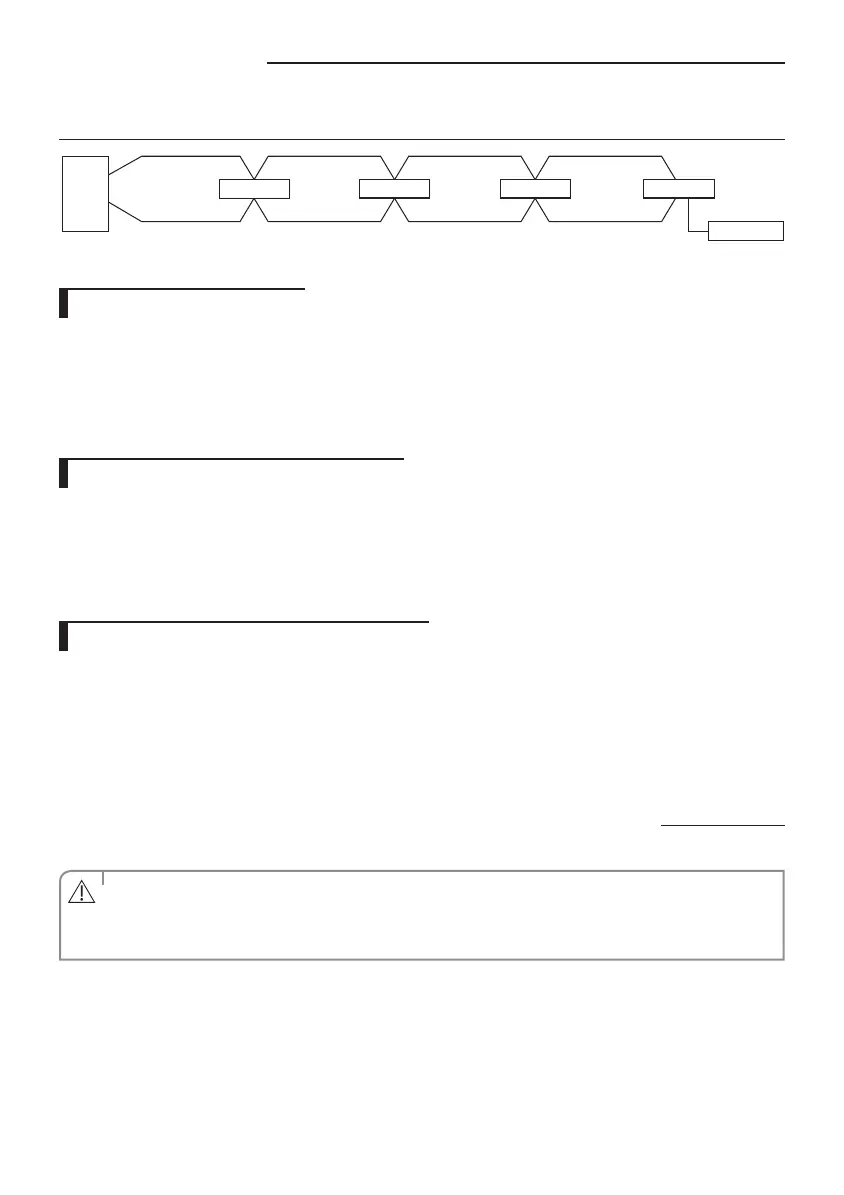
Installing DPM
In case of 4indoor units connection
Outdoor
unit
Indoor unit #1
Remote control
F1/F2
F1/F2 F1/F2 F1/F2F1/F2 F1/F2 F1/F2
L/N
L/N L/N L/NL/N L/N L/N
Indoor unit #2 Indoor unit #3 Indoor unit #4
The wired remote controller can be used with any of the DPM indoor units.
Operation and specication
The two, the three, or the four sets of the indoor units with DPM installation which are controlled by wired and wireless
remote controller work equally. (All controls such as ON/OFF, cooling/heating/dehumidication/ventilation, high/
medium/low wind, xing louver angle/swing are equally applied.)
Thermo OFF which stops when indoor temperature reaches set temperature works by the average sensor value of the
indoor temperature of the all indoor units.
When one of the several indoor units has a problem, they protect operation or stop working.
Instruction for installation and operation
You should install the DPM according to the above installation specication and eliminate the factors that give electrical
load to the both indoor units when installing and operating. (Heater / window / front door / ventilation / partition that
divides space)
You should provide sucient instructions about the operation method and specication features to users and ll in caution
phrases on wired remote controller when necessary.
- <The air-conditioners in this area are special type to be controlled simultaneously.>
Set up indoor quantity by key switch(K1, K2)
Press and hold K1 switch to enter the setting mode on the number of the installed indoor unit : Check “A0” sign on
7-segment
- Press K2 switch to set the number of the installed indoor unit :
Ex) If there are two indoor units, press K2 switch twice, and check "A2" sign on 7-segment.
If there are three indoor units, press K3 switch three times, and check "A3" sign on 7-segment.
If there are four indoor units, press K4 switch four times, and check "A4" sign on 7-segment.
- Press K1 switch to complete setting the number of the installed indoor unit : Check "AA" sign on 7-segment.
Connecting up and removing air in the circuit
• When installing, make sure there is no leakage. When recovering the refrigerant, ground the compressor rst
before removing the connection pipe. If the refrigerant pipe is not properly connected and the compressor
works with the service valve open, the pipe inhales the air and it makes the pressure inside of the refrigerant
cycle abnormally high. It may cause explosion and injury.
CAUTION
The air in the indoor unit and in the pipe must be purged. If air remains in the refrigeration pipes, it will aect the compressor
either reduce cooling/heating capacity or lead to a malfuction. Refrigerant for air purging is not charged in the outdoor unit.
Use Vacuum Pump as shown at the right gure.
1. Connect each assembly pipe to the appropriate valve on the outdoor unit and tighten the are nut.
CAC GD-EU_IM_32793A-23_EN.indd 26 2016-05-25 오후 7:08:42
Bekijk gratis de handleiding van Samsung RC140PHXEA, stel vragen en lees de antwoorden op veelvoorkomende problemen, of gebruik onze assistent om sneller informatie in de handleiding te vinden of uitleg te krijgen over specifieke functies.
Productinformatie
| Merk | Samsung |
| Model | RC140PHXEA |
| Categorie | Airco |
| Taal | Nederlands |
| Grootte | 7101 MB |


