Handleiding
Je bekijkt pagina 22 van 80
22 English
Installation instructions
Installation instructions
If the range is pulled from the wall for any reason, always repeat this procedure
to verify the range is properly secured by the anti-tip bracket. Never completely
remove the leveling legs or the range will not be secured to the anti-tip device
properly.
Step 5. Plug in and place
WARNING
BEFORE OPERATING OR TESTING, follow the grounding requirements on pages
17
~
18 in this manual. Improper connection of the grounding plug can result in a
risk of electric shock.
• All gas ranges come with a power cord. The power cord is connected to the rear
of the range. Please review "Electrical requirements" on pages 17
~
18.
• The electrical system, including the power cord, is preinstalled and prewired at
the factory. Altering any part of this system may result in a short or overload.
1. Plug in the power cord. Make sure the outlet meets local or national electrical
codes as referenced on pages 17
~
18.
2. Slide the range into place.
3. Check the gas supply line to make sure it did not get damaged and it stayed
connected during positioning.
4. Check to make sure the back leg of the range has slid into the anti-tip bracket.
Carefully tip the range forward to ensure that the anti-tip bracket engages the
back brace and prevents tip-over.
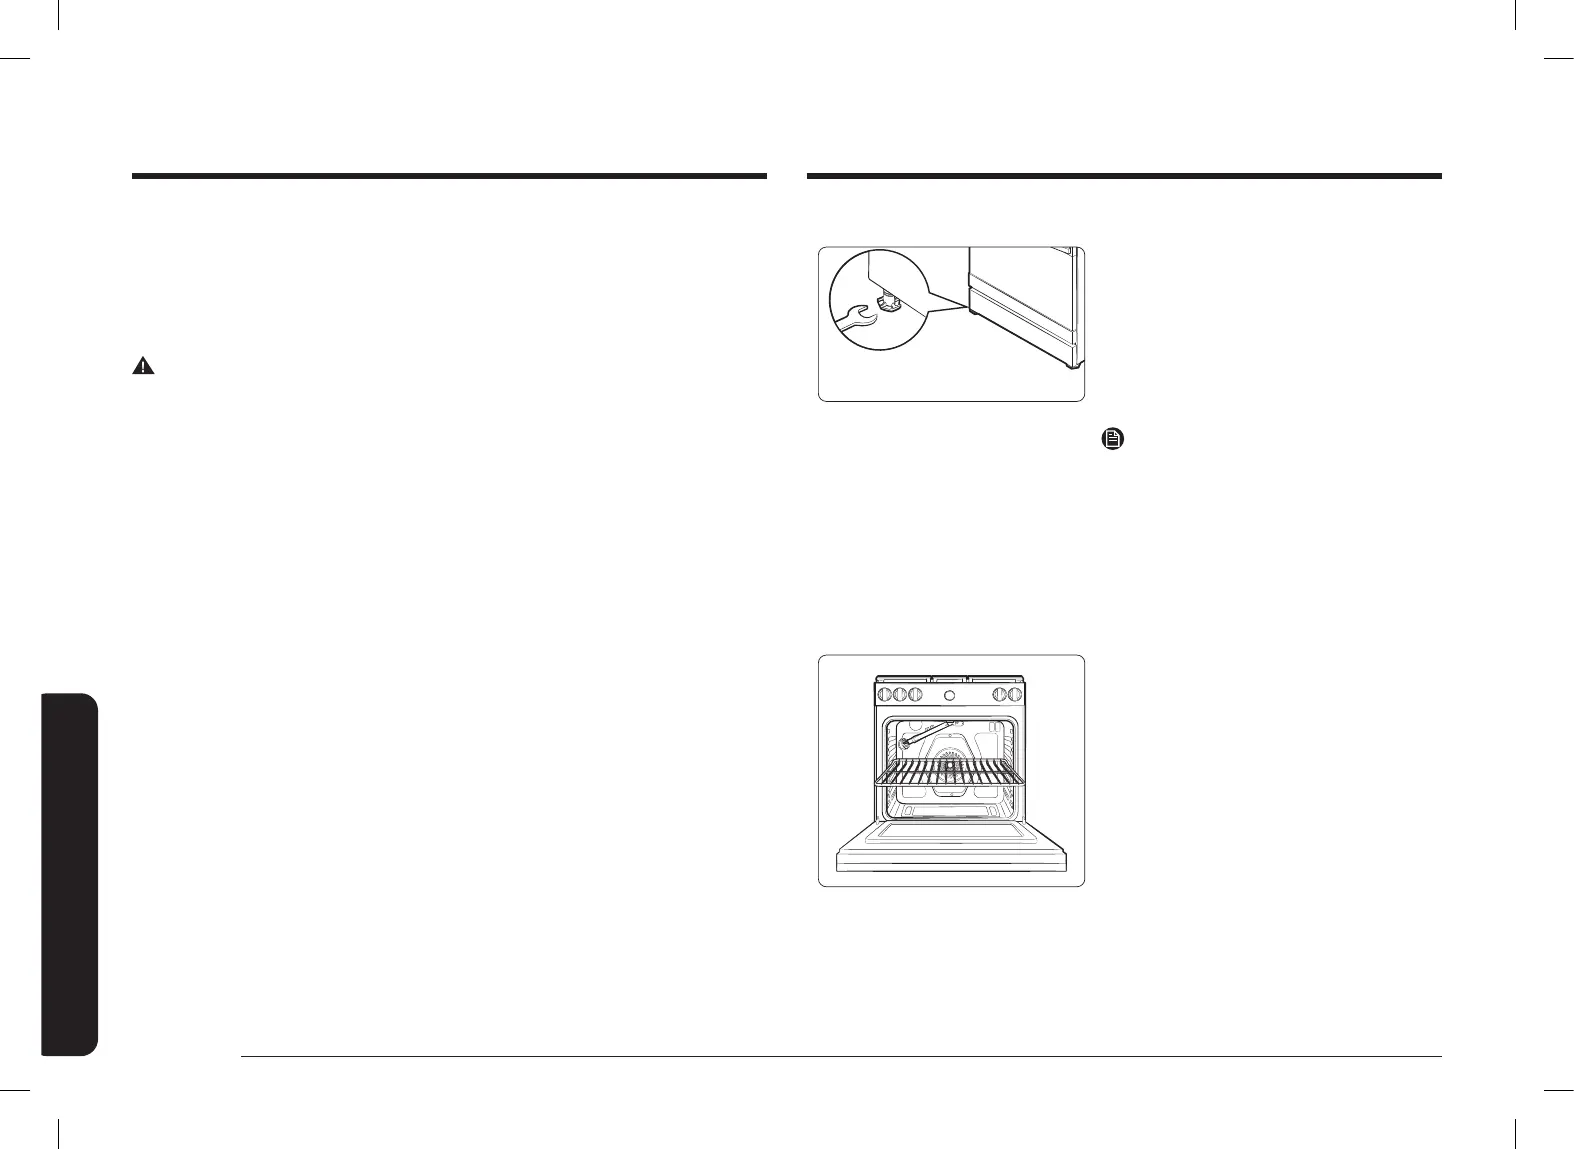
Step 6. Level the range
Leveling leg
1. Make sure the range is positioned where
you want it.
2. Using a wrench, level the range by
turning the front leveling legs in or out
as necessary. Counterclockwise shortens
the leg and lowers the range. Clockwise
lengthens the leg and raises the range.
NOTES
• Adjusting the two front legs is usually
sufcient, but adjust all four legs if
necessary.
• Adjust the leveling legs only as far as
necessary to level the range. Extending
the leveling legs more than necessary or
removing legs can cause the range to be
unstable.
3. If range is next to or between cabinets,
make sure the cooktop (without the
surface burner grates) is level with the
countertops.
4. Position an oven rack in the center rack
position.
5. Check the level of the range with a
carpenter level using the two positions
shown at right.
6. After the range becomes level, slide the
range away from the wall so that the
anti-tip bracket can be installed.
DG68-01600A-00_IM_NSG6DG8700SRAA_EN+MES+CFR.indb 22DG68-01600A-00_IM_NSG6DG8700SRAA_EN+MES+CFR.indb 22 2023-12-20 오후 2:54:202023-12-20 오후 2:54:20
Bekijk gratis de handleiding van Samsung NSG6DG8100SS, stel vragen en lees de antwoorden op veelvoorkomende problemen, of gebruik onze assistent om sneller informatie in de handleiding te vinden of uitleg te krijgen over specifieke functies.
Productinformatie
| Merk | Samsung |
| Model | NSG6DG8100SS |
| Categorie | Fornuis |
| Taal | Nederlands |
| Grootte | 15975 MB |


