Rikon 70-305 handleiding
Handleiding
Je bekijkt pagina 13 van 24
13
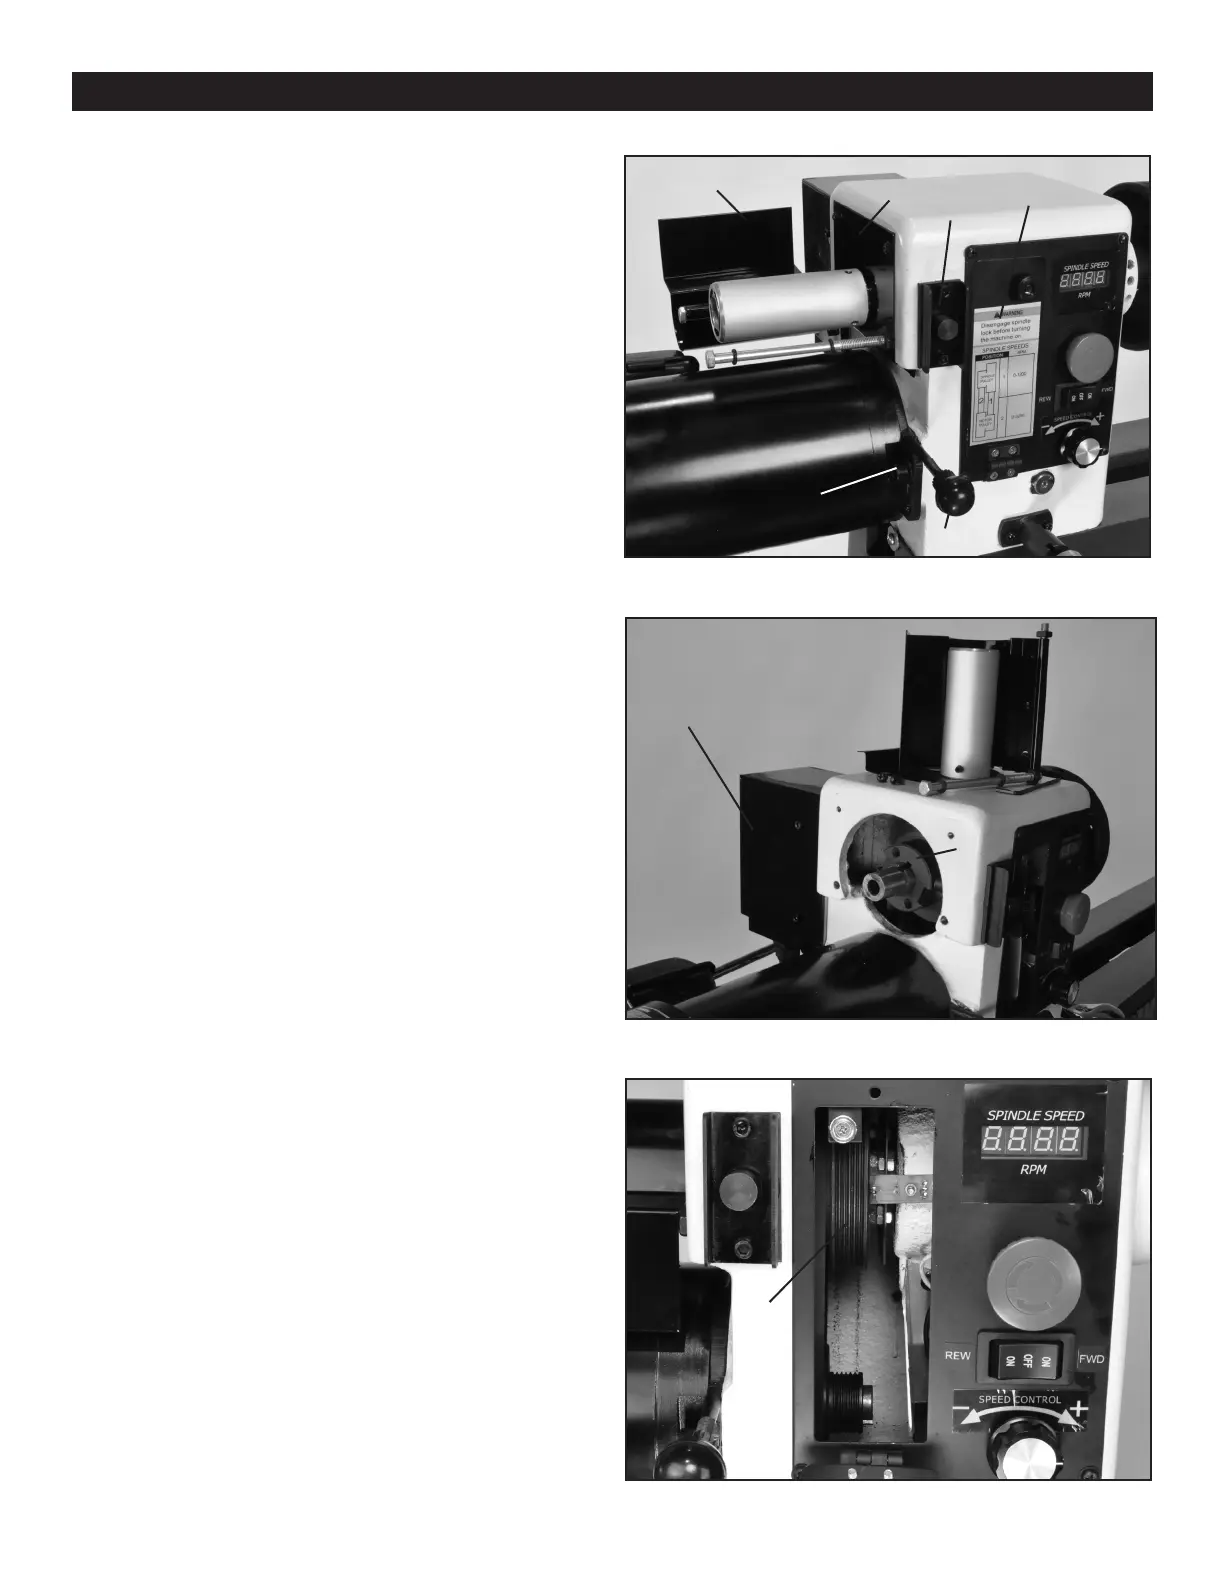
ADJUSTMENTS
1. Unplug the lathe from the power source.
2. Open the front Belt Door (#B75, FIG. 13, A) to gain
access to the belt and pulleys inside of the headstock.
3. Loosen the front and rear motor mount Locking Hex
Head Screws (#B37 & B36, FIG. 13, B).
4. Lift the Tensioning Handle (#B40, C) to loosen the
tension on the Poly V-Belt (#B24). The belt can now be
removed from the lower pulley.
5. Loosen the Set Screws (#B32) that attach the Hand
Wheel (#B29, D) to the spindle, and remove the Hand
Wheel.
6. Remove the two Screws (#B27) and two Bolts (#B69)
that hold the Cover Plate (#B28, E) and Hand Wheel Cover
(#B60, F) in position. Remove the Cover Plate (#B28). This
will open up the side of the headstock so that the Drive Belt
(#B24) can be removed.
7. Move the belt over the spindle pulleys, around the end
of the spindle, and between the Spindle Lock Pin (#B49, G)
and spindle to remove the belt from the machine. If more
room is needed, the Spindle Pulley (#B26, FIG. 14 & 15, H)
can be shifted by loosening its set screws (#B25). Return
the pulley back to position and secure the set screws once
the new belt is installed.
8. Install a new drive belt by reversing the procedure.
9. Reassemble the lathe parts by also reversing the
procedure described in steps 7 - 1 above.
CHANGING THE BELT
FIG. 13
FIG. 14
CHANGING THE BEARINGS
1. Unplug the lathe from the power source.
2. Follow the steps 2-7 above to remove the drive belt.
3. Loosen the Set Screws (#B25) in the Spindle Pulley
Assembly (#B26).
4. Carefully knock out the spindle, towards the tailstock.
Use a block of wood against the spindle end to prevent any
damage when it is hit with a mallet/hammer.
5. Replace the two Bearings (#B6 &B7) in the headstock.
6. Reassemble the lathe parts by reversing the procedure
described in steps 4 - 1 above.
NOTE: The lathe’s ball bearings are lifetime lubricated,
sealed, and do not need any further care. To prevent slip-
ping, keep the drive belt free of oil and grease.
FIG. 15
C
D
E
A
B
F
G
H
AC INVERTER
H
Bekijk gratis de handleiding van Rikon 70-305, stel vragen en lees de antwoorden op veelvoorkomende problemen, of gebruik onze assistent om sneller informatie in de handleiding te vinden of uitleg te krijgen over specifieke functies.
Productinformatie
| Merk | Rikon |
| Model | 70-305 |
| Categorie | Niet gecategoriseerd |
| Taal | Nederlands |
| Grootte | 6904 MB |


