RGBlink mini-pro 2 handleiding
Handleiding
Je bekijkt pagina 16 van 61
© Xiamen RGBlink Science & Technology Co., Ltd.
Ph: +86 592 5771197
| support@rgblink.com | www.rgblink.com
15
Chapter 3 Use Your Product
After system connection of mini-pro to power supply, input source devices(computer,
MIC(camera) and output to HDMI display and USB 3.0 streaming which is recognized as webcam
source on computer.
3.1 Touch Screen Operation
Touch Screen Introduction
There is a 2” touch screen on mini-pro operation board, through which most operation can be
done, so let’s introduce this touch screen first.
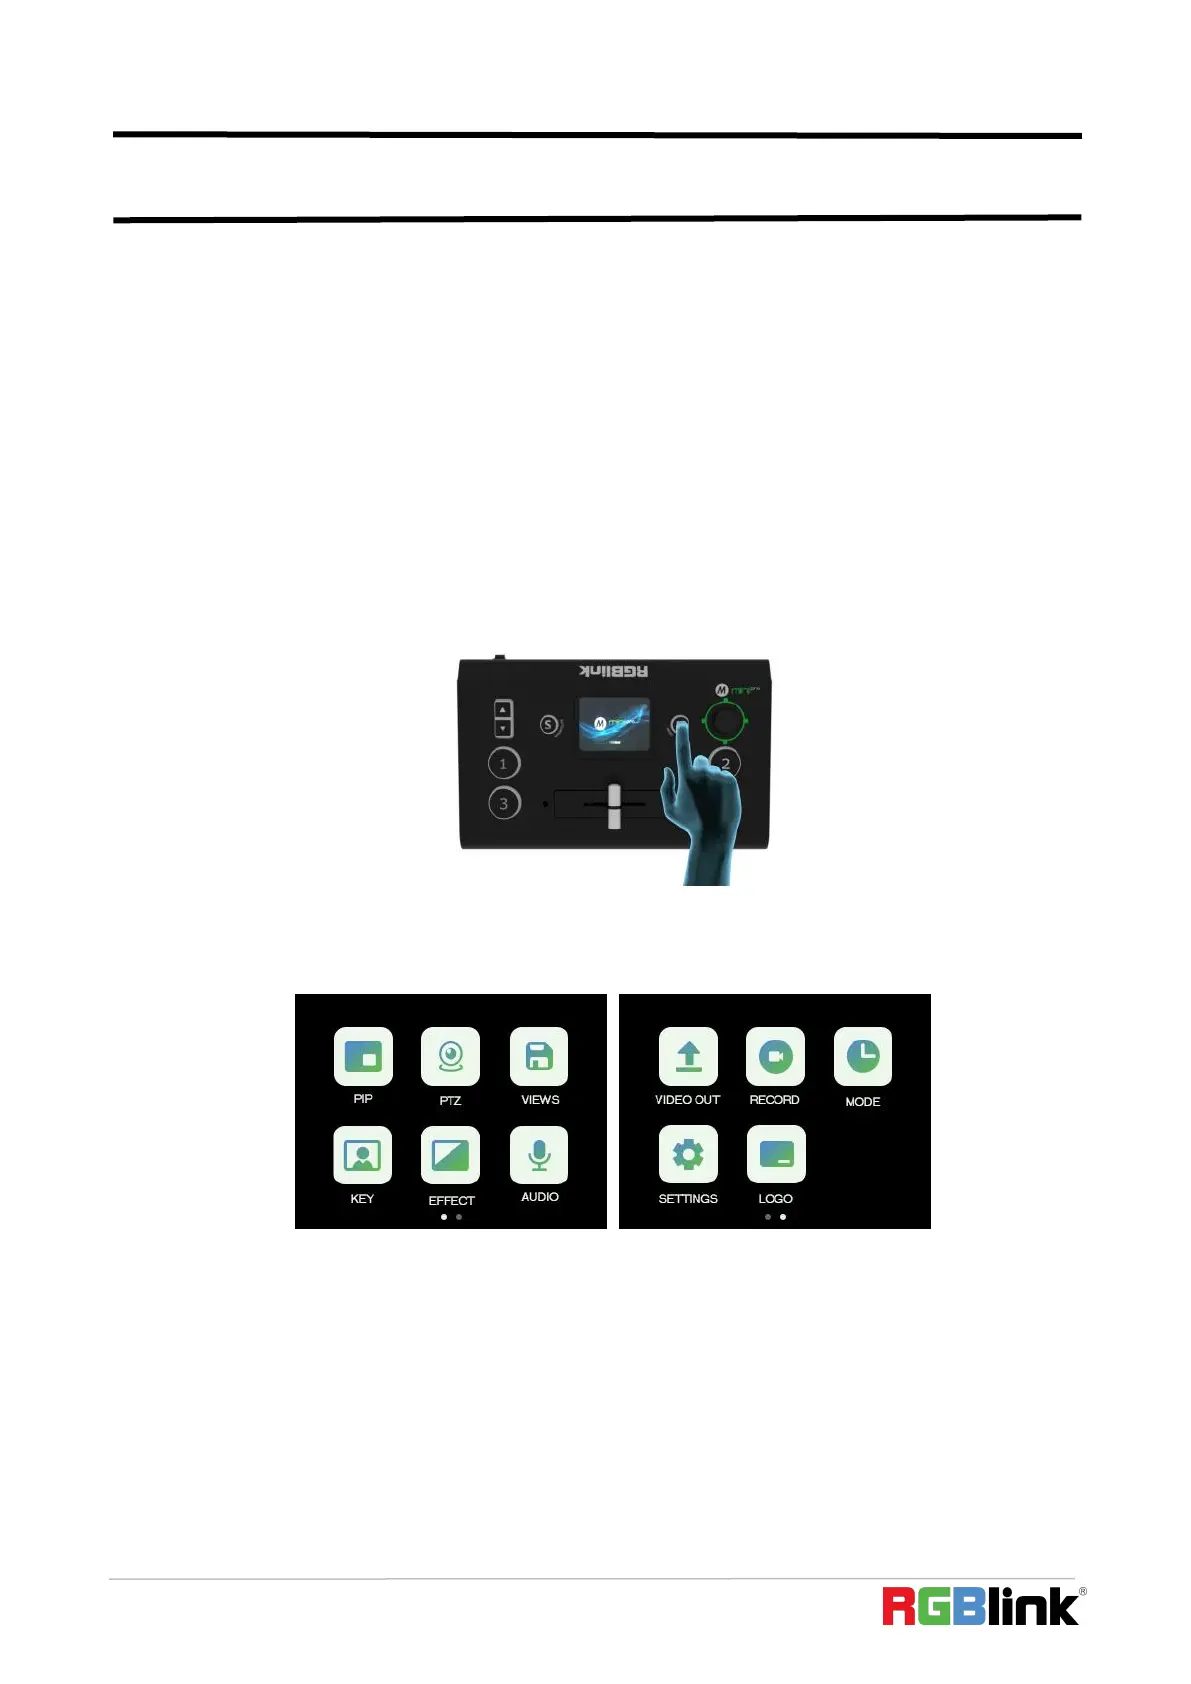
Before introducing the operation of the touch screen, we need to introduce the button
【M】,the MENU and back key. Push the button and the 2-inch LCD screen will quickly return to the
main menu interface.
As shown in the figure below, the UI style on the touch screen is similar to current smart phone
operating interface. The first-level menu is in icon. You can quickly enter the corresponding function
management interface by tapping the corresponding icon.
Swipe Shortcut
Similarly, the mini-pro's touch screen also has some simple swipe shortcut functions:
Bekijk gratis de handleiding van RGBlink mini-pro 2, stel vragen en lees de antwoorden op veelvoorkomende problemen, of gebruik onze assistent om sneller informatie in de handleiding te vinden of uitleg te krijgen over specifieke functies.
Productinformatie
| Merk | RGBlink |
| Model | mini-pro 2 |
| Categorie | Niet gecategoriseerd |
| Taal | Nederlands |
| Grootte | 17241 MB |


