Reolink E1 Outdoor Pro handleiding
Handleiding
Je bekijkt pagina 3 van 36
English English3 4
j
áÅ
êç =p
a
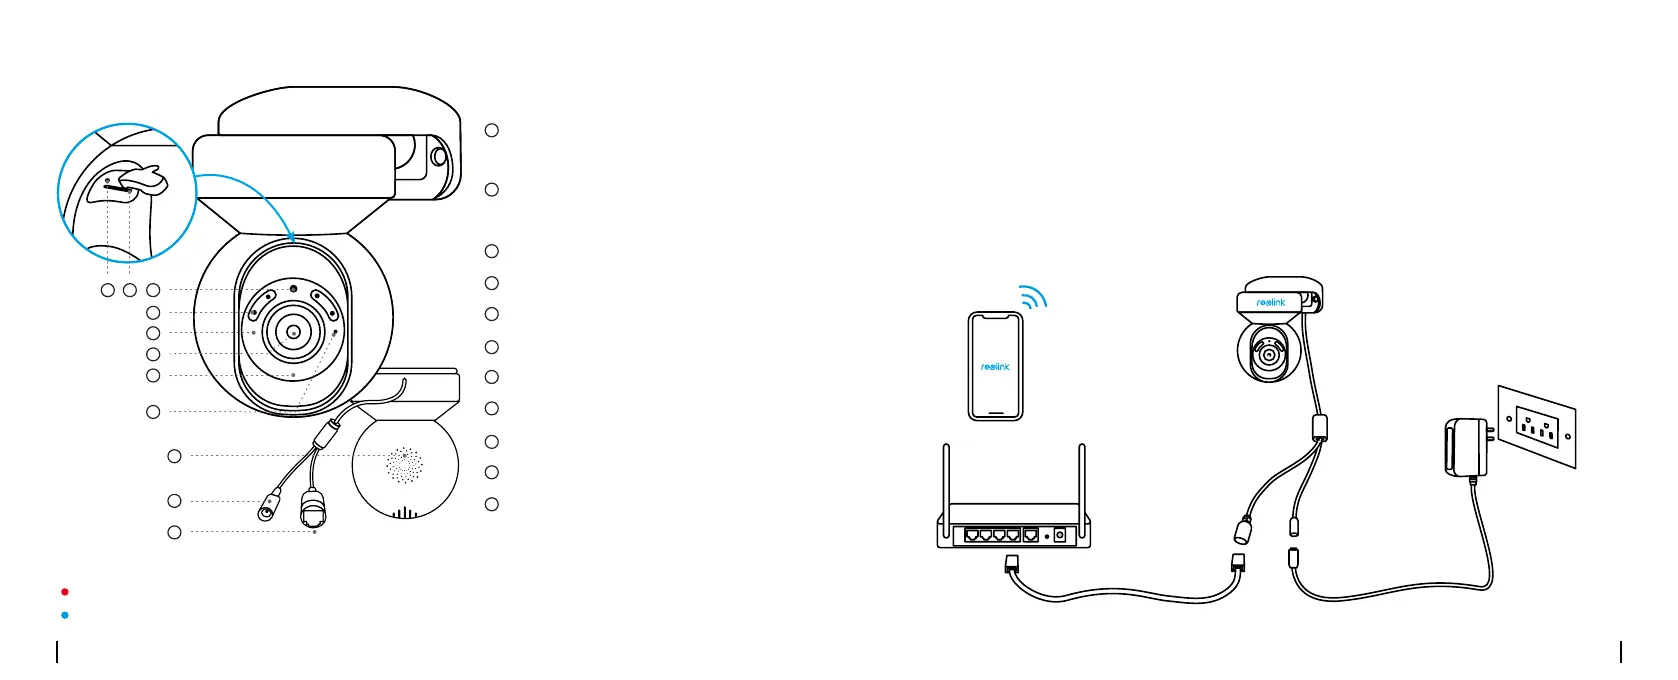
Camera Introduction
Reset Button
Micro SD Card Slot
Daylight Sensor
Spotlight
Infrared Lights
Lens
Status LED
Built-in Mic
Speaker
Power Cable
Network Cable
* Press for more than ve seconds to
restore the device to default settings.
* Rotate the lens to nd the
reset button and the SD card slot.
3
4
5
8
9
10
11
7
6
1
1
2
3
4
5
6
7
8
9
10
11
2
Set up the Camera
Wired Setup
It is recommended that the initial setup be completed with the Ethernet cable. You may follow the
steps below to set up your camera.
Step 1 Connect the camera to a LAN port on your router with an Ethernet cable.
Step 2 Use the power adapter provided to power on the camera.
Your Smart Device
Power Cable
Camera
Power Adapter
Network Cable
Router
Dierent states of the status LED:
Red Light: WiFi connection failed Blinking: Standby status
Blue Light: WiFi connection succeeded On: Working status
Bekijk gratis de handleiding van Reolink E1 Outdoor Pro, stel vragen en lees de antwoorden op veelvoorkomende problemen, of gebruik onze assistent om sneller informatie in de handleiding te vinden of uitleg te krijgen over specifieke functies.
Productinformatie
| Merk | Reolink |
| Model | E1 Outdoor Pro |
| Categorie | Bewakingscamera |
| Taal | Nederlands |
| Grootte | 4890 MB |


