Rangemaster Professional+ 100 Gas handleiding
Handleiding
Je bekijkt pagina 33 van 48
INSTALLATION
Check the appliance is electrically safe and gas sound when you have nished.
29
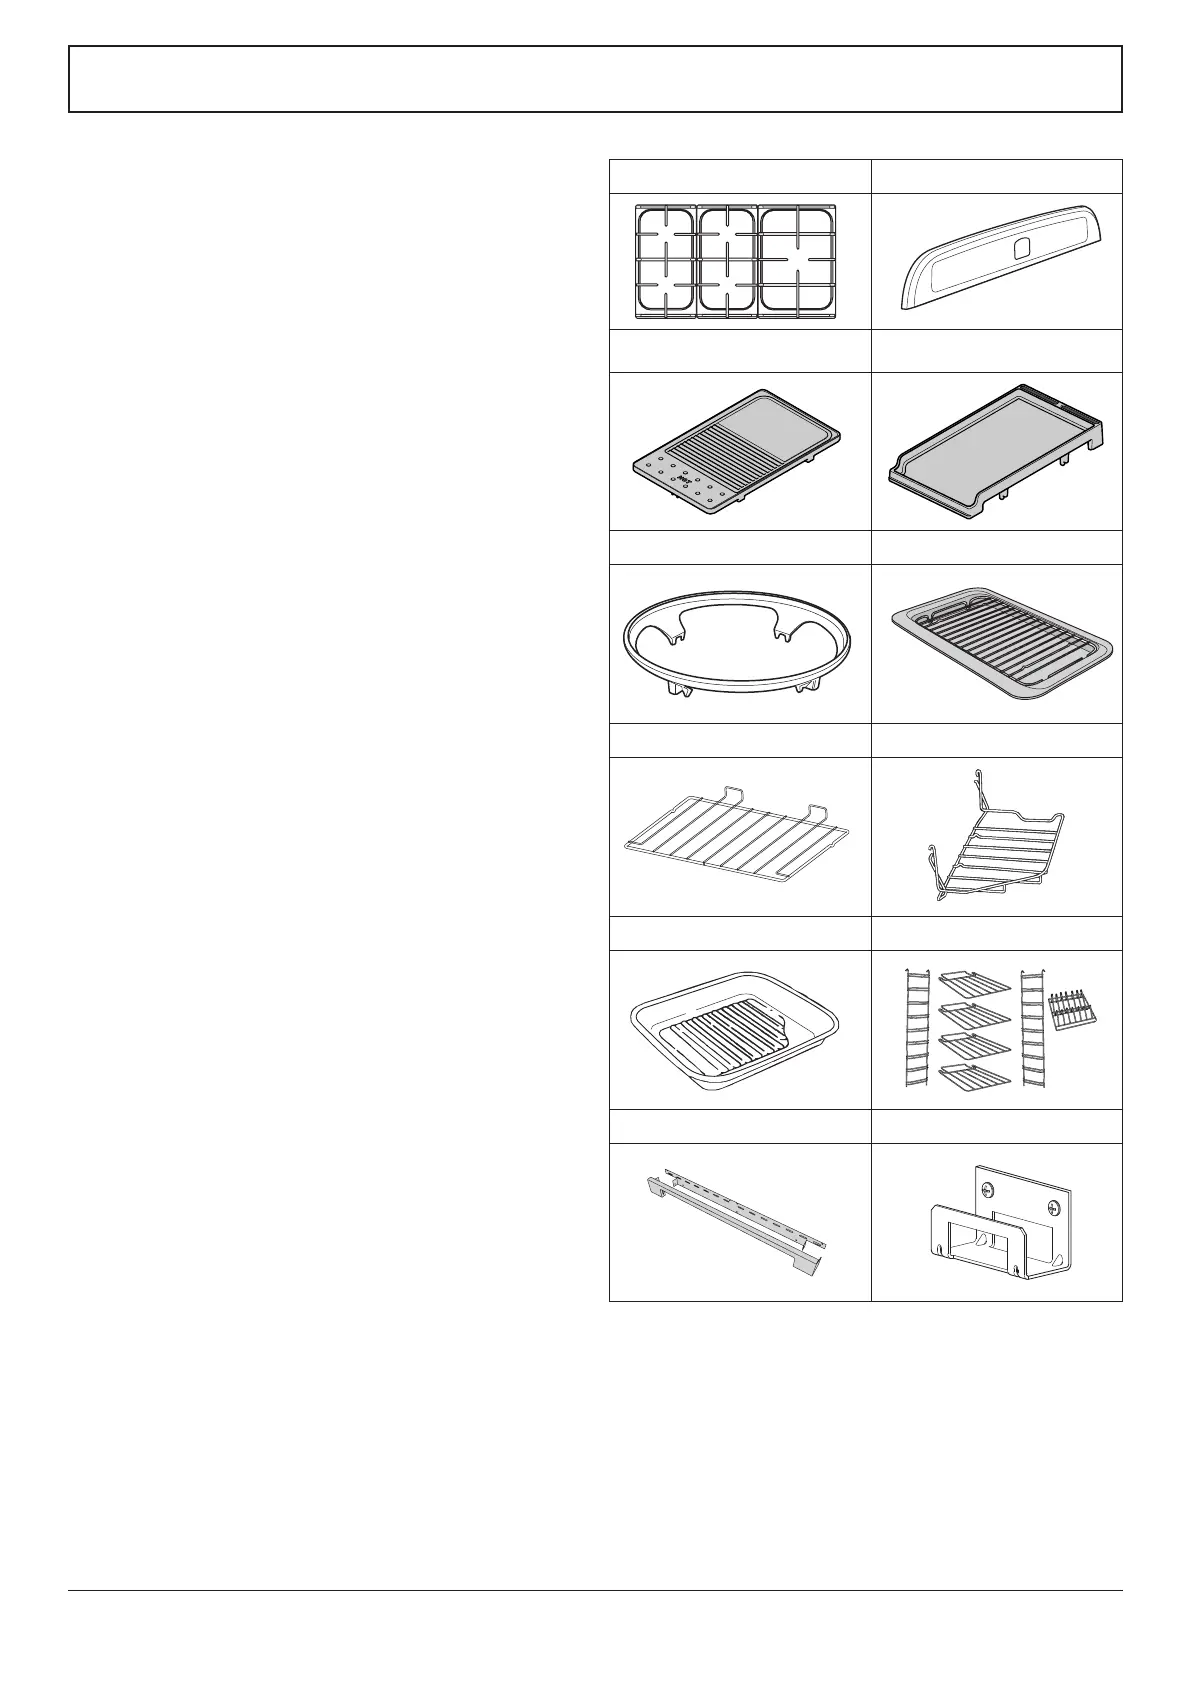
Checking the Parts:
3 pan supports Splashback (Classic only)
ArtNo.000-0001 90 Pan supports
ArtNo.421-0002 - Splashback
Griddle (Supplied with Classic and
Professional+, optional for Kitchener)
Teppanyaki
(Optional for all models)
ArtNo.311-0043 - Griddle 09
Wok cradle (Optional) Grill pan & trivet
ArtNo.000-0009 Wok ring, cast
ArtNo.330-0001 - Grill pan
2 at shelves Handyrack
ArtNo.324-0003 Handyrack
Roasting tin Tall oven shelves and shelf supports
ArtNo.324-0004 Roasting tin
ArtNo.000-0010 Tall oven shelves
Plinth (2 piece shown) Stability bracket
Location of Cooker
The cooker may be installed in a kitchen/kitchen diner but
NOT in a room containing a bath or shower.
This appliance is designed for domestic cooking only. Use for
any other purpose could invalidate any warranty or liability
claim.
Note: An appliance for use on LPG must not be installed
in a room or internal space below ground level, e.g. in a
basement.
Conversion
This appliance is supplied set for G20 20 mbar Cat II
2H3+.
A conversion kit for another gas is available for the cooker.
If the appliance is to be converted to another gas we
recommend that this is carried out before installation.
n
We recommend an overpressure shut-o device or
pressure relief valve be used in any LPG installation
to prevent exposure of downstream ttings /
appliances to excessive pressure (over 75mbar) in
event of regulator failure.
After converting the appliance please attach the Gas
Conversion sticker over the appropriate area of the data
badge - this will identify the gas type for which the appliance
is now set.
You will need the following equipment to complete the
cooker installation satisfactorily:
• Stability bracket: If the cooker is to be supplied with
gas through a flexible hose, a stability bracket or chain
MUST be fitted. These are not supplied with the
cooker but are available at most builders’ merchants.
• Gas pressure tester/manometer.
• Flexible gas hose: Must be in accordance with the
relevant standards.
• Multimeter: For electrical checks.
You will also need the following tools:
1. Electric drill
2. Masonry drill bit (only required if tting the cooker on a
stone or concrete oor)
3. Wall plugs (only required if tting the cooker on a stone
or concrete oor)
4. Steel tape measure
5. Cross head screwdriver
6. Flat head screwdriver
7. Spirit level
8. Pencil
9. Adjustable spanner
10. Allen keys (for Classic – supplied)
11. Screws for tting stability bracket
12. 13 mm spanner (or socket wrench)
Bekijk gratis de handleiding van Rangemaster Professional+ 100 Gas, stel vragen en lees de antwoorden op veelvoorkomende problemen, of gebruik onze assistent om sneller informatie in de handleiding te vinden of uitleg te krijgen over specifieke functies.
Productinformatie
| Merk | Rangemaster |
| Model | Professional+ 100 Gas |
| Categorie | Fornuis |
| Taal | Nederlands |
| Grootte | 9404 MB |
Caratteristiche Prodotto
| Soort bediening | Draaiknop |
| Vermogen grill | 2730 W |
| Kleur van het product | Roestvrijstaal |
| Ingebouwd display | Ja |
| Breedte | 994 mm |


