Rangemaster Professional+ 100 Gas handleiding
Handleiding
Je bekijkt pagina 28 van 48
24
ArtNo.320-0002a Proplus oven door side screws
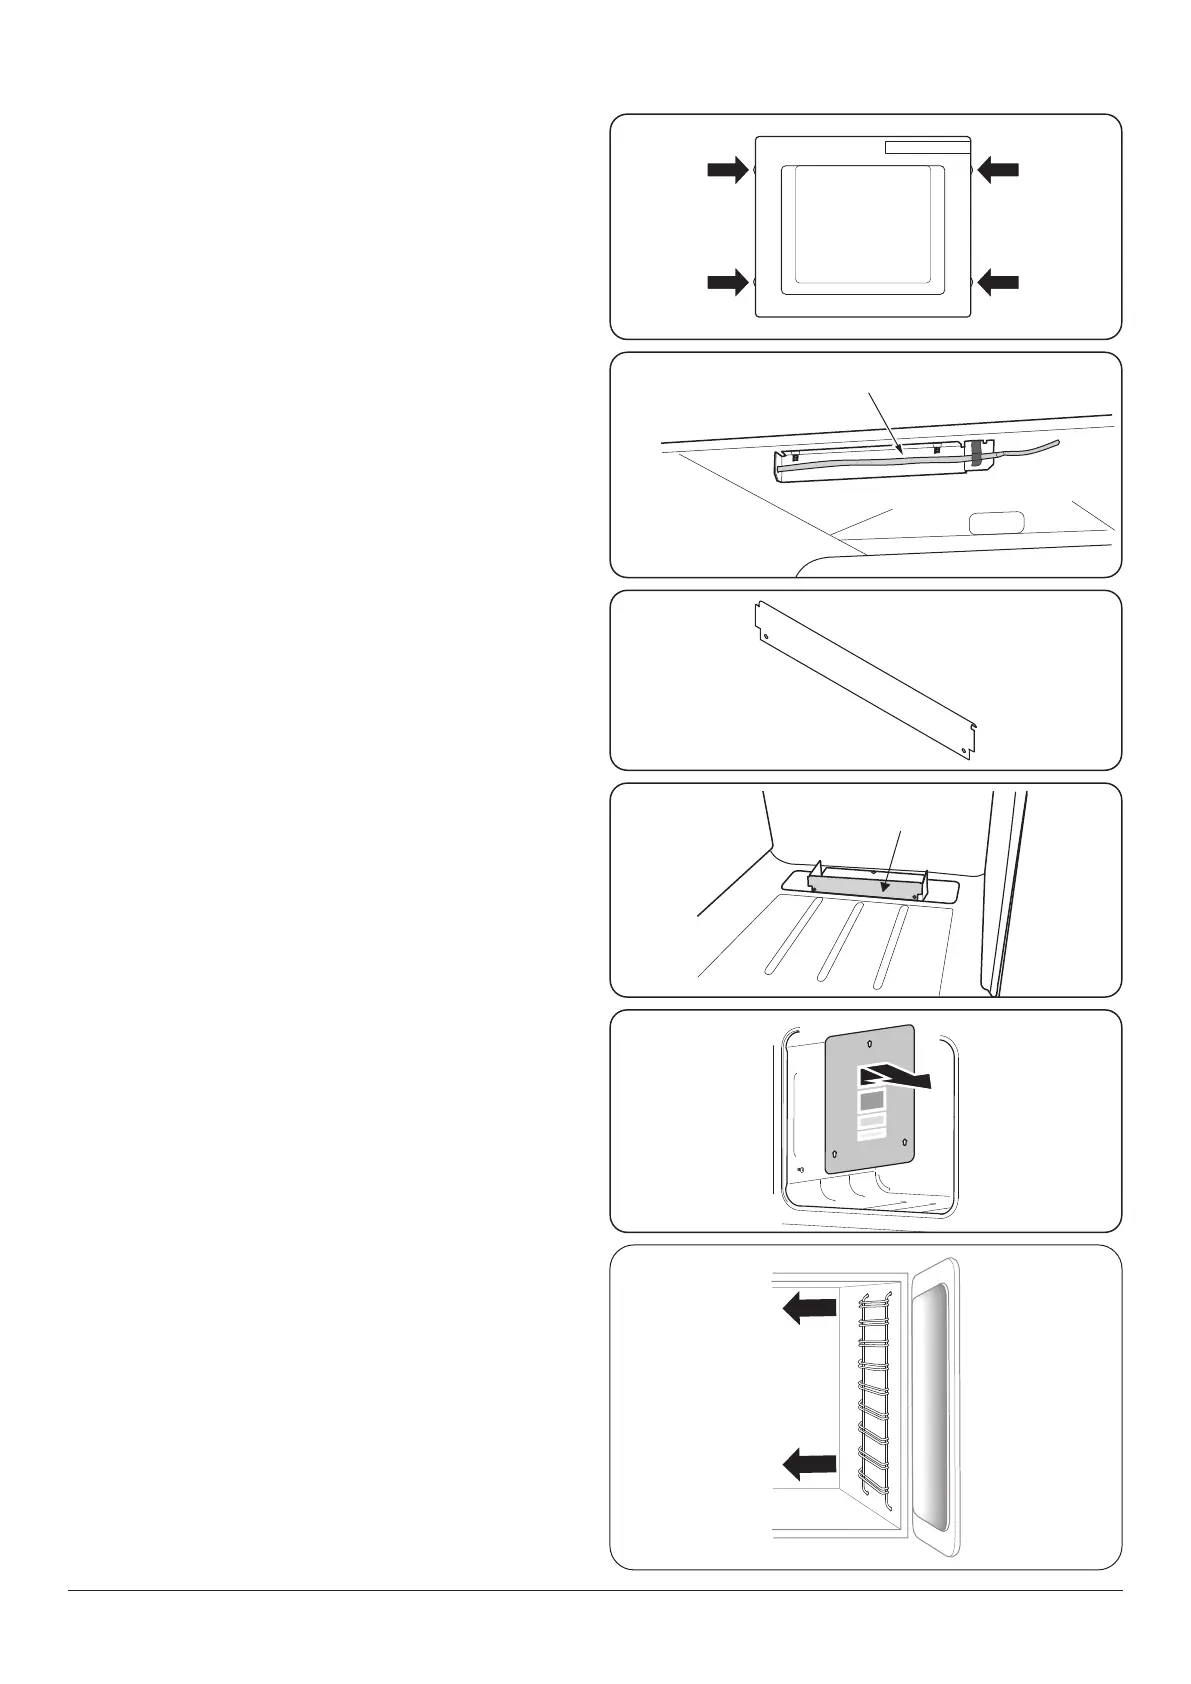
Open the oven door slightly and remove the front panel
xing screws from the door sides, two each side (Fig. 8.10).
Carefully lift o the outer door panel. The inside face of the
glass panels can now be cleaned – take care not to disturb or
wet the door insulation.
NOTE: If the door is triple glazed then the inner two panels
are xed together and should not be separated. After
cleaning, carefully ret the outer door panel and replace the
side xing screws.
Ovens
Cleaning is easier if carried out while the oven is still warm.
Before cleaning, cover the burner to prevent the burner holes
becoming blocked.
The inside of the oven and inner door panel can be cleaned
using an approved cleaner (Table 8.1).
Take care not to disturb the oven thermostat temperature
sensor at the top of the oven opening (Fig. 8.11).
The enamelled oven burner trim (Fig. 8.12) can be removed
for cleaning.
The oven burner trim hooks onto the front of the oven burner
bracket. When retting make sure that the trim is in the
middle of the front of the oven burner bracket (Fig. 8.13).
‘Cook & Clean’ Panels
The ovens have panels which have been coated with a special
enamel that partly cleans itself. This does not stop all marks
on the lining, but helps to reduce the amount of manual
cleaning needed.
The ‘Cook & Clean’ panels work better above gas mark6
(200 °C). If you do most of your cooking below this
temperature, occasionally remove the panels and wipe with
a lint free cloth and hot soapy water. The panels should then
be dried and replaced and the oven heated at gas mark6
(200 °C) for about one hour. This will make sure that the ‘Cook
& Clean’ panels are working eectively.
n
DO NOT use steel wool, oven cleaning pads, or any
other materials that will scratch the surface.
Removing the Main Oven Linings
Some of the lining panels can be removed for cleaning.
If you wish to clean the enamel interior of the oven, you will
need to remove the shelves before removing the panels.
You do not have to remove the support brackets to remove
the panels. Lift each lining upward and slide forward o the
support brackets (Fig. 8.14).
Once the panels have been removed, the oven enamel
interior can be cleaned.
Ret in the reverse order.
The Tall Oven
To clean the oven sides, slide out the shelves. With both hands
gently pull the oven shelves support and lift out (Fig. 8.15).
Thermostat temperature sensor
ArtNo.323-0009 - Bray burner shield fitted
Oven burner trim
ArtNo.323-00011 - Bray burner front shield
Fig. 8.10
Fig. 8.11
Fig. 8.12
Fig. 8.13
Fig. 8.14
Fig. 8.15
Bekijk gratis de handleiding van Rangemaster Professional+ 100 Gas, stel vragen en lees de antwoorden op veelvoorkomende problemen, of gebruik onze assistent om sneller informatie in de handleiding te vinden of uitleg te krijgen over specifieke functies.
Productinformatie
| Merk | Rangemaster |
| Model | Professional+ 100 Gas |
| Categorie | Fornuis |
| Taal | Nederlands |
| Grootte | 9404 MB |
Caratteristiche Prodotto
| Soort bediening | Draaiknop |
| Vermogen grill | 2730 W |
| Kleur van het product | Roestvrijstaal |
| Ingebouwd display | Ja |
| Breedte | 994 mm |


