Handleiding
Je bekijkt pagina 22 van 25
22
Input Connection
Product Connector Specifications
PL-CA5
PL-CA6
• 1 EUROBLOCK Connector • Current Rating 12 Arms
• Solid Wire 14 AWG (2.5 mm
2
)
• 4 poles
• Fasten on male part with M3.5 screws
• The connector is recessed and may be covered by a IP65 sealing plate.
• The plate allows 1 gland connectors (not provided) to pass the signal IN and
OUT.
• The input connection of the PL-CA5 & PL-CA6 does not allow bi-amp
mode but does support throughput connection to daisy chain additional
loudspeakers.
PL-CA8
PL-CA12
PL-CA15
• 1 EUROBLOCK Connector • Current Rating 32 Arms
• Solid Wire 8-24 AWG (up to 10 mm
2
)
• The 4 poles Connector allows bi-amp mode but does not support daisy chain
THRU connection. Use the SPEAKON NL4 for this purpose or connect IN and
THRU wires in the same pole.
• Fasten on male part with M3.5 screws
• 2 x SPEAKON NL4 (cable
connector not provided)
• Locking
• Up to 30 Arms
• Up to 9-16 AWG gauge (up to 6 mm
2
)
• Connectors are wired in parallel, allowing daisy chain THRU in passive or
bi-amp mode
• Both connectors are recessed.
• The plate allows 2 gland connectors (not provided) to pass the signal IN and OUT.
• IP65 Sealing is only available when using the EUROBLOC connector.
• Switching between PASSIVE and Bi-Amp requires removing the connection plate and adjusting an internal
MOLEX connector. (See page 23)
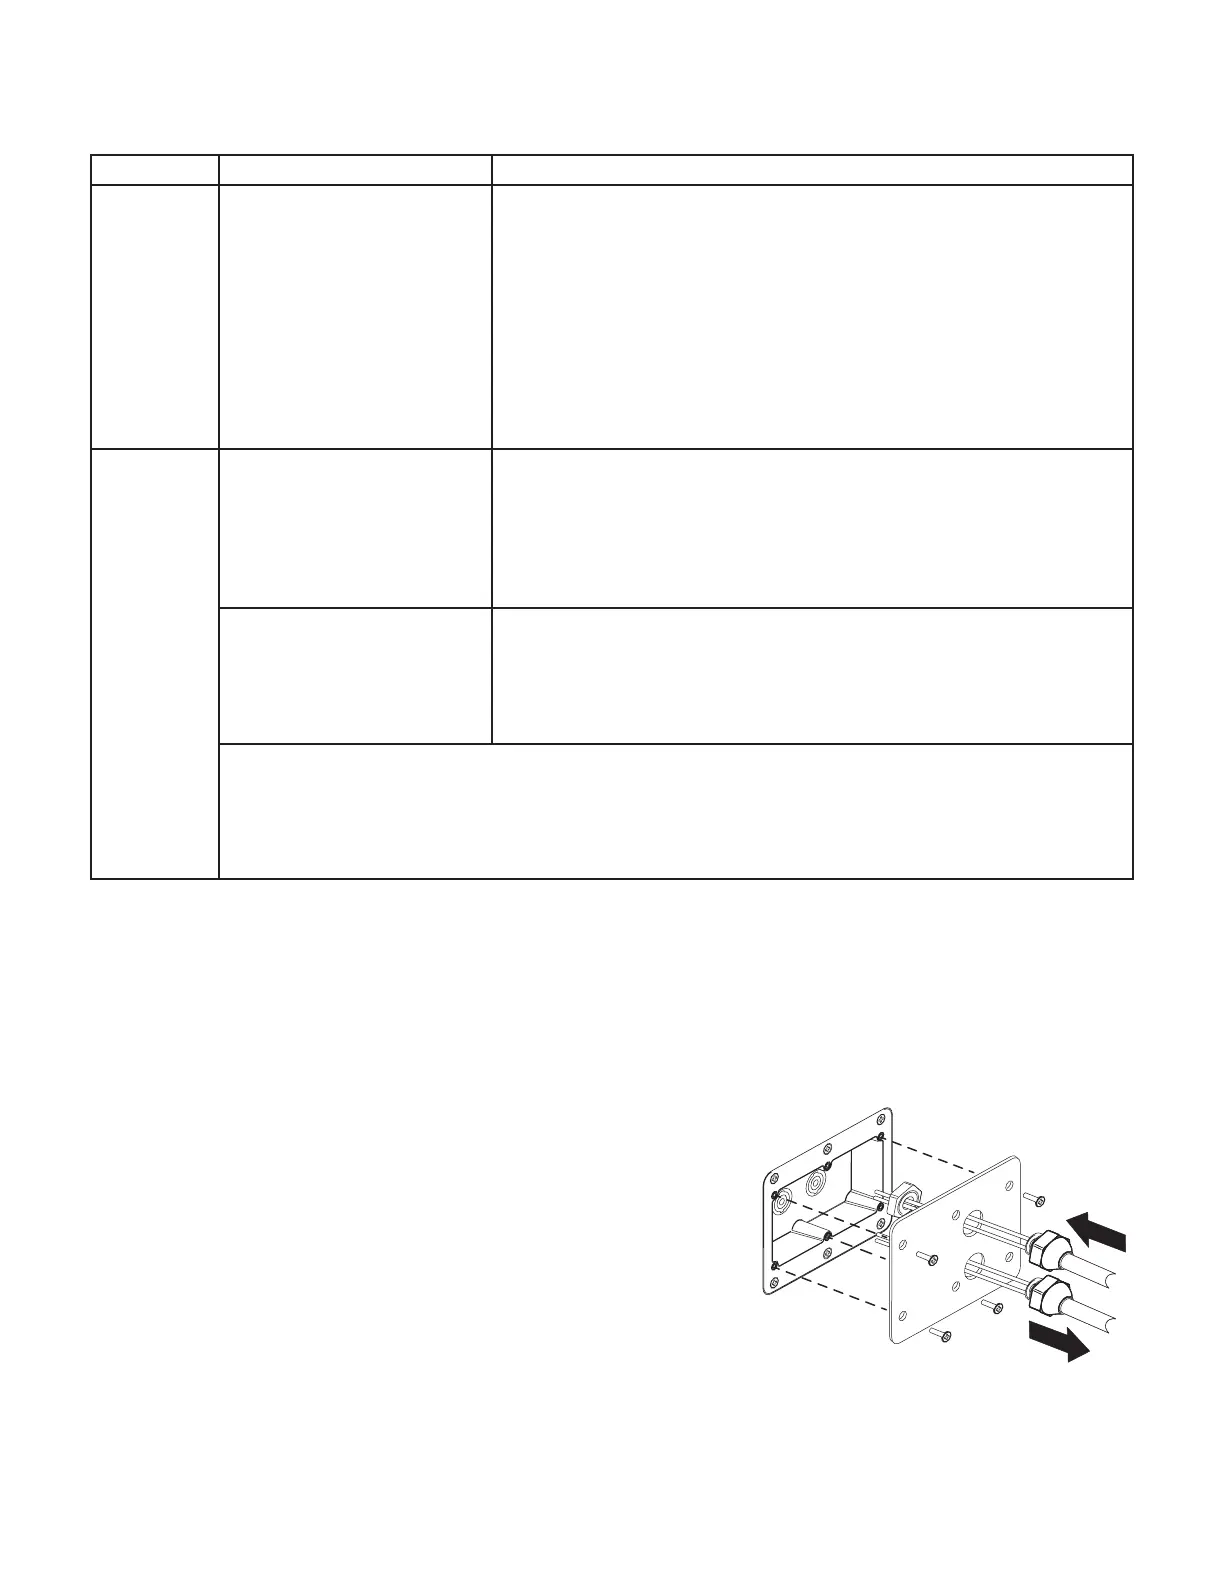
Installing the Optional Input Connection Cover
Due to the variety of cable diameters, the "cable gland" (suitable for 22.5 mm diameter hole) must be sourced independently.
The loudspeaker comes with a weather cover for the input cup to protect the input connections and switches from precipitation and
other weather hazards. Use the weather cover for all outdoor installations or any applications where the loudspeaker may be exposed
to moisture. To ensure good seal in the cable gland, use outdoor-rated cable with a round jacket up to 0.37 in or 9.4 mm in diameter.
Using the Weather Cover
1. Loosen the nut on the cable gland.
2. Pass the cable all the way through the nut and the rest of the gland.
3. Attach the input connector to the wires (see Input Connector, below).
4. Once the loudspeaker enclosure is installed, plug the input connector into the
loudspeaker's input cup. Secure the connector to the loudspeaker using the two
captive retaining screws, one on each end.
5. Place the cover onto the loudspeaker's input cup and attach it using the four
screws, lock washers, and flat washers provided.
6. Dress the cable so there is no undue strain on it. Tighten the gland nut until the
grommet inside the gland has made a tight seal onto the cable jacket.
The optional input cover only accommodates the EUROBLOC Connector, not the SPEAKON NL4.
Use the hole cover LB-004261-20 (PL-CA8-12-15) or LB-004254 (PL-CA5 and PL-CA6) for sealing the extra hole when needing only
single termination.
Bekijk gratis de handleiding van QSC PL-CA6, stel vragen en lees de antwoorden op veelvoorkomende problemen, of gebruik onze assistent om sneller informatie in de handleiding te vinden of uitleg te krijgen over specifieke functies.
Productinformatie
| Merk | QSC |
| Model | PL-CA6 |
| Categorie | Speaker |
| Taal | Nederlands |
| Grootte | 2605 MB |


