Princeton Tec Charge X handleiding
Handleiding
Je bekijkt pagina 2 van 8
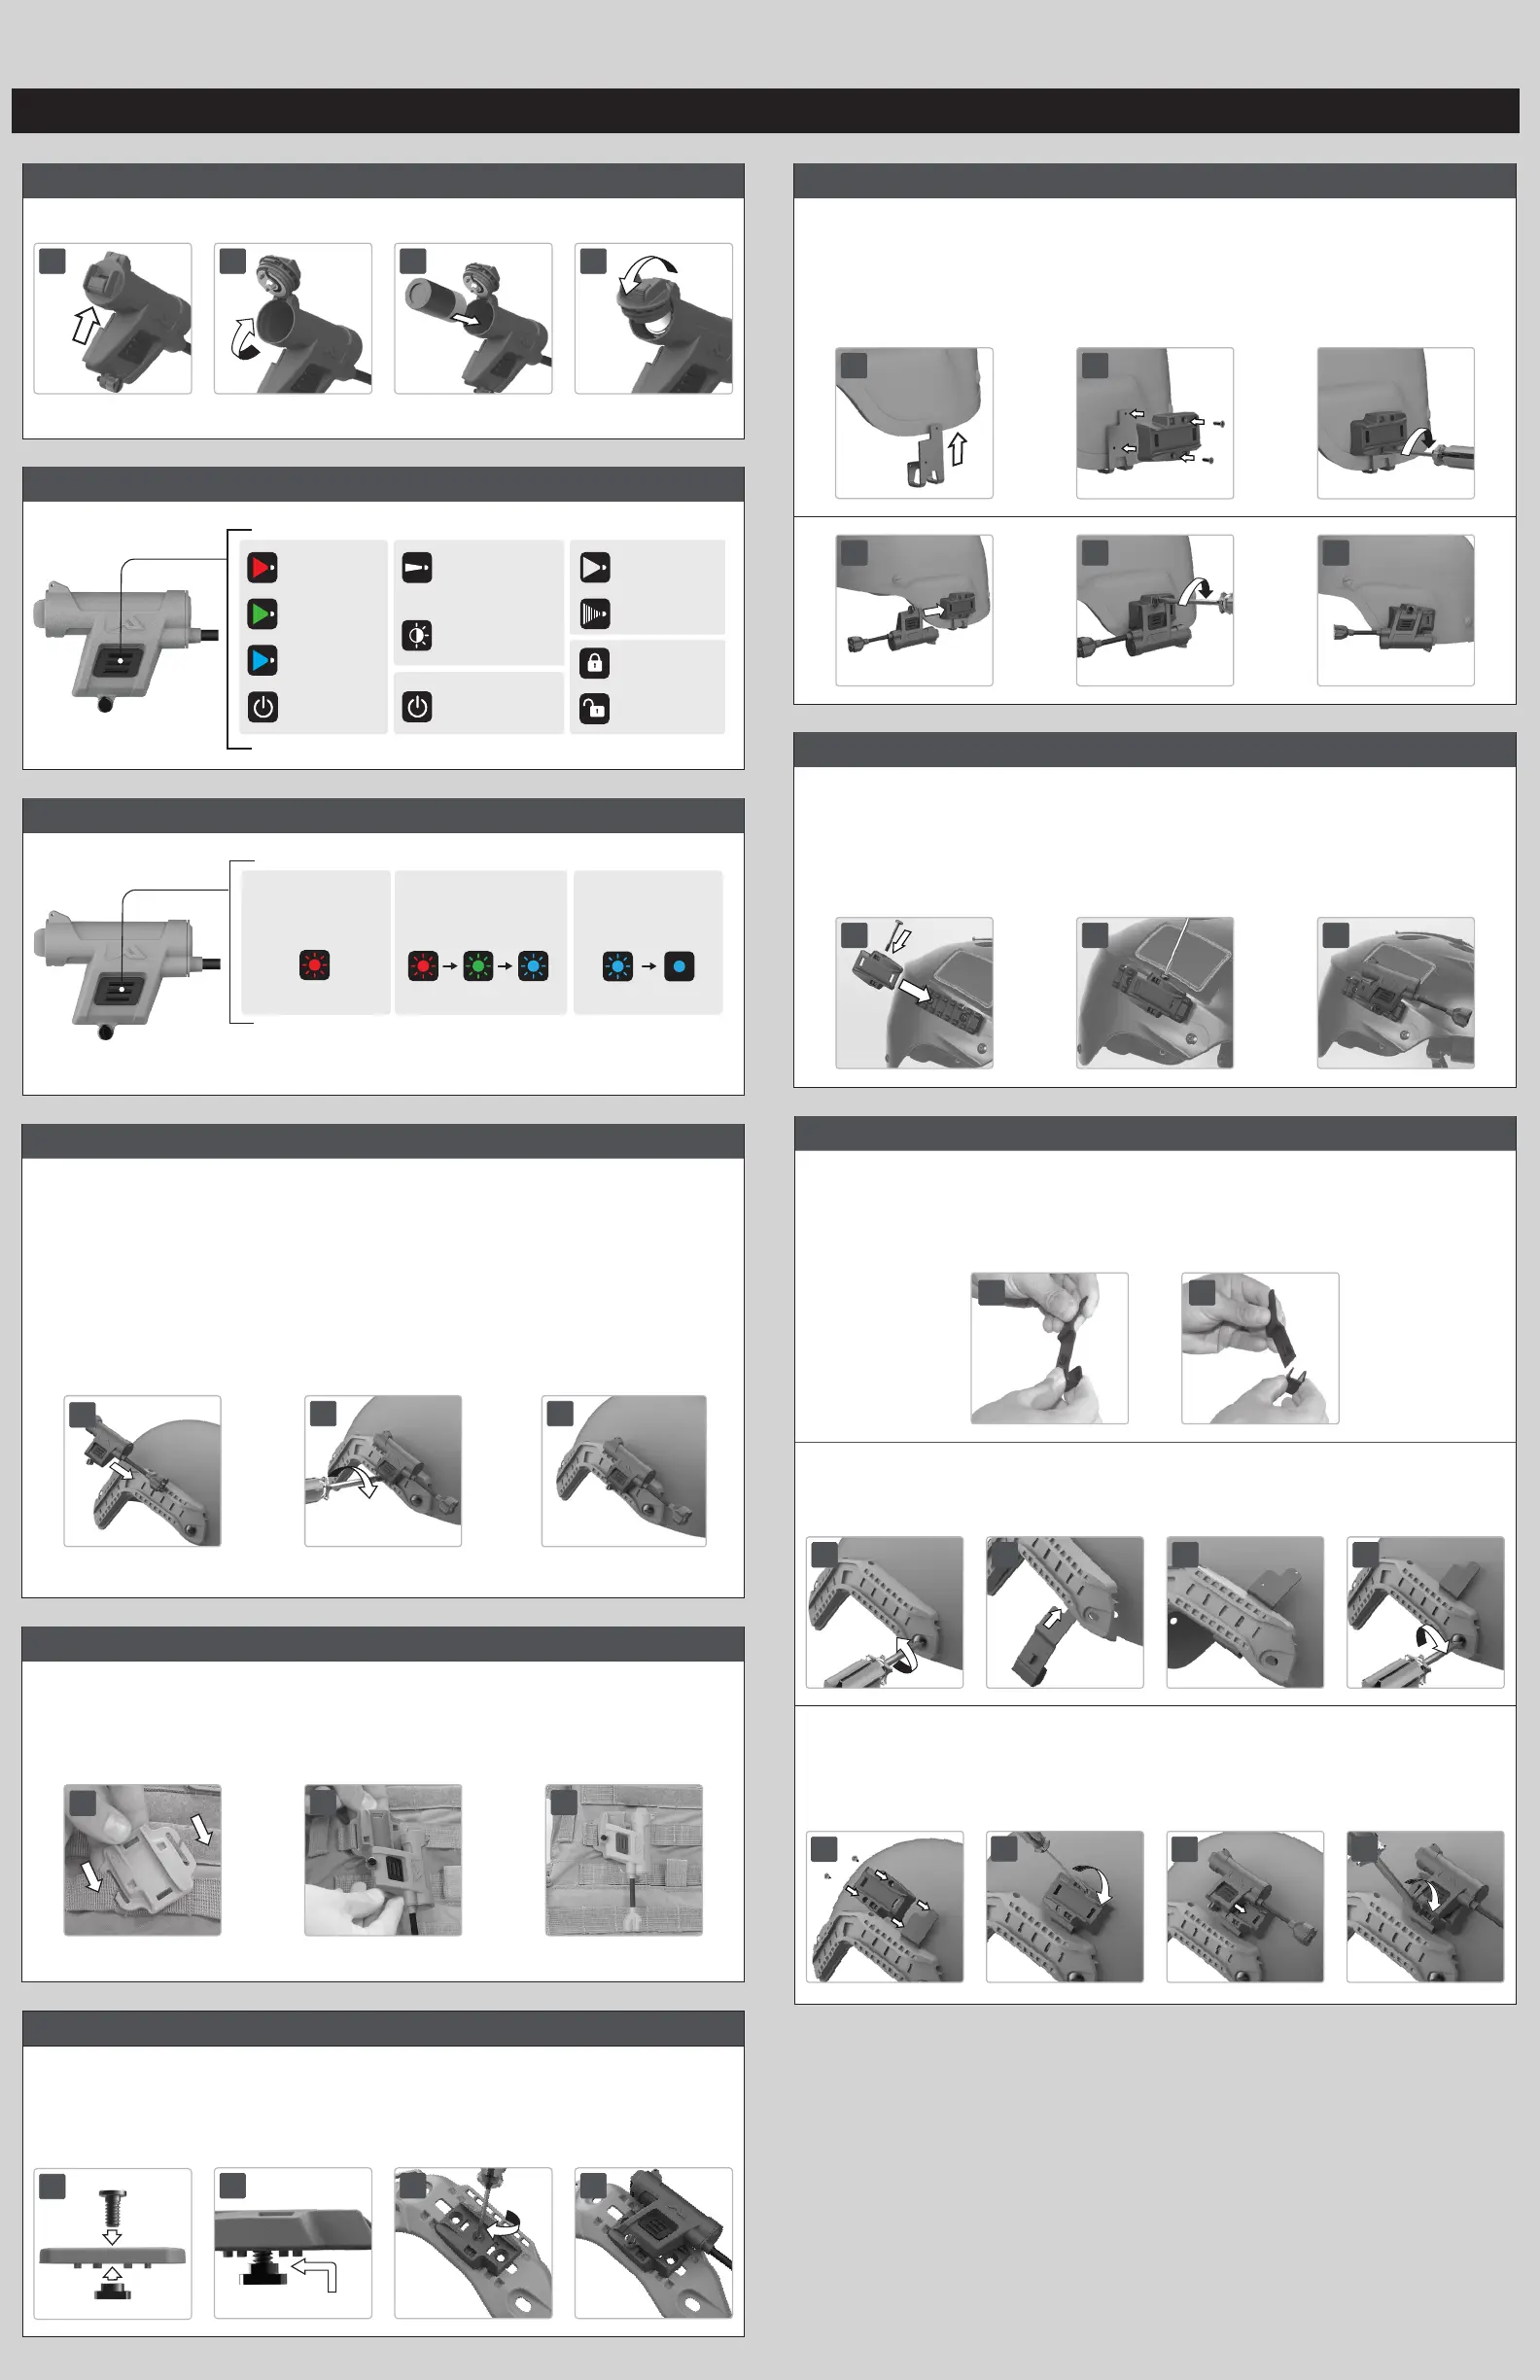
Figure 1 – Battery Installation
1 2 3 4
Figure 2 – Switch Operation
Press 2x:
Green
Press 4x:
O
Press 5s from Lock:
Unlock
Press 5s:
Lock-Out
Press 1x:
Red
Press 3x:
Blue
1s hold in any mode:
White 80%
After 1s in any mode:
Press 1x:
O
From white:
Hold:
Dimming
2s hold from o:
IR
IR
1s hold from IR:
IR Strobe
Figure 3 – Programming Mode
8s hold from o:
Programming Mode
Press & cycle
to desired color:
8s hold on
desired color:
Save color
Figure 4 – ARC Rail Installation
Charge X is designed to attach directly to the ARC Rail – Helmet Rail System.
Charge X can mount to either left or right helmet rail. Using a athead
screwdriver, back the set screw out approximately 5 turns, then slide Charge
dovetail into open end of helmet rail. The spring-loaded ball bearing will engage
detents. When the light is situated to your preference, hand tighten set screw to
secure Charge X.
1
2 3
Figure 5 – MOLLE Mount
Slide clip inside any strap position, pinch MOLLE strap to hook the lower end of
the metal clip onto the strap.
1
2 3
Figure 6 – M-LOK
®
Mount
Insert screw and T-nut into M-LOK
®
mount. T-Nut “gap” must be slightly greater
than the thickness of the mounting surface. Slide mount on to M-LOK
®
rail and
tighten with screwdriver.
1
2
SET GAP
3 4
Figure 7 – MICH Mount Installation
Back the screw out so the end of screw is ush with metal U-clip. Slide the
exposed U-clip over the bottom edge of your helmet with the metal clip on the
inside and the plastic base exposed on the outside of your Helmet. Holding Mount
rmly upward, tighten center slotted screw until it stops.
1
2
4 5 6
Figure 8 – Picatinny Rail Mount
Remove the center through screw from the side of the Picatinny base mount.
Slide Picatinny to desired position and insert side locking screw aligning with any
slot in Picatinny rail and tighten to clamp in place.
DO NOT OVERTIGHTEN this screw.
1 2 3
Figure 9 – (ABR) Above Rail Mount
A. If using Charge X ABR on a ballistic helmet, skip to step B. For use with
nonballistic helmets, begin by snapping off unneeded portion of ABR mount by
hand or with a pair of pliers, and discarding the smaller ‘hook’ portion
1a 2a
B. Loosen or remove front rail screw, and slide ABR into desired position beneath
rail. Retighten front rail screw.
1b
2b
3b 4b
C. Select Charge X mount and secure with included machine screws, gently
tightening with a Phillips screwdriver. Install Charge X and tighten set screw
onto mount.
1c
2c
3c
4c
English
Bekijk gratis de handleiding van Princeton Tec Charge X, stel vragen en lees de antwoorden op veelvoorkomende problemen, of gebruik onze assistent om sneller informatie in de handleiding te vinden of uitleg te krijgen over specifieke functies.
Productinformatie
| Merk | Princeton Tec |
| Model | Charge X |
| Categorie | Niet gecategoriseerd |
| Taal | Nederlands |
| Grootte | 4866 MB |