Pioneer MVH-S010UB handleiding
Handleiding
Je bekijkt pagina 16 van 160
16En
Blue/white
The pin position of the ISO
c
onnector will differ depending on
the type of vehicle. Connect and
when Pin 5 is an antenna
control type. In another type of
v
ehicle, never connect and .
Blue/white
Connect to the system control
t
erminal of the power amp (max.
300 mA 12 V DC).
Blue/white
Connect to the auto-antenna relay
c
ontrol terminal (max. 300 mA 12 V
DC).
Yellow/black (Only for MVH-
S100UI)
If you use equipment with a Mute
fu
nction, wire this lead to the
Audio Mute lead on that
equipment. If not, keep the Audio
Mute lead free of any connections.
Speaker leads
White: Front left
White/black: Front left
Gray: Front right
Gray/black: Front right
Green: Rear left or subwoofer
Green/black: Rear left or
subwoofer
Violet: Rear right or subwoofer
Violet/black: Rear right or
subwoofer
ISO connector
In some vehicles, the ISO connector
ma
y be divided into two. In this
case, be sure to connect to both
connectors.
NOTES
• Change the initial menu of this unit.
Refer to [SP-P/O MODE]
(page 6). The
subwoofer output of this unit is
mon
aural.
• W
hen using a subwoofer of 2 Ω, be
sure to connect the subwoofer to the
violet and violet/black leads of this
unit. Do not connect anything to the
green and green/black leads.
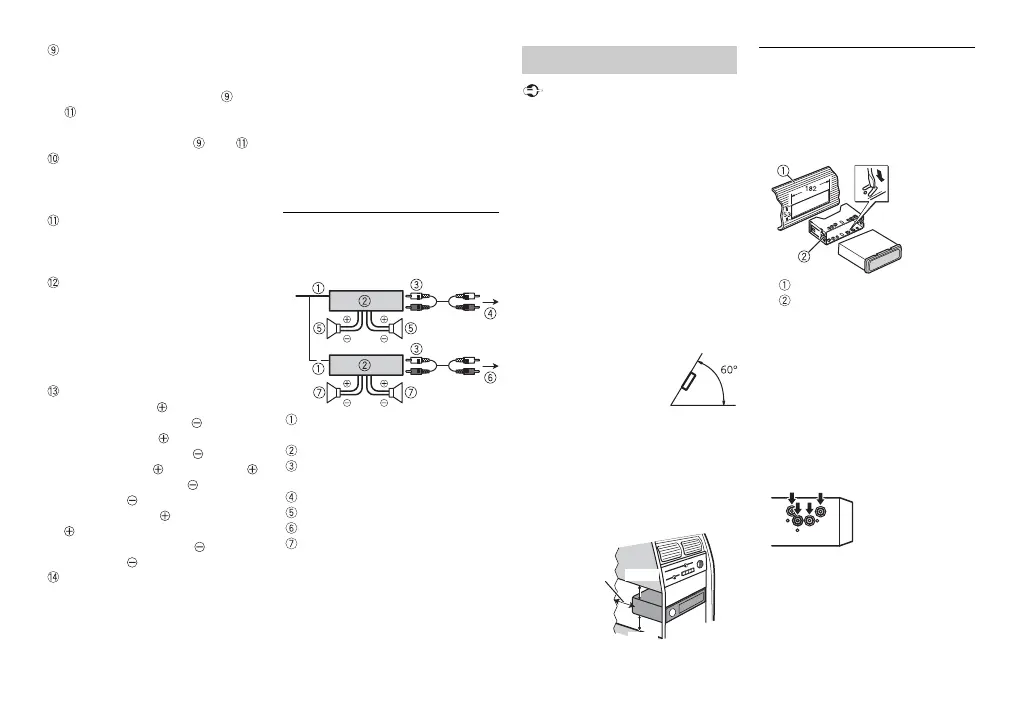
Power amp (sold separately)
Perform these connections when
using the optional amplifier.
System remote control
Connect to blue/white cable.
Power amp (sold separately)
Connect with RCA cables (sold
separately)
To front output*
Front speaker*
To rear output or subwoofer output
Rear speaker or subwoofer
* Only for MVH-S100UI
Important
• Check all connections and systems
before final installation.
• Do not use unauthorized parts as
this may cause malfunctions.
• C
onsult your dealer if installation
requires drilling of holes or other
modifications to the vehicle.
• Do n
ot install this unit where:
–it may interfere with operation of
t
he vehicle.
–it may cause injury to a passenger
as a r
esult of a sudden stop.
• T
he semiconductor laser will be
damaged if it overheats. Install this
unit away from hot places such as
near the heater outlet.
• Opti
mum
performance is
obtained when the
unit is installed at an
angle of less than 60°.
• W
hen installing, to ensure proper
heat dispersal when using this unit,
make sure you leave ample space
behind the rear panel and wrap any
loose cables so they are not blocking
the vents.
DIN mount installation
1 Insert the supplied mounting
sleeve into the dashboard.
2 Secure the mounting sleeve by
using a screwdriver to bend the
metal tabs (90°) into place.
Dashboard
Mounting sleeve
• M
ake sure that the unit is
installed securely in place. An
unstable installation may cause
skipping or other malfunctions.
When not using the supplied
mounting sleeve
1 Line up the holes on the
mounting bracket with the holes
on the sides of the unit to attach
the bracket.
2 Screw in one screw on each side to
hold the unit in place.
Installation
Leave ample
space
5 cm
5 cm
Bekijk gratis de handleiding van Pioneer MVH-S010UB, stel vragen en lees de antwoorden op veelvoorkomende problemen, of gebruik onze assistent om sneller informatie in de handleiding te vinden of uitleg te krijgen over specifieke functies.
Productinformatie
| Merk | Pioneer |
| Model | MVH-S010UB |
| Categorie | Niet gecategoriseerd |
| Taal | Nederlands |
| Grootte | 18582 MB |


