Phonic DMP1616 handleiding
Handleiding
Je bekijkt pagina 6 van 28
4
English
DMP1616 / DMP1616D
CONTROLS & SETTINGS
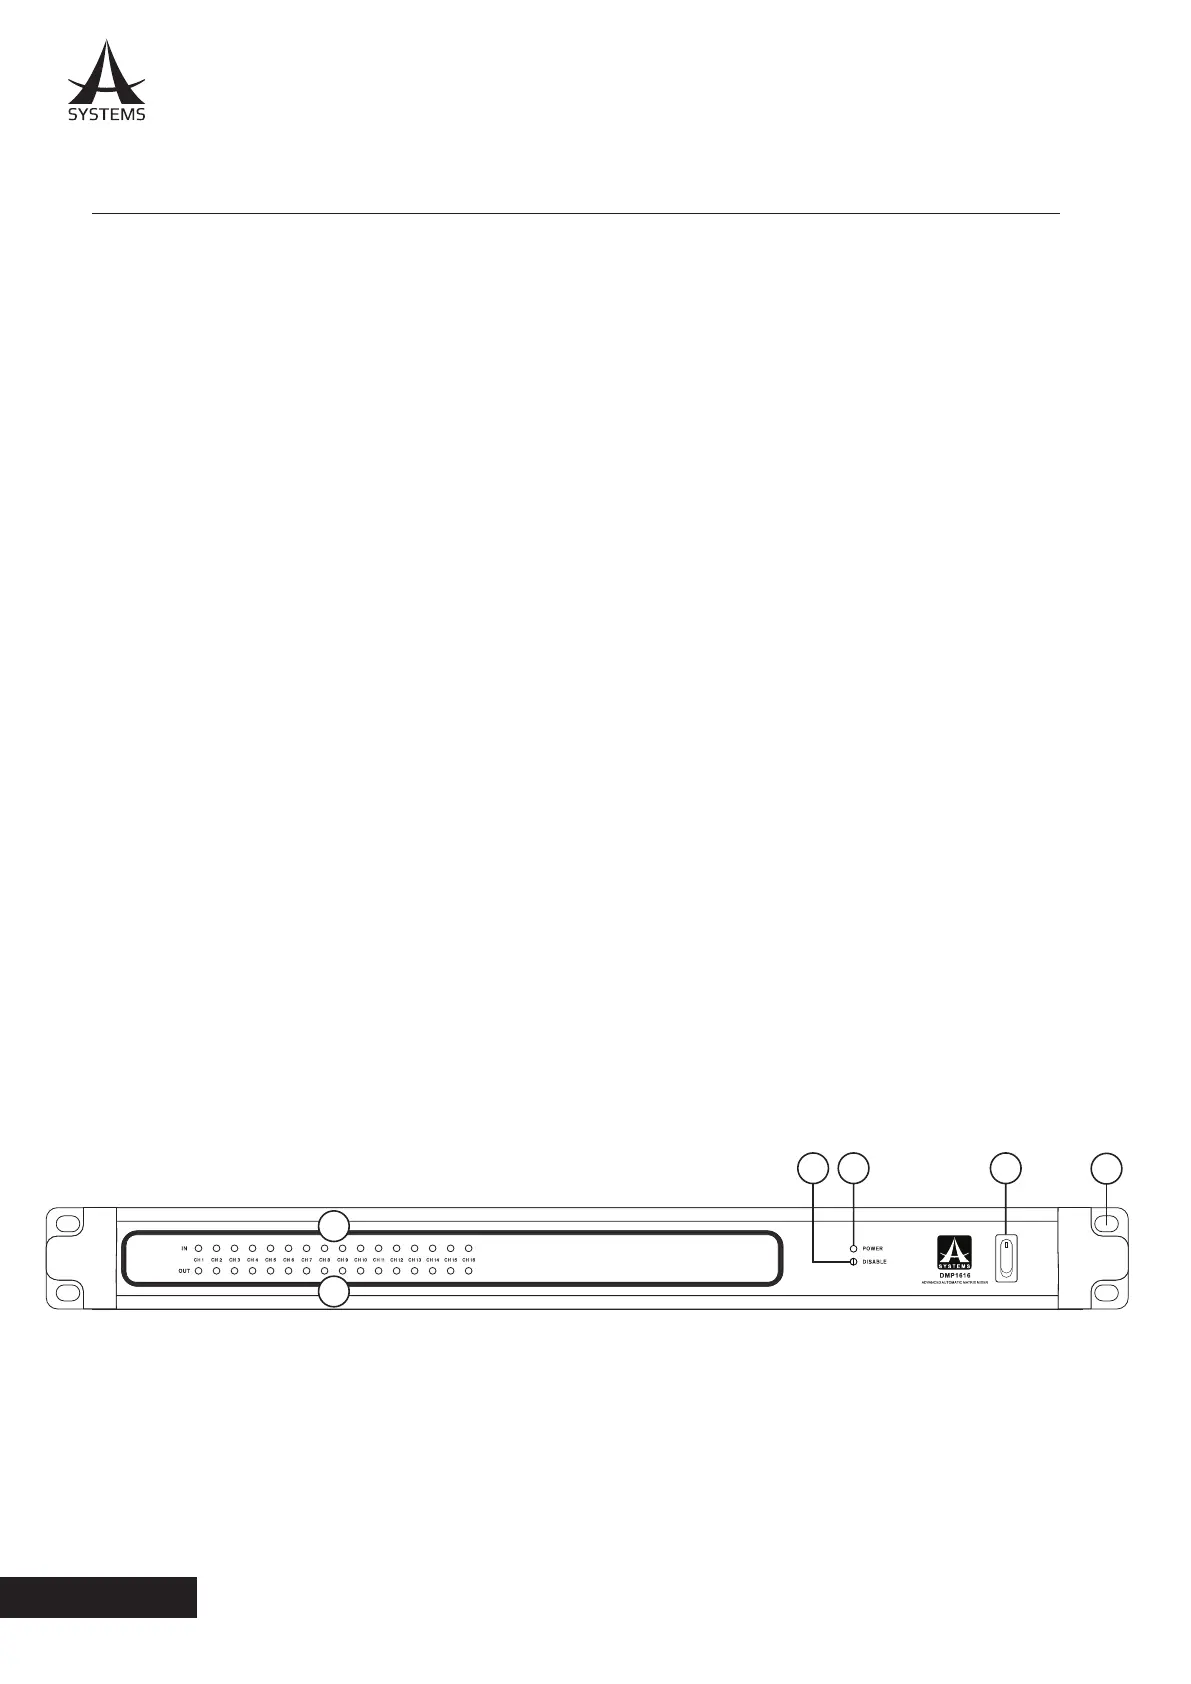
FRONT PANEL
1. Mounting Holes
These holes are for mounting the DMP1616 on a standard
19” rack.
2. Power Switch
Flick this switch to sturn the unit on or put it on standy. Be
aware that the power switch can be disabled through the
Asystems DMP1616 software.
3. Power LED
This LED indicator will illuminate when the DMP1616
is activated – whether by switch or through the remote
software.
4. Disable LED
This LED will light up when the power switch is disabled.
When this occurs, the DMP1616 cannot be turned on or
put on standby via the front panel switch. This function is
disabled within the Asystems PC software.
5. Output LEDs
The Channel Output LEDs will light up green when an
output signal is present on the corresponding output mix.
It will also ash red when the output channel clips. In this
event, you can reduce any excessive input signals, or turn
down your master output mix level through the control
software.
6. Input LEDs
The Channel Input LEDs will light up green when an
signal is present on the corresponding input mix. It will
also ash red when the input channel clips. In the event
that an input signal ash red, you can either reduce any
excessive input signals or reduce the input level within the
DMP1616 software.
234
6
5
1
Bekijk gratis de handleiding van Phonic DMP1616, stel vragen en lees de antwoorden op veelvoorkomende problemen, of gebruik onze assistent om sneller informatie in de handleiding te vinden of uitleg te krijgen over specifieke functies.
Productinformatie
| Merk | Phonic |
| Model | DMP1616 |
| Categorie | Niet gecategoriseerd |
| Taal | Nederlands |
| Grootte | 4356 MB |


