Phoenix Contact FL PN/PN SDIO-2TX/2TX handleiding
Handleiding
Je bekijkt pagina 44 van 94
FL PN/PN SDIO-2TX/2TX
44
PHOENIX CONTACT 8220_en_06
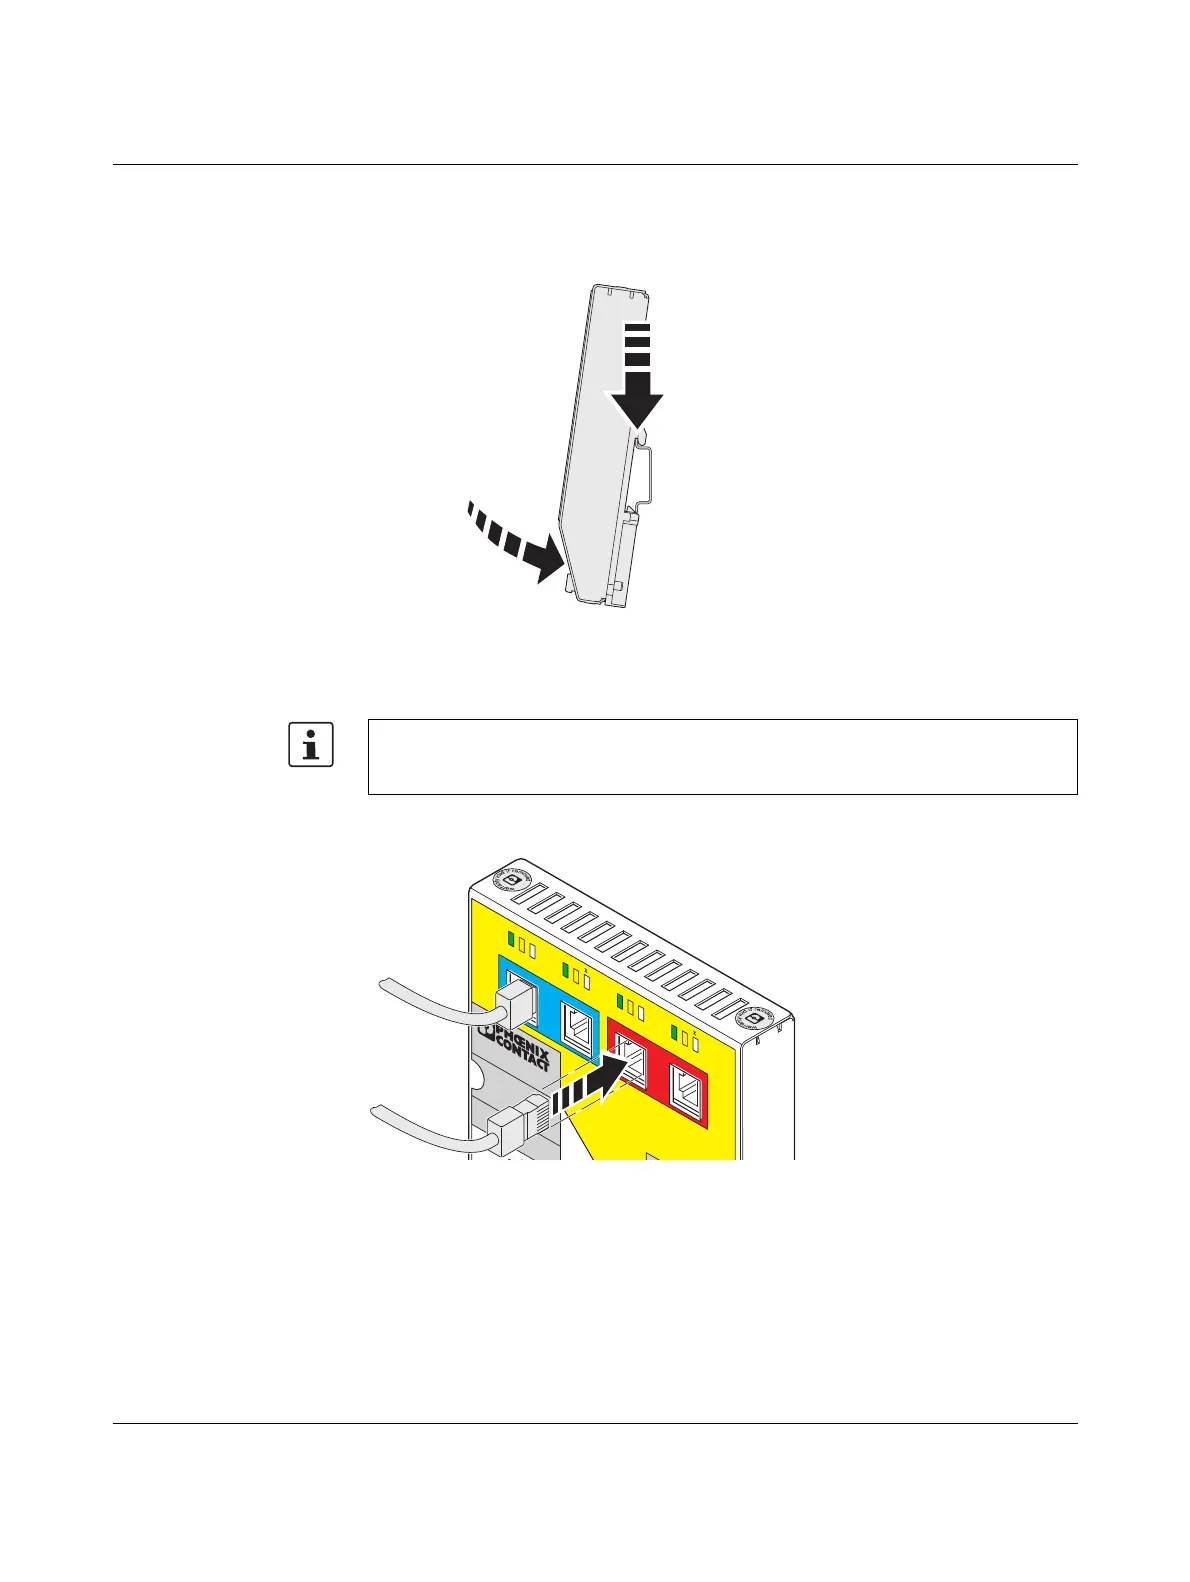
6. Place the groove of the device onto the DIN rail from above (A in Figure 3-7). Push the
bottom of the device towards the DIN rail until the spring-loaded holder engages with a
click (B in Figure 3-7).
Figure 3-7 Snapping the device onto the DIN rail
7. Finally, make sure that the device is securely mounted on the DIN rail.
8. If present, plug in the Ethernet cables.
Figure 3-8 Establishing the Ethernet connections
A
B
In the next step, make sure that the Ethernet cables cannot be mixed up and that the
RJ45 plugs are plugged into the correct positions again. Observe the measures previously
specified.
LNK1
ACT1
LNK2 ACT2
2
LNK3 ACT3 LNK4 ACT4
4
X1
X2
X3 X4
PROFIsafe
c
SF1
BF1
FL P
N
/P
N
SD
IO
-2T
X
/2TX
O
rd. No. 27 00 651
M
A
C
A
d
d
re
s
s
Bekijk gratis de handleiding van Phoenix Contact FL PN/PN SDIO-2TX/2TX, stel vragen en lees de antwoorden op veelvoorkomende problemen, of gebruik onze assistent om sneller informatie in de handleiding te vinden of uitleg te krijgen over specifieke functies.
Productinformatie
| Merk | Phoenix Contact |
| Model | FL PN/PN SDIO-2TX/2TX |
| Categorie | Niet gecategoriseerd |
| Taal | Nederlands |
| Grootte | 7175 MB |


