Phoenix Contact AS-WORKBENCH-F 90 MA handleiding
Handleiding
Je bekijkt pagina 16 van 52
clipx WIRE assist
16 / 50 Phoenix Contact
109435_en_02
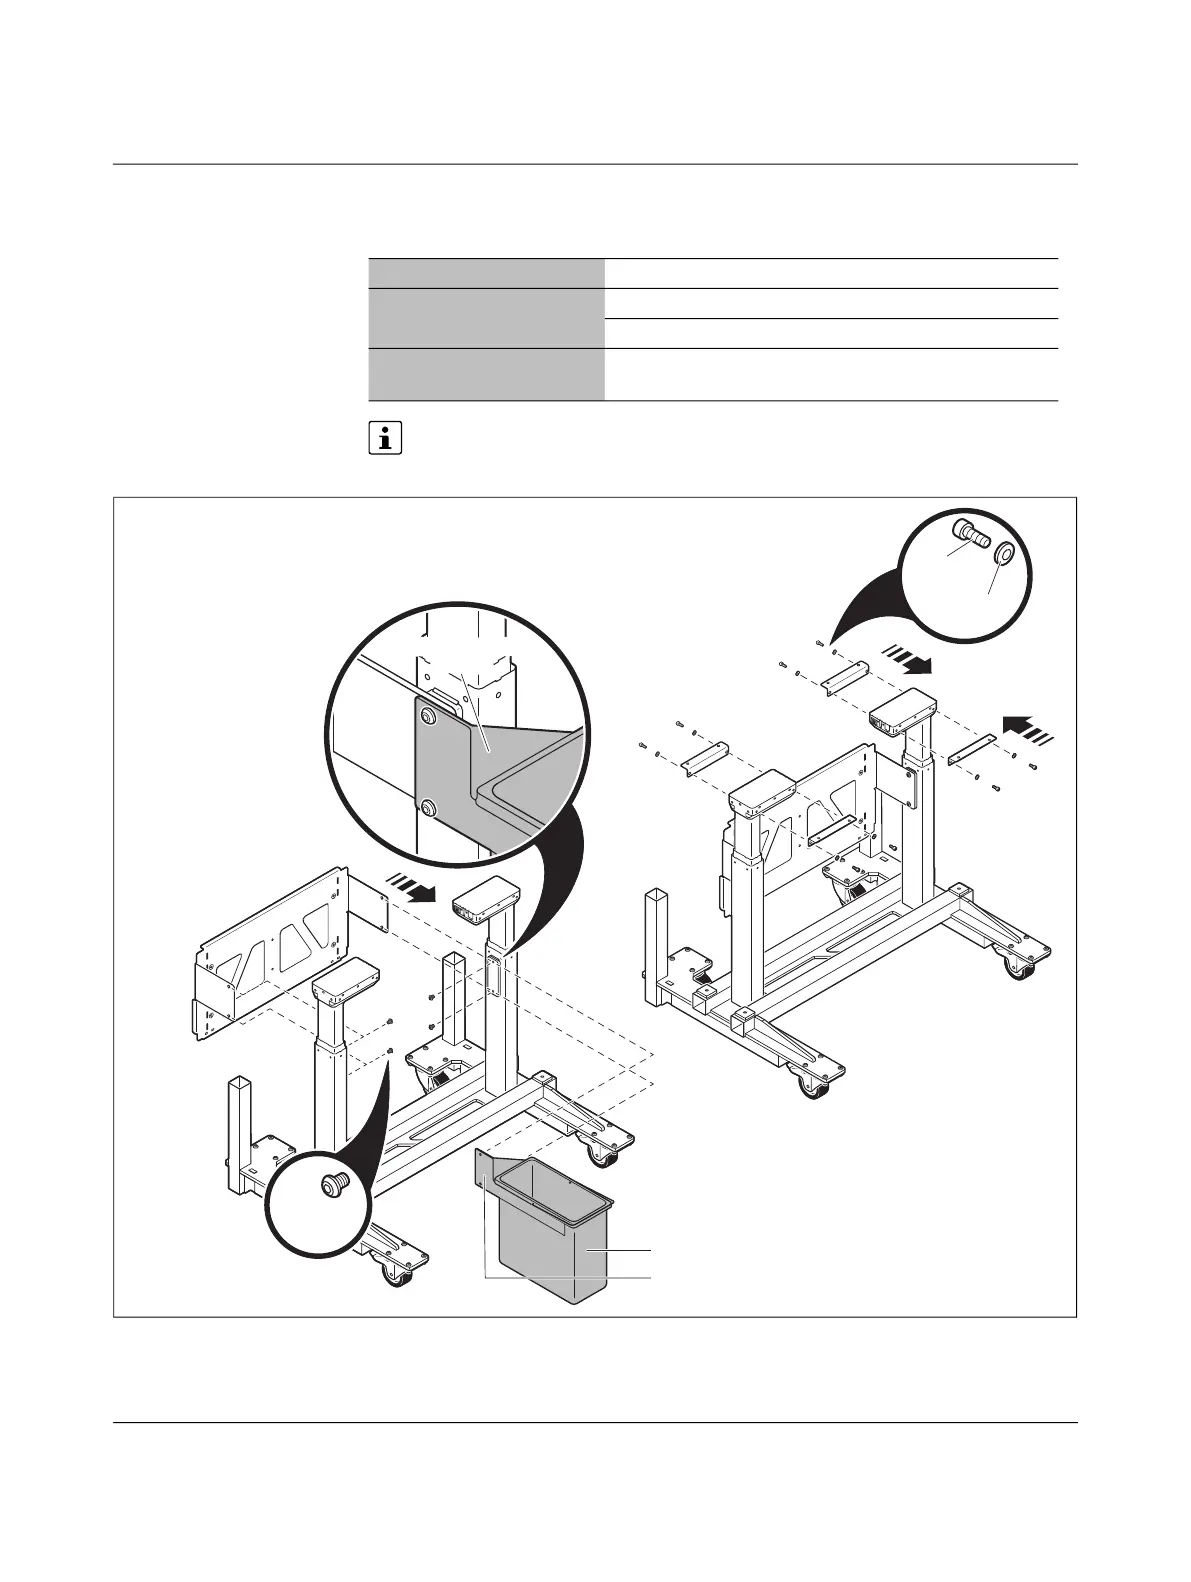
2.3.3 Attaching the rear panel and mounting brackets for the
worktop
Do not fully tighten the screws on the mounting brackets and the rear panel.
Figure 2-2 Attaching the rear panel (A) and mounting brackets for the worktop (B)
Rear panel (W4) 4x Raised cheese-head screw, hexagon socket, M8x10
4x mounting brackets
(W3)
8x Head cap screw, hexagon socket, M6x16
8x Washer, M6
Waste bin (optional) If a waste bin should be mounted, screw it together with
the rear panel.
M8x10
ʾʽÅ
M6x16
˄Ɠ˂Å
M6
ƘƘƯ
1193801
A
B
ƘƘƯƓʾʾˆˀ˅ʽʾ
ƘƘƯƓʾʾˆˀ˅ʽˆ
C2
C1
C2
Bekijk gratis de handleiding van Phoenix Contact AS-WORKBENCH-F 90 MA, stel vragen en lees de antwoorden op veelvoorkomende problemen, of gebruik onze assistent om sneller informatie in de handleiding te vinden of uitleg te krijgen over specifieke functies.
Productinformatie
| Merk | Phoenix Contact |
| Model | AS-WORKBENCH-F 90 MA |
| Categorie | Niet gecategoriseerd |
| Taal | Nederlands |
| Grootte | 5597 MB |


