Handleiding
Je bekijkt pagina 10 van 46
8
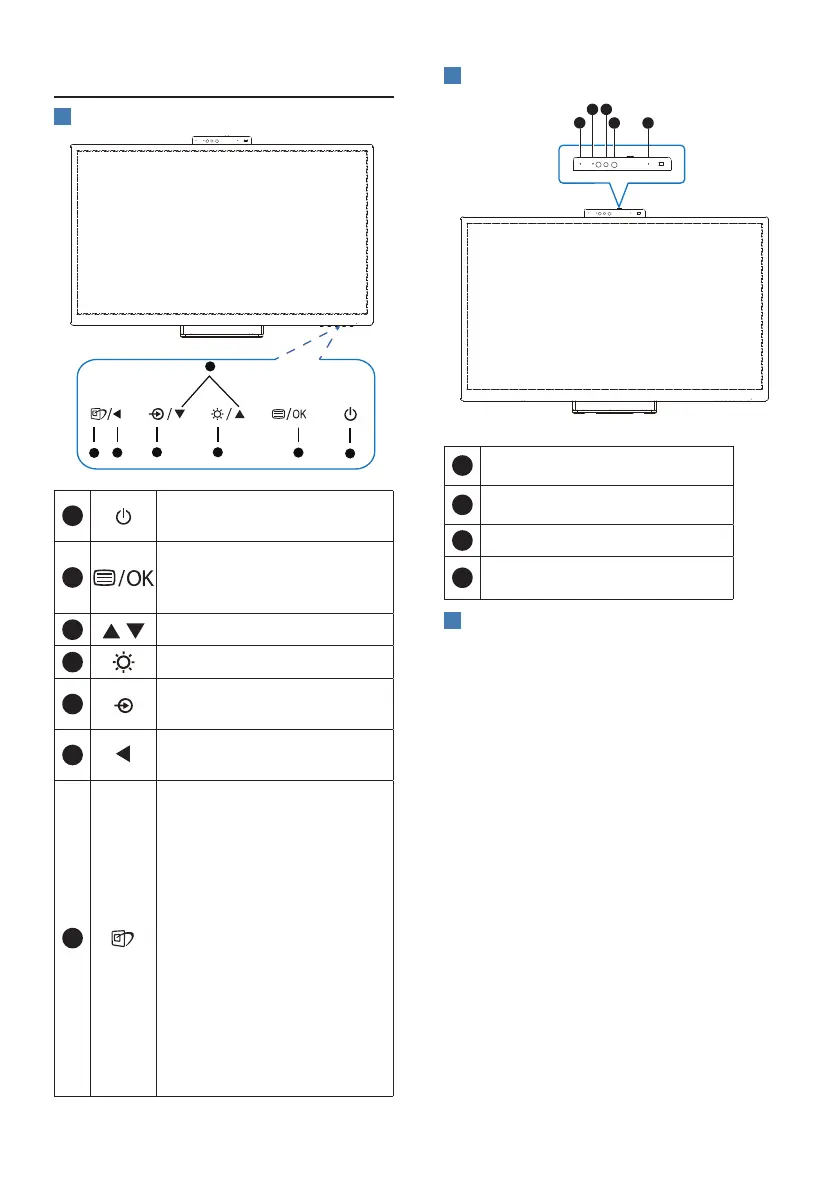
2.2 Operating the monitor
1
Description of the control buttons
5 4
3
2
1
7
6
1
Switch monitor’s power ON
or OFF.
2
Access the OSD menu
.
Conrm the OSD
adjustment.
3
Adjust the OSD menu.
4
Adjust the brightness level.
5
Change the signal input
source.
6
Return to previous OSD
level.
7
SmartImage hot key. There
are multiple modes to
select: EasyRead, Oce,
Photo, Movie, Game,
Economy, SmartUniformity,
D-Mode, O.
When the monitor receives
HDR signal, SmartImage
will show HDR menu: There
are multiple selections:
HDR HLG, HDR Vivid, HDR
Movie, DisplayHDR 600,
Personal, O.
2
Webcam
1
3
2
1
4
1
Microphone
2
Webcam a
ctivity light
3
5.0 Megapixel Webcam
4
IR of Face identication
3
Webcam autoframing
1. What is it?
The webcam is equipped with a zoom
in and out function within a limited
distance when Webcam Autoframing
feature is on.
2. Why do I need it?
The Webcam Autoframing feature is
ideal for dynamic video calls and long
meetings as well as calls involving
multiple team members.
3. How does it work?
Users can make an open-handed gesture
or a st to activate and deactivate
the Webcam Autoframing within the
monitor's webcam viewing range
of 180cm. Additionally, the webcam
supports gesture-based zoom in and
out. To zoom out, simply spread your
ngers apart in a "V" shape. To zoom
in, change from the “V” shape to the
Bekijk gratis de handleiding van Philips 27E3U7903, stel vragen en lees de antwoorden op veelvoorkomende problemen, of gebruik onze assistent om sneller informatie in de handleiding te vinden of uitleg te krijgen over specifieke functies.
Productinformatie
| Merk | Philips |
| Model | 27E3U7903 |
| Categorie | Monitor |
| Taal | Nederlands |
| Grootte | 5202 MB |


