Handleiding
Je bekijkt pagina 8 van 31
6
2. Setting up the monitor
1
2
3
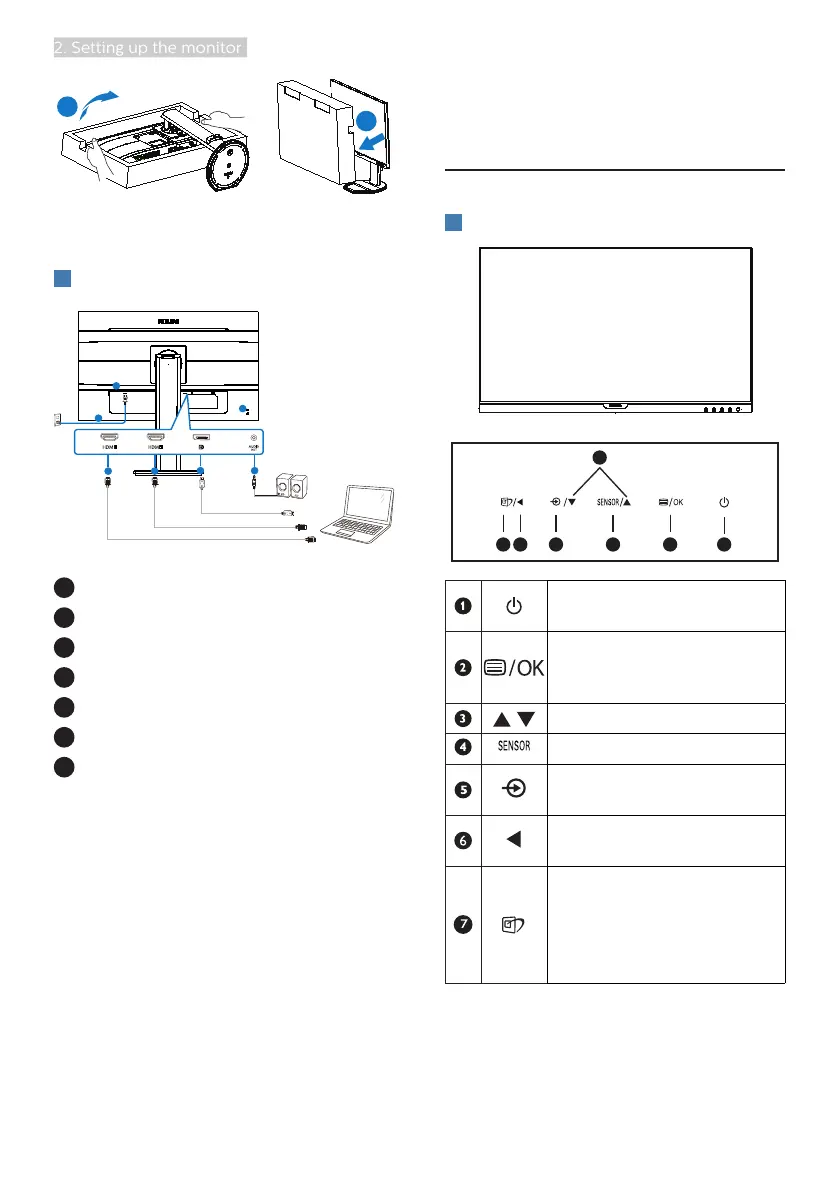
Connecting to your PC
3
5 4
2
1
6
7
1
Kensington anti-theft lock
2
Audio output
3
Display port input
4
HDMI 2 input
5
HDMI 1 input
6
AC power input
7
Power Switch
Connect to PC
1. Connect the power cord to the back
of the monitor firmly.
2. Turn off your computer and unplug
its power cable.
3. Connect the monitor signal cable to
the video connector on the back of
your computer.
4. Plug the power cord of your
computer and your monitor into a
nearby outlet.
5. Turn on your computer and monitor.
If the monitor displays an image,
installation is complete.
2.2 Operating the monitor
1
Description of the control buttons
7
6
25
4
3
1
Switch monitor’s power
ON and OFF.
Access the OSD menu
.
Confirm the OSD
adjustment.
Adjust the OSD menu.
PowerSensor
Change the signal input
source.
Return to previous OSD
level.
SmartImage. There are
multiple selections:
EasyRead, Office, Photo,
Movie, Game, Economy,
LowBlue Mode,Off.
Bekijk gratis de handleiding van Philips 275B9N, stel vragen en lees de antwoorden op veelvoorkomende problemen, of gebruik onze assistent om sneller informatie in de handleiding te vinden of uitleg te krijgen over specifieke functies.
Productinformatie
| Merk | Philips |
| Model | 275B9N |
| Categorie | Monitor |
| Taal | Nederlands |
| Grootte | 2871 MB |
Caratteristiche Prodotto
| Kleur van het product | Zwart |
| Gewicht verpakking | 9300 g |
| Breedte verpakking | 690 mm |
| Diepte verpakking | 250 mm |
| Hoogte verpakking | 462 mm |


