Perfect Aire 1PAFD12E handleiding
Handleiding
Je bekijkt pagina 6 van 8
6
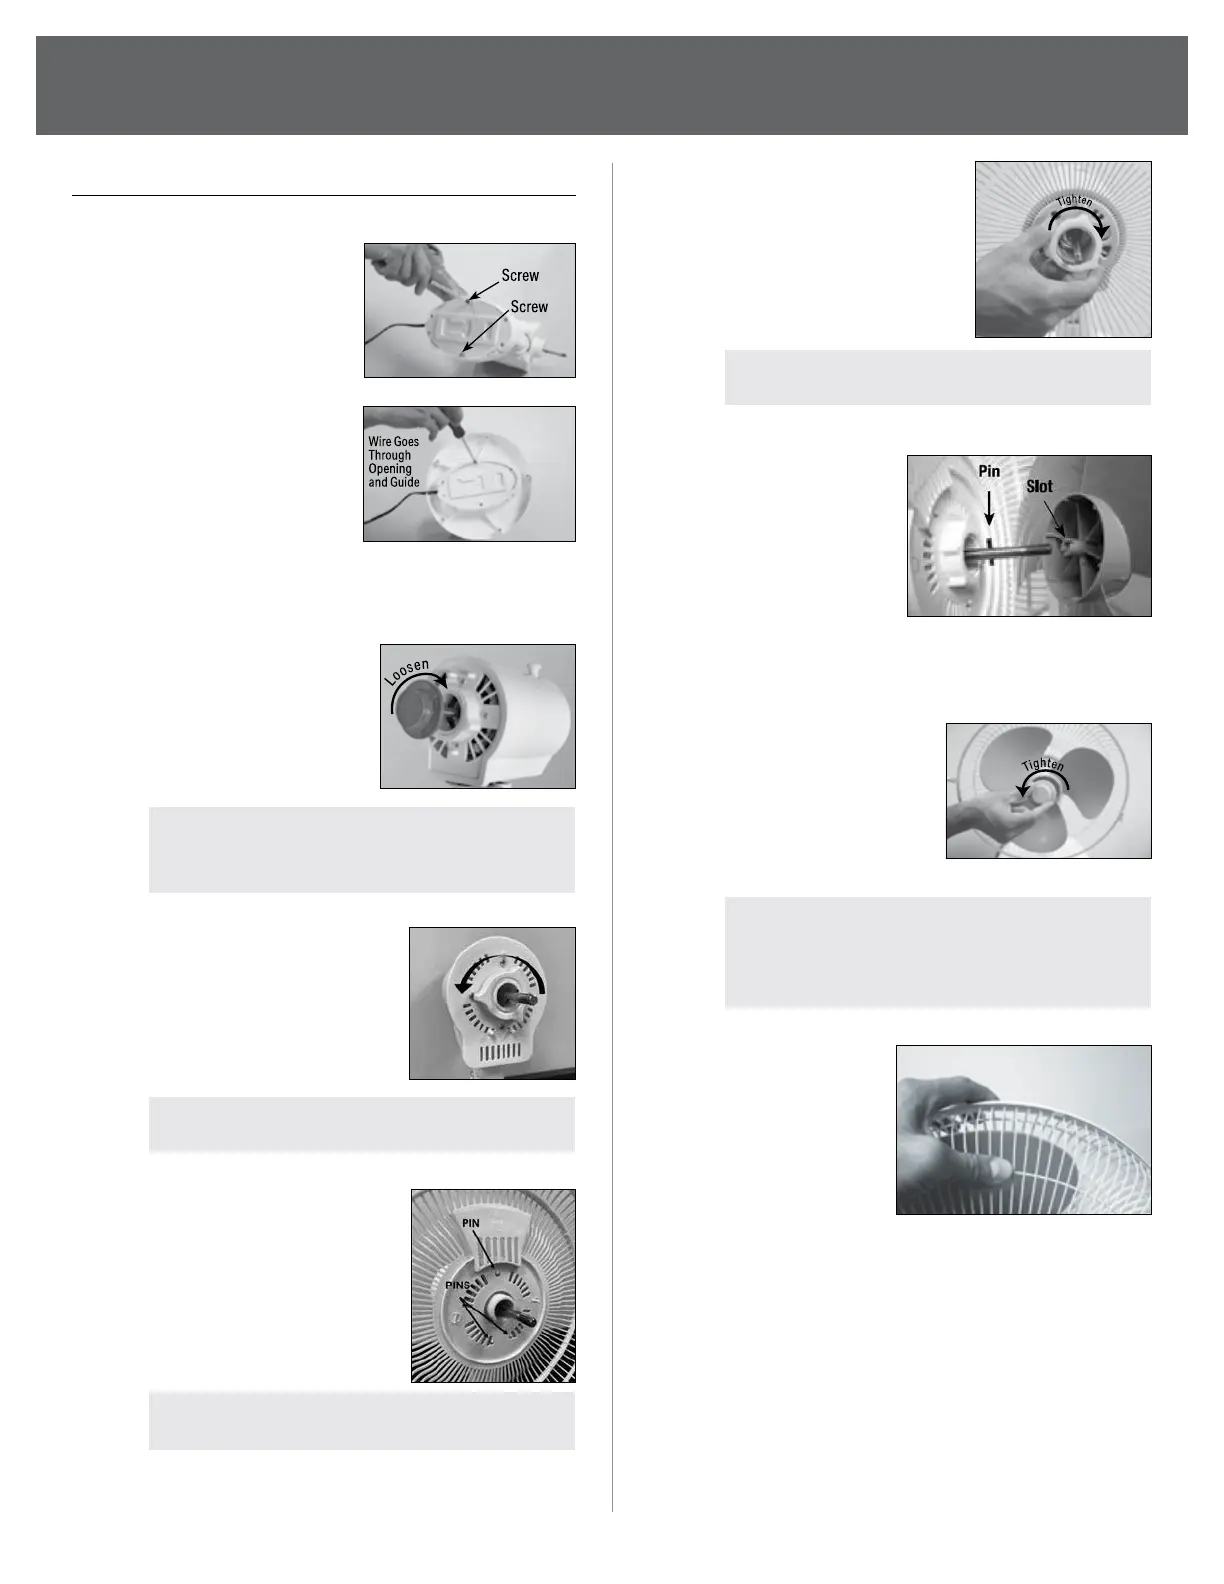
FAN ASSEMBLY
Assembly is required to use this fan.
Step 1. Remove two (2)
screws from base
of fan and save
them for Step 2.
Step 2. Place power cord
wire through
opening of plastic
fan base. With
cord opening
properly positioned,
snap plastic fan base onto fan body.
Re‑assemble screws removed in Step 1.
Step 3. Remove the Blade
Cap by twisting it
CLOCKWISE while
holding the retaining
pin tightly.
NOTE: Threads are reversed.
Loosen = Clockwise.
Step 4. Loosen and remove
the locknut from the
motor housing to
attach rear grille.
NOTE: Loosen = Counter‑clockwise.
Step 5. Assemble Rear Grille
onto Motor Housing.
Rear Grille should t
into alignment pins
on fan motor housing
as shown.
NOTE: Handle should be on top.
FAN ASSEMBLY
Step 6. Thread Locknut onto
Motor Housing to lock
Rear Grille in place. .
NOTE: Tighten = Clockwise.
Step 7. Remove any
protective
covering over
retaining pin
before fan blade
installation.
Place fan blade
onto retaining pin. Notice the pin on
retaining pin should t into slots of fan
blade.
Step 8. Thread blade cap
onto threaded end
of the motor shaft.
NOTE: Threads are reversed at this
connection.
Tighten = Counter‑clockwise
Step 9. With logo
upright, attach
Front Grille to
Rear Grille by
snapping them
together. Be
sure all 8 clips
are secure.
Do not operate fan without grille in place.
Bekijk gratis de handleiding van Perfect Aire 1PAFD12E, stel vragen en lees de antwoorden op veelvoorkomende problemen, of gebruik onze assistent om sneller informatie in de handleiding te vinden of uitleg te krijgen over specifieke functies.
Productinformatie
| Merk | Perfect Aire |
| Model | 1PAFD12E |
| Categorie | Ventilator |
| Taal | Nederlands |
| Grootte | 1923 MB |


