Panduit WME31RU handleiding
Handleiding
Je bekijkt pagina 6 van 16
INSTALLATION INSTRUCTIONS
© Panduit Corp. 2024
V00029TB_06INSTALLATION INSTRUCTIONS
For Technical Support: www.panduit.com
Page 6 of 16
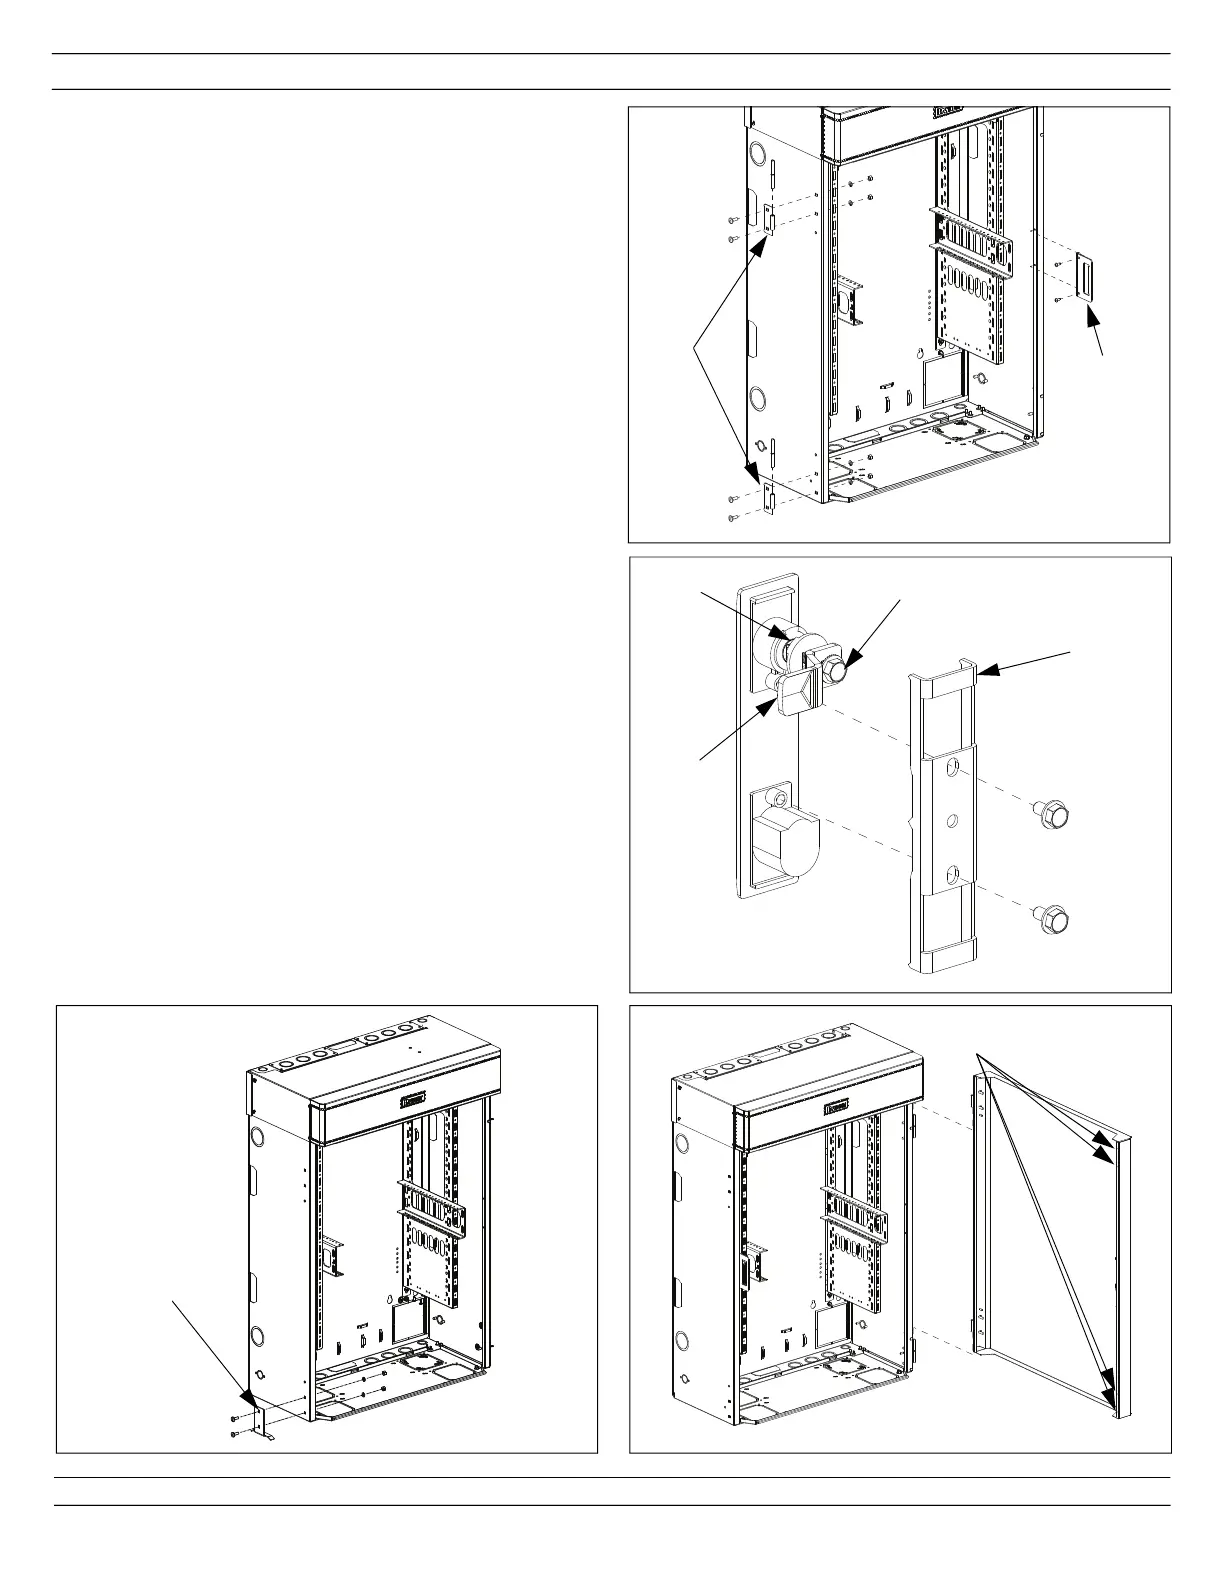
Bumper locations
(4 total)
Cam
Lock
180°
turn
Handle
Support
Bracket
Cam
Stop
90°
turn
Cam
Screw
Reversing Door and Handle
1 Remove door by opening to 90°, and lifting up
over the hinge pins. Remove the hinge pins.
2 Remove hinges using a 7/16" wrench/ratchet to
loosen the nuts. Remove nuts, washers, &
bolts.
3 Remove door latch using T25 torx driver to
remove the screws.
4 Re-install hinges and door latch to the opposite
side. Re-install hinge pins.
5 Remove door handle by removing the handle
support bracket using an M10 wrench/ratchet.
Remove handle from the door.
6 Loosen cam screw using an M10 wrench/
ratchet. Do not remove. Rotate the cam lock
180°, and the cam stop 90°. Tighten the cam
screw.
7 Rotate door 180°. Re-attach the door handle so
the cam aligns with the door latch.
8 Re-attach door by lining up the door hinges and
lowering the door on to the hinge pins.
9 If rubber bumpers are not pre-installed, apply to
the door as shown.
Door
Hinge
Door
Latch
1 Align door guide ramp with the lower square
holes on the side of the enclosure opposite of
the door hinge.
2. Assemble with provided nuts, washers, and
carriage bolts.
3. Push guide ramp upward to be flush with the
bottom of the enclosure while tightening nuts
with 7/16" wrench.
Attaching Door Guide Ramp
Door
Guide
Ramp
Bekijk gratis de handleiding van Panduit WME31RU, stel vragen en lees de antwoorden op veelvoorkomende problemen, of gebruik onze assistent om sneller informatie in de handleiding te vinden of uitleg te krijgen over specifieke functies.
Productinformatie
| Merk | Panduit |
| Model | WME31RU |
| Categorie | Niet gecategoriseerd |
| Taal | Nederlands |
| Grootte | 2641 MB |
Caratteristiche Prodotto
| Kleur van het product | Zwart |
| Montagewijze | Schroef |
| Materiaal | Staal |
| Type product | Schakelkast montagerail |


