Panduit CD-525 handleiding
Handleiding
Je bekijkt pagina 2 van 2
© Panduit Corp. 2023
INSTALLATION
INSTRUCTIONS
CT-2500CH, CT-2300, UP14ZLW Tools;
CD-525, CD-550, CD-570 & CD-090 Dies
Page: 2 of 2
NOTE: POSITION RED/BLUE
POCKET INDICATORS
FACING
AWAY FROM THE TOOL, AS
SHOWN IN THE PHOTO
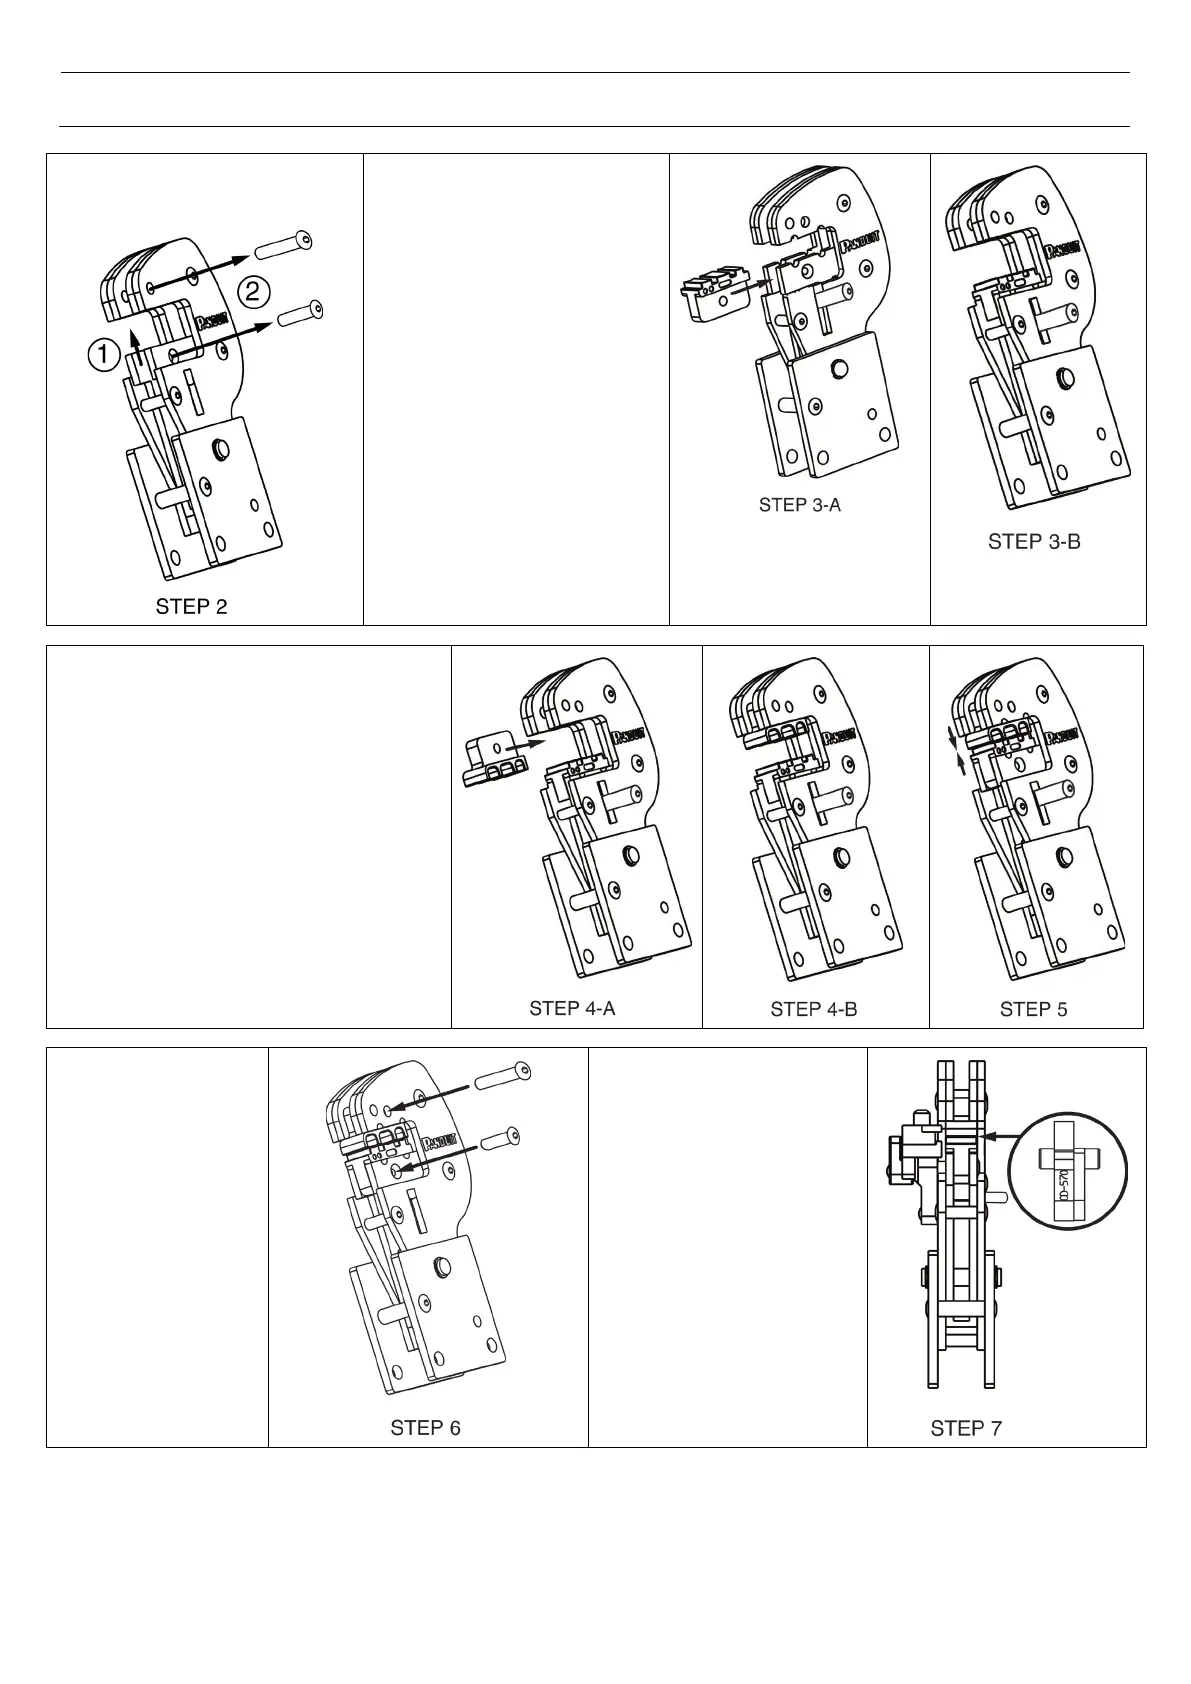
Step 2: Slide Lower Jaw
upward. Remove two (2)
screws as shown.
Step 3: Insert lower half
of Crimp Die Insert into
tool.
Insert should be fully seated
between plates. If insert has
pins, pins should be nested in
indent cavities.
Screw hole in crimp die (insert
should align with hole in jaw)
Pull lower jaw back down
Step 4: Insert upper half of Crimp Die
Insert into tool.
Part numbers should be facing forward.
Insert should be fully seated between
plates.
If Insert has pins, pins should be
nested in indent cavities.
Screw hole in Die Insert should align with
hole in jaw.
Step 5: Bring lower jaw up to mate with
upper jaw.
The two (2) Crimp Die Insert halves should
properly nest as shown on previous page.
Step 6: Insert the
two (2) screws into
the jaws and
tighten.
The longer screw is
used in the upper
jaw.
Step 7: Die halves should
align front and back; and
side-to-side.
Re-insert Crimp Head with newly installed Crimp Die Inserts into the tool per the instructions on Page 1.
Monthly Maintenance
1. Thoroughly clean all surfaces.
2. Oil the locating pins.
Bekijk gratis de handleiding van Panduit CD-525, stel vragen en lees de antwoorden op veelvoorkomende problemen, of gebruik onze assistent om sneller informatie in de handleiding te vinden of uitleg te krijgen over specifieke functies.
Productinformatie
| Merk | Panduit |
| Model | CD-525 |
| Categorie | Niet gecategoriseerd |
| Taal | Nederlands |
| Grootte | 892 MB |
Caratteristiche Prodotto
| Soort | Krimptang |
| Materiaal | Staal |
| Duurzaamheidscertificaten | RoHS |
| Aantal per verpakking | 1 stuk(s) |


