OmniMount DESK65 handleiding
Handleiding
Je bekijkt pagina 9 van 20
888-24-226-W-02 rev. E • 12/12
9 of 20
8x
1
2
3
ENGLISH
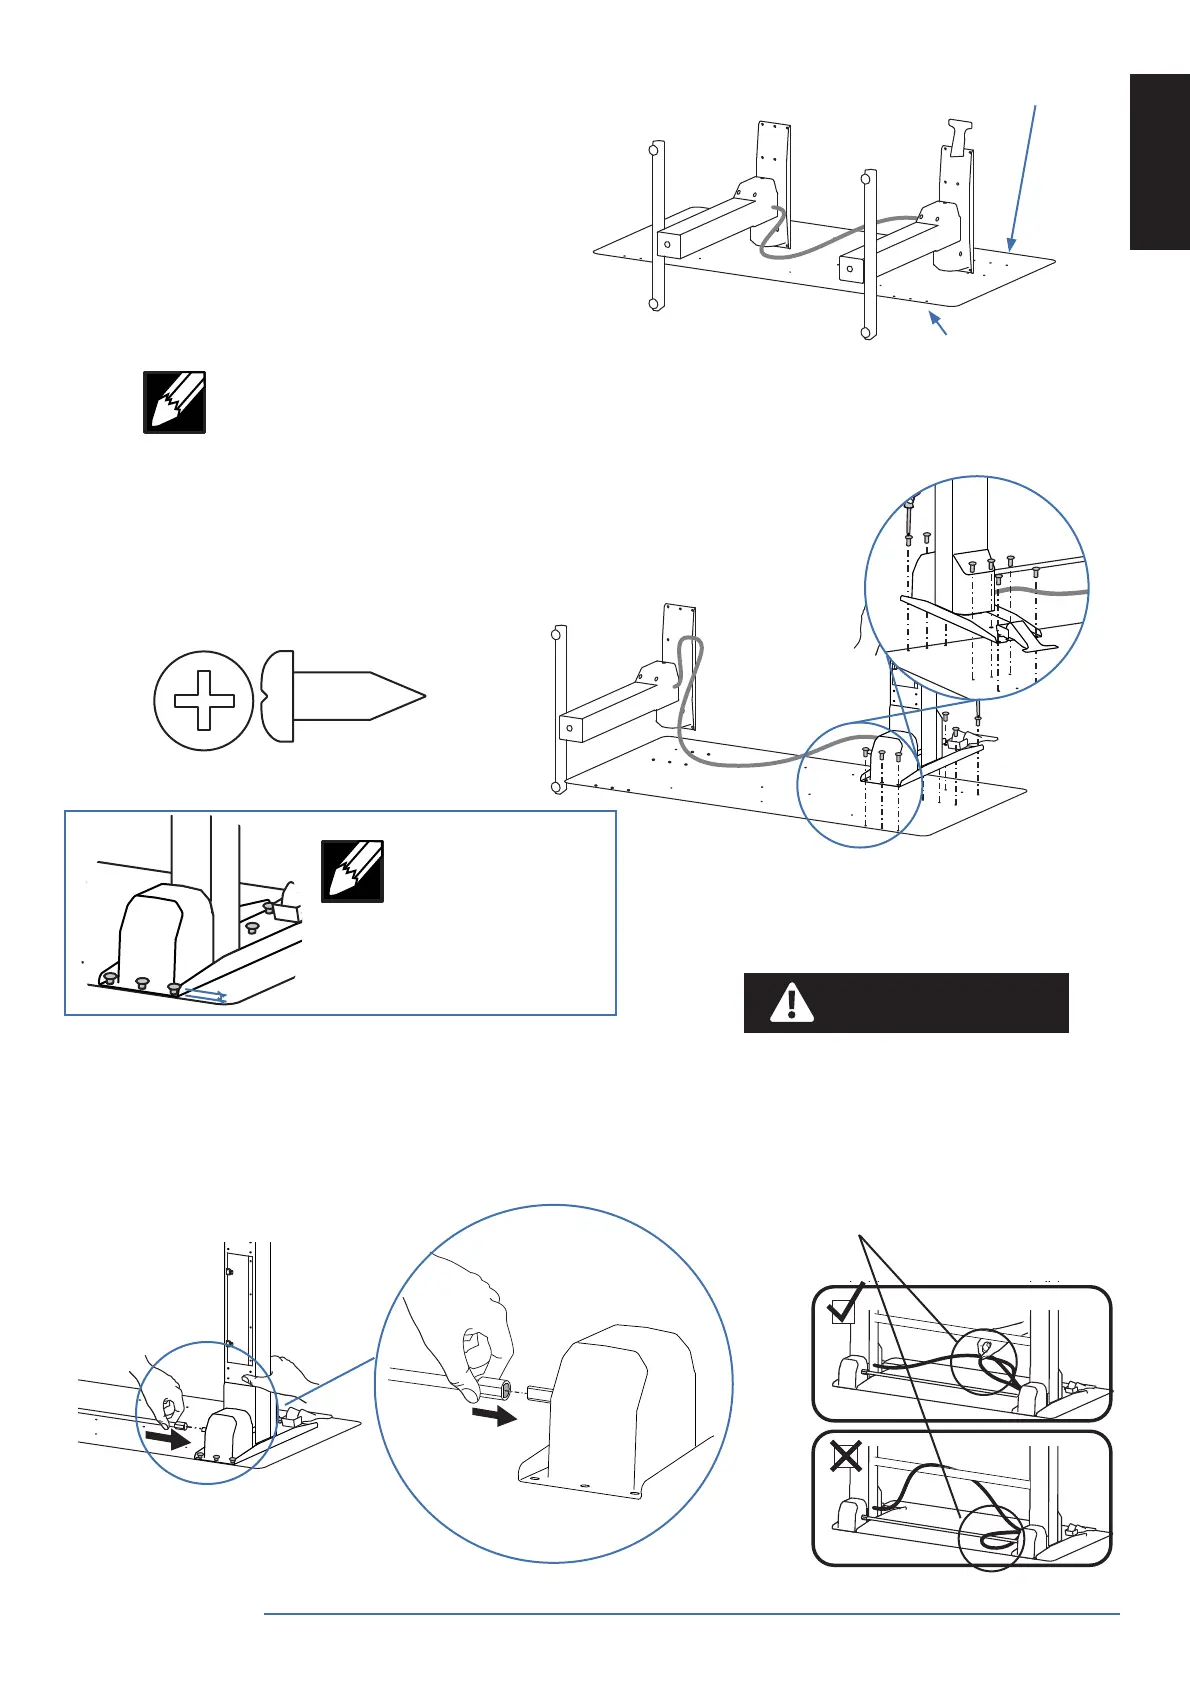
Place the worksurface on a clean oor with
the top side facing down.
Carefully position the leg with the hand
brake on the right end of the worksurface.
Place the other leg on the left end.
Attach one end of the sync rod to the
right leg as illustrated. Make sure the
brake cables don’t loop around the sync
rod. See Warning, right.
Set-up Steps
NOTE: The brake cable is attached to both legs. Take care when re-
moving the legs from the packaging to avoid damaging or pulling the
brake cable from the legs.
NOTE: Do not fully
insert the screws
into the worksurface
at this time. Leave
approximately 1/8”
space.
Front =2 screws
Middle = 3 screws
Rear = 3 screws
# 12-14 Wood Screw
Front Edge of Worksurface
Rear Edge of Worksurface
Set the right leg (with hand brake) upright on the
worksurface.
Partially insert 3 of the provided #12-14 wood
screws at the rear of the leg, 3 near the middle of
the leg and 2 at the front of the leg.
WARNING
Keep Brake Cables Away from
Sync Rod and Crossbars
During Installation!
Failure to keep the brake cables away from
sync rod and crossbars may restrict lift
motion and may cause equipment damage
or personal injury! Refer to instruction
manual for more information.
Bekijk gratis de handleiding van OmniMount DESK65, stel vragen en lees de antwoorden op veelvoorkomende problemen, of gebruik onze assistent om sneller informatie in de handleiding te vinden of uitleg te krijgen over specifieke functies.
Productinformatie
| Merk | OmniMount |
| Model | DESK65 |
| Categorie | Niet gecategoriseerd |
| Taal | Nederlands |
| Grootte | 4124 MB |


