Handleiding
Je bekijkt pagina 10 van 24
10 User Manual OVD7
• Step 4: Drill holes for expansion bolts. The drill diameter
is 14mm. Drill 4 holes according to the positioning paper
drawing (hole depth 60mm). Find the hole mark on the
positioning paper. Drill 4 holes orderly at the positioning
paper hole mark with a Ø 14 drill bit (use specially-made Ø 14
drill bit to pre-drill for the walls with tiles).
• Step 5: Fix the hook to wall. Fix the hook with an expansion
bolt to the wall.
• Take out the expansion bolt from the accessories. Insert the
bolt and expansion tubular into the drilled holes.
Insert one nut into the bolt. To prevent the thread being
damaged, don’t expose the end-thread of the bolt.
Then hammer the 4 bolts into the holes orderly;
• After the bolts are hammered into the wall, screw off the nuts
and expose the bolts.
Then insert one auxiliary tube to the bolt, and hammer the
tube until the expansion tubular is flush with the wall surface.
The expansion tubular is totally expanded then, and the
expansion tubular installation is finished.
• After finishing the expansion procedure, take out the hook
and insert it to the bolt.
Fasten the hook with a socket or a wrench.
•
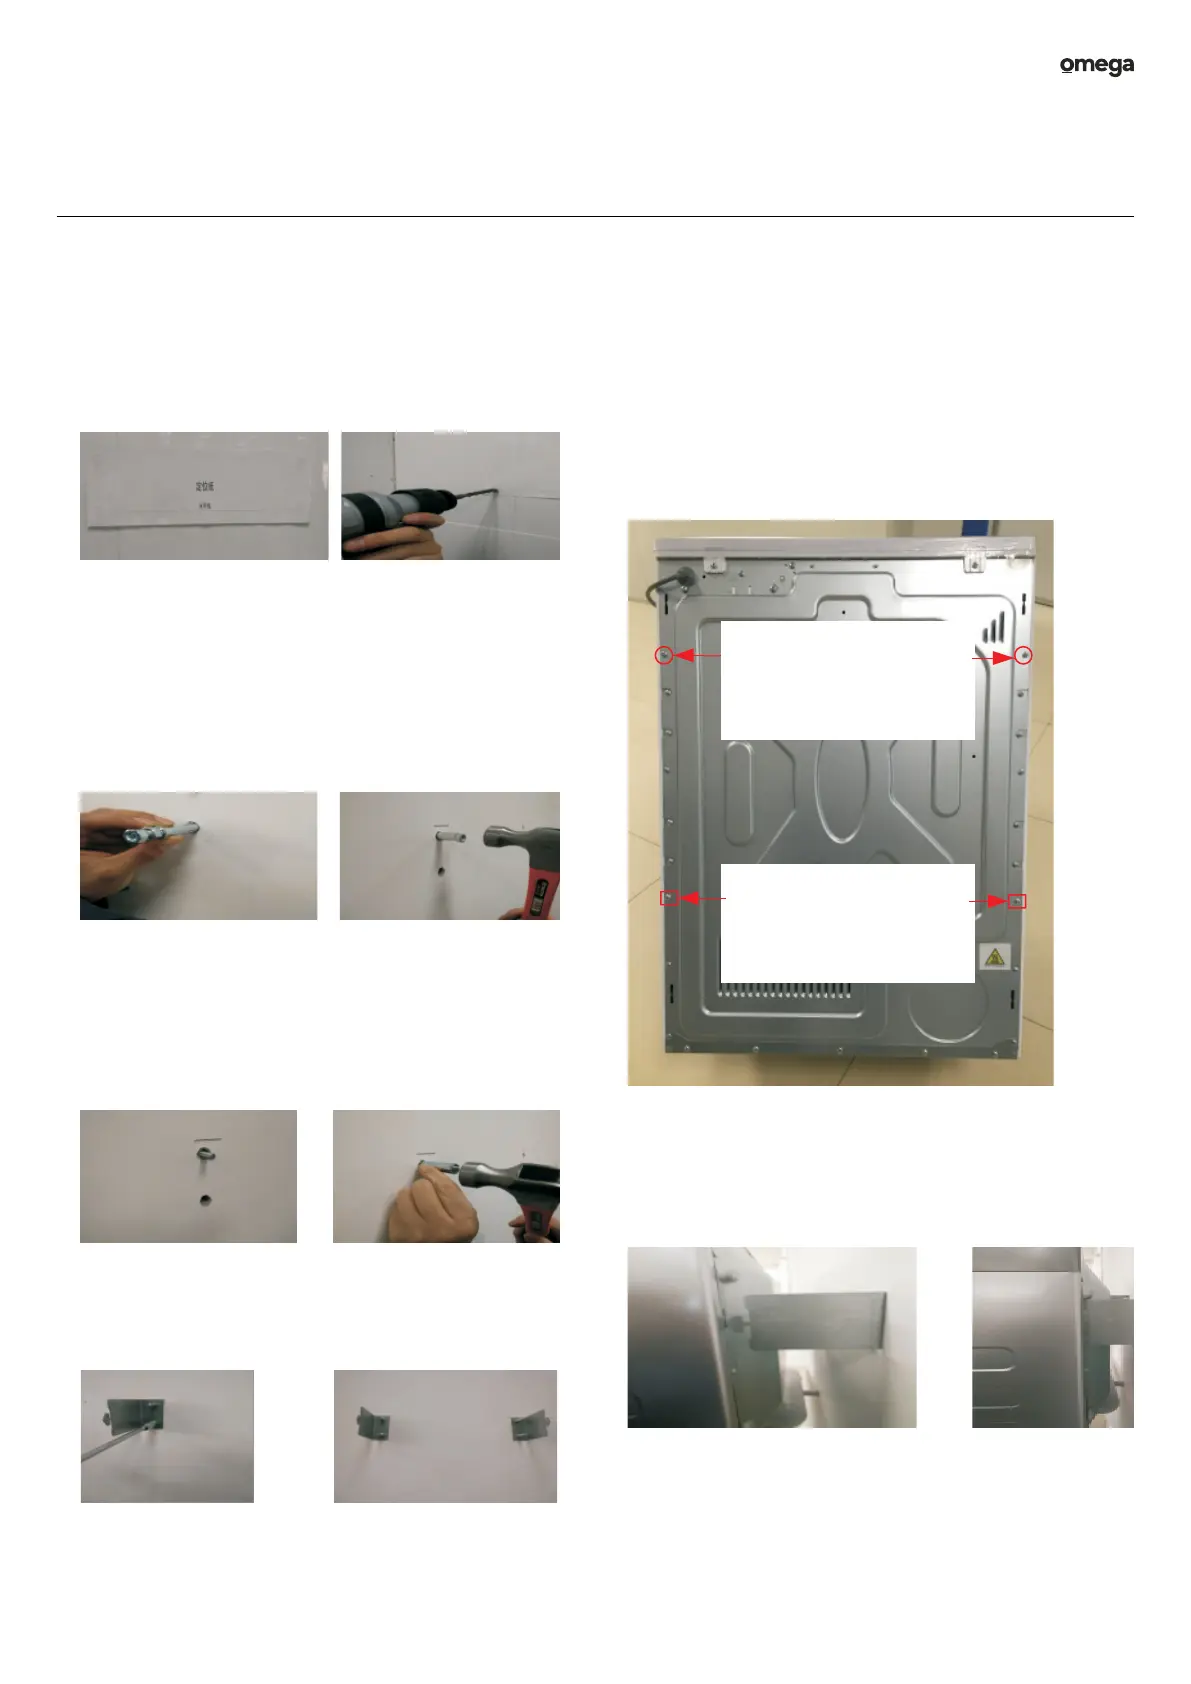
• Step 6: Fix the holder to the dryer machine. Place the
unpackaged dryer machine on the floor. Unscrew the two
screws at the back of the machine with a cross screwdriver.
Take out the holder in the kit. Press the screws into the holes
on the holder and then fasten them into the original screw
holes. When hang upside down, Fix the holder at the position
of the two screws.
Caution! Weight Hazard.
Two or more people required to lift and install the dryer.
Figure 6: Placement for the dryer holders.
• Step 7: Lift the dryer machine with two persons and direct
the slots at the back of the washing machine to the hooks.
Then insert the hooks with some force to the slots.
Figure 7: Placement for the dryer hooks.
Installation Instructions
Wall Hanging Installation Manual
1. Accessories include components:
hooks (2), holders (2), expansion bolts (4), installation
positioning paper (1), and installation manual (1).
Hook
Holder
Expansion
Bolt
Installation
Positioning Paper
When hang
straight,Hang the
hooks into the
two holes.
When hang
upside down,
Hang the hooks
into these two holes.
When hang upside
down, Fix the holder
at the position of the
two screws.
When hang straight,
Fix the holder at the
position of the two
screws.
(Applicable to 6kg and 7kg models)
Bekijk gratis de handleiding van Omega OVD7, stel vragen en lees de antwoorden op veelvoorkomende problemen, of gebruik onze assistent om sneller informatie in de handleiding te vinden of uitleg te krijgen over specifieke functies.
Productinformatie
| Merk | Omega |
| Model | OVD7 |
| Categorie | Wasdroger |
| Taal | Nederlands |
| Grootte | 3623 MB |