Navman MiVue True 4K PRO Surround handleiding
Handleiding
Je bekijkt pagina 9 van 46
8
2. If installing the device using an electrostatic sticker
(optional), attach the electrostatic sticker to the
windscreen (make sure there are no air bubbles trapped
underneath).
Note:
If your vehicle’s windscreen has a third visor frit (a patch of black
dots around the rear view mirror), please do not attempt to ax
the electrostatic lm/dash cam in this area as it is likely to fall o.
Attaching the device to an electrostatic sticker allows for the
easy removal of the device mount from the windscreen.
3. Peel the backing tape from the windscreen mount
and press rmly to attach it to your windscreen (make
sure the “UP” arrow is pointing upward). Fit the dash
cam to the window mount by aligning the three tabs
and slide the dash cam to the left until it clicks into
position.
Note: For best results, allow at least 12 hours before attaching the device to the mount to assure a strong
bond between the 3M adhesive tape and the electrostatic sticker/windscreen.
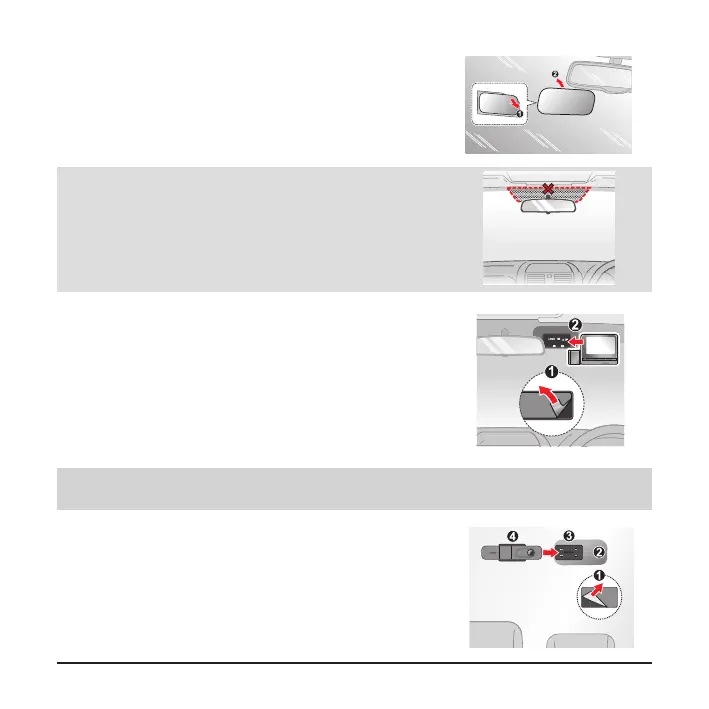
4. Detach the mounting base from the MiVue
TM
rear
cam, peel the backing tape from the mount and press
it rmly to attach to the electrostatic sticker or rear
window. To ensure correct orientation, the micro-USB
port should be facing right when axing the MiVue
TM
rear cam to the mount.
Bekijk gratis de handleiding van Navman MiVue True 4K PRO Surround, stel vragen en lees de antwoorden op veelvoorkomende problemen, of gebruik onze assistent om sneller informatie in de handleiding te vinden of uitleg te krijgen over specifieke functies.
Productinformatie
| Merk | Navman |
| Model | MiVue True 4K PRO Surround |
| Categorie | Niet gecategoriseerd |
| Taal | Nederlands |
| Grootte | 2942 MB |


