Mount-It! MI-7983 handleiding
Handleiding
Je bekijkt pagina 3 van 9
5
4
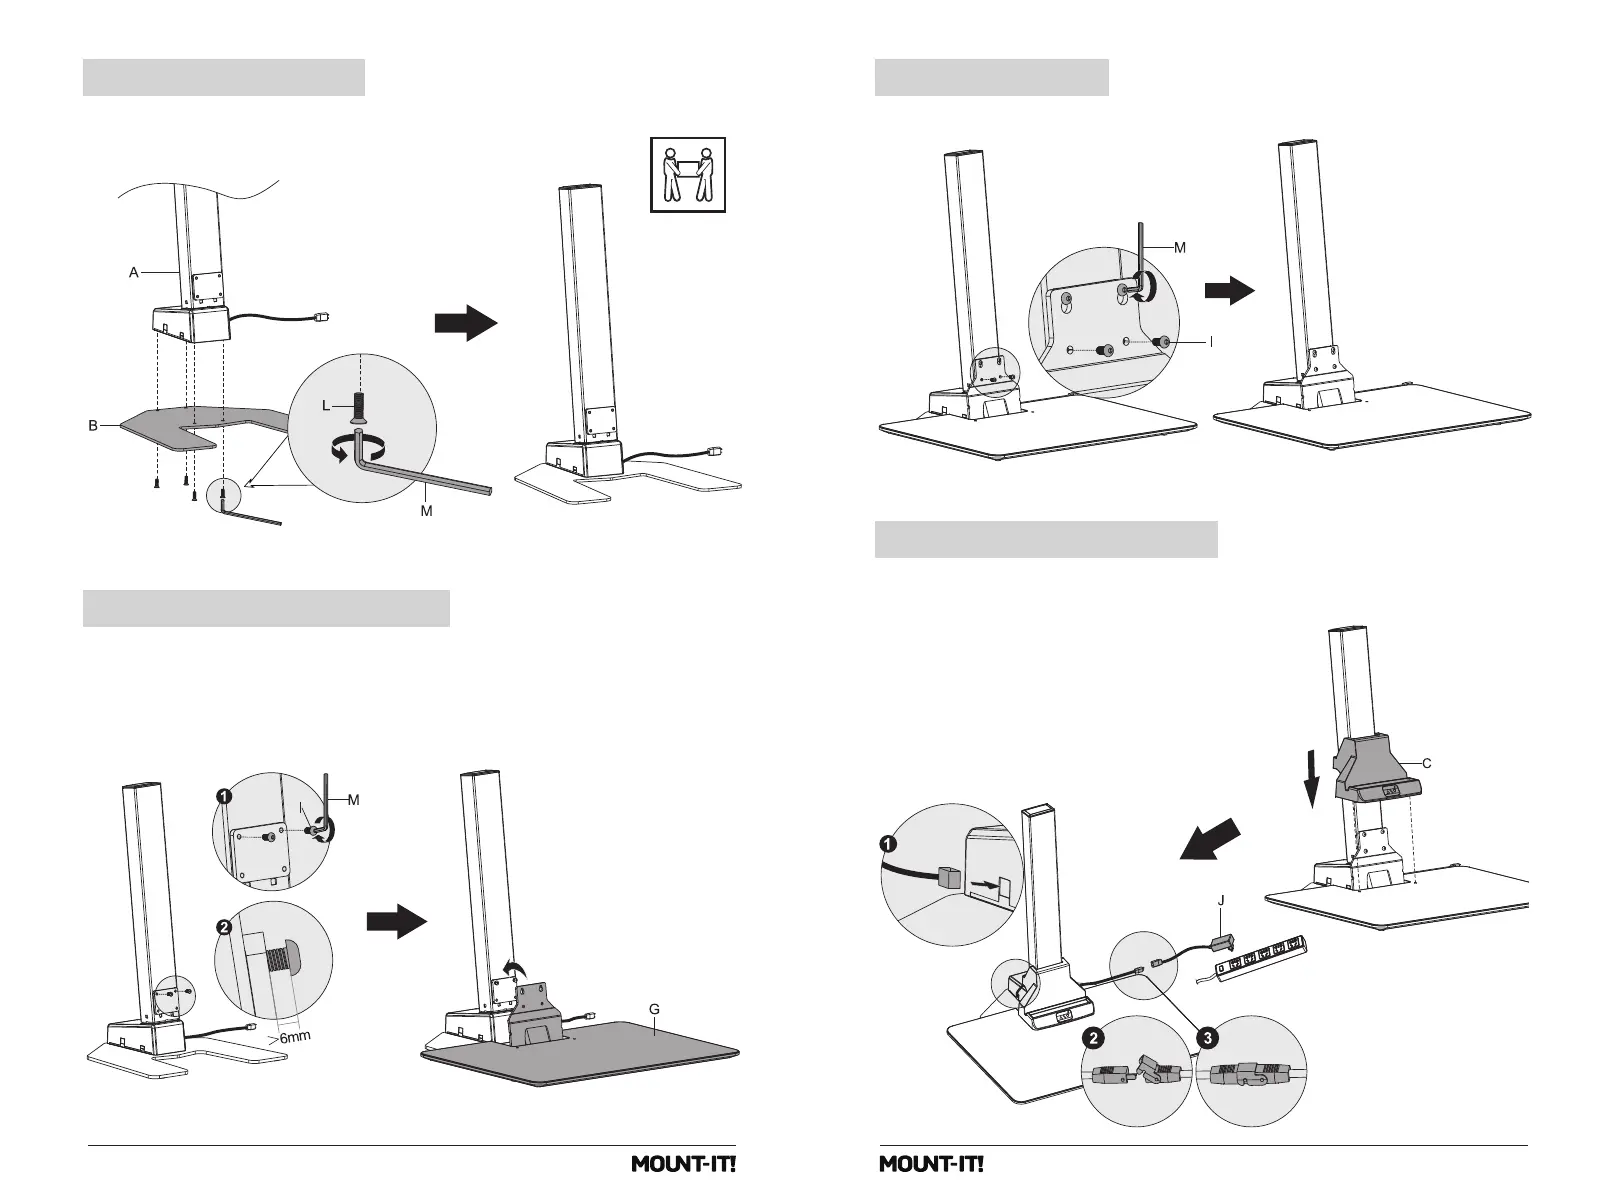
• Insert the upper 2 Bolts (#I) into the rectangular bracket on the lower portion of the Lift Column.
• Leave a gap of approximately 6mm (.23in) between the bottom of the bolt head and the bracket.
• Hang the Keyboard Tray (#G) on the 2 bolts and ensure that the bolts are seated fully in the smaller end
of the keyhole shaped holes.
Caution: Do not use the keyboard tray to lift or move the desk.
Attach the Keyboard Tray
Step 2
• Attach the Lift Column (#A) to the Base (#B) using the Bolts (#I).
Assemble the Base
Step 1
• Install the 2 Bolts (#I) to the lower bolt holes then fully tighten the upper 2 bolts.
Secure the Tray
Step 3
• Slide the Control Panel (#C) down over the top of the column.
• Pass the control panel cable through the opening shown here and out the other side.
• Connect the cable to the Wall Plug (#J)
• Press the latch down to secure the ends together.
• Plug the cord into a power outlet.
Install the Control Panel
Step 4
>0.24"
Bekijk gratis de handleiding van Mount-It! MI-7983, stel vragen en lees de antwoorden op veelvoorkomende problemen, of gebruik onze assistent om sneller informatie in de handleiding te vinden of uitleg te krijgen over specifieke functies.
Productinformatie
| Merk | Mount-It! |
| Model | MI-7983 |
| Categorie | Niet gecategoriseerd |
| Taal | Nederlands |
| Grootte | 1359 MB |


