Minolta DiMAGE Scan Multi PRO handleiding
Handleiding
Je bekijkt pagina 15 van 129
DiMAGE Scan Multi PRO 15
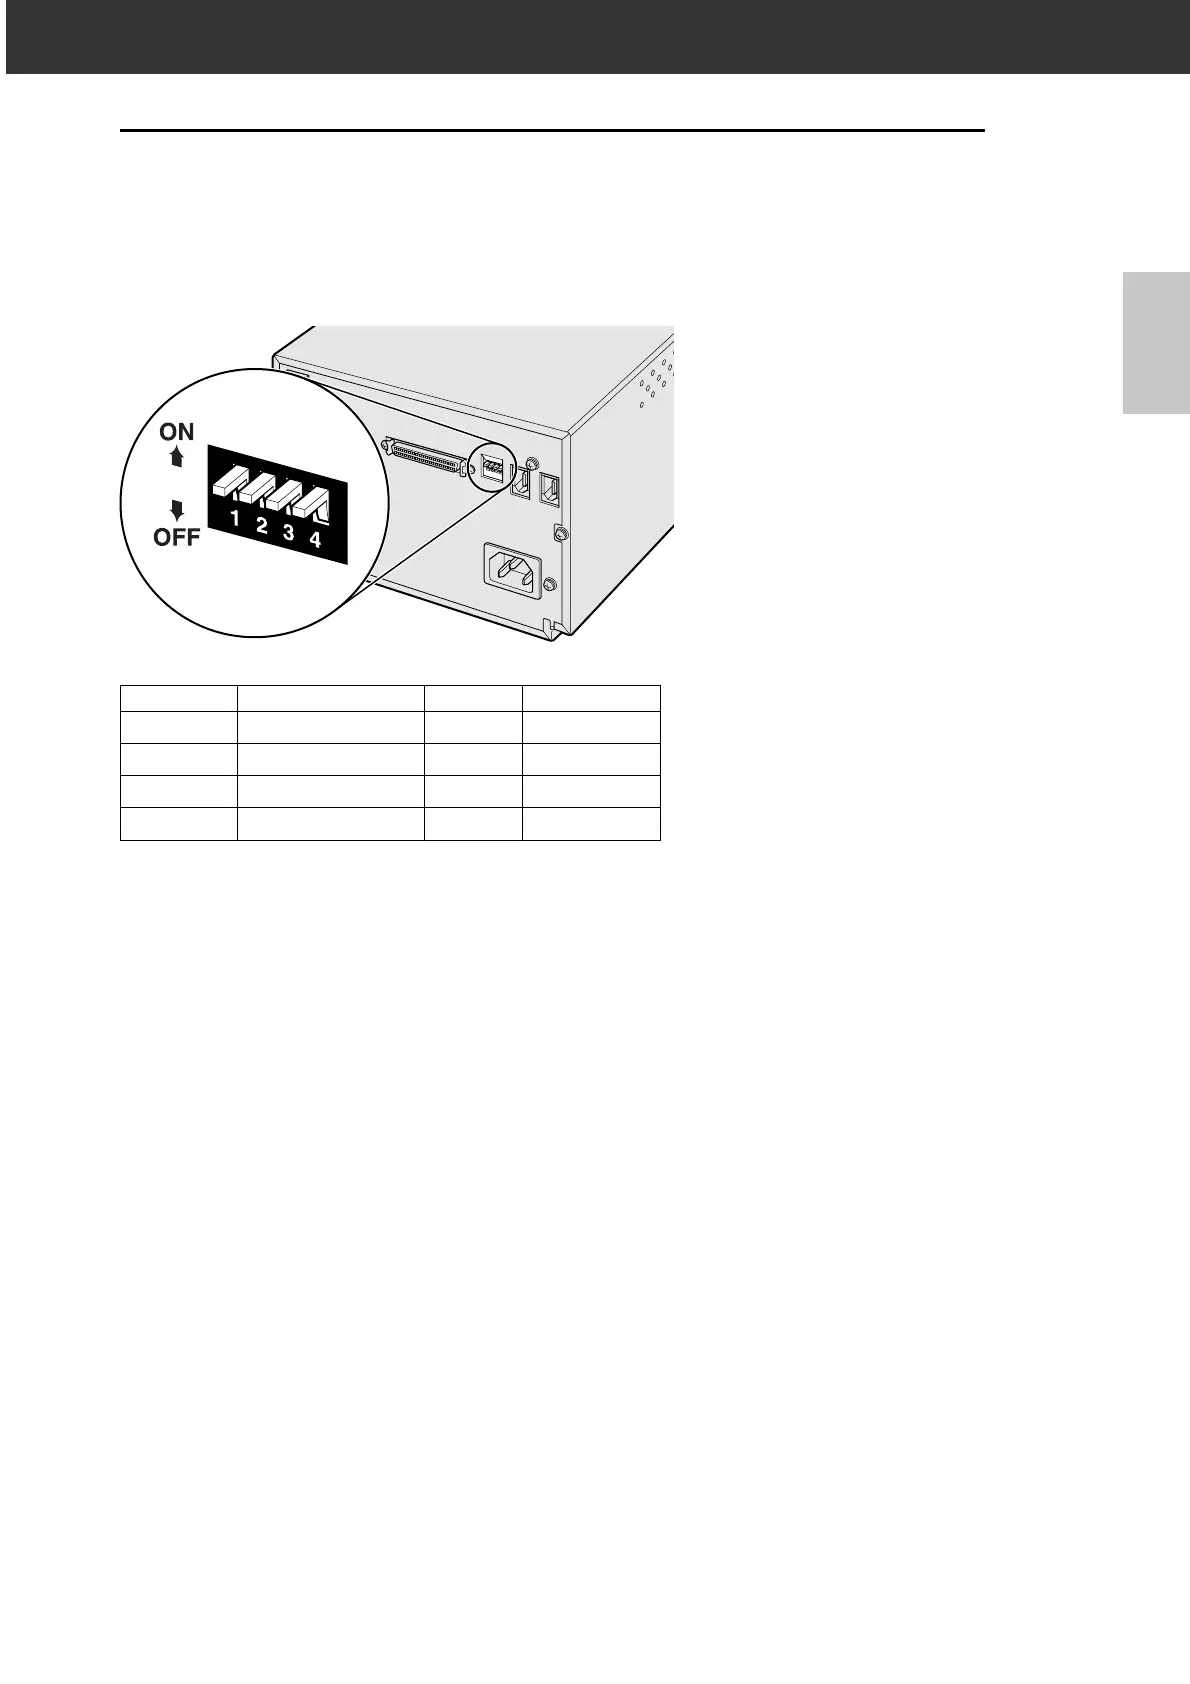
CONNECTING THE HARDWARE
Switch No. Function ON OFF
1 SCSI terminator ON OFF
2 Auto Power Save ON OFF
3———
4 Select Interface SCSI IEEE 1394
SETTING THE DIP SWITCHES
Before connecting the scanner to a computer turn off the power of the scanner, then, decide
which interface you will be using, and use the Dip switch No. 4 to set the scanner to the selected
interface. Set additional Dip switches for termination and auto power save if necessary.
Switch No. 1: SCSI Terminator
Set when selecting SCSI as the interface to be used to connect the scanner to a computer. If this
scanner is the last device of the SCSI chain, set to ON. Switch No. 1 is factory preset to ON.
Switch No. 2: Auto Power Save
Set to “ON” (up), if you want the fluorescent light to turn off automatically, when you are not going
to use it for about 2 hours. In order to save electricity and the life of the fluorescent light, we
recommend that you have it “ON”. The default setting is ON.
Switch No. 3: Inactive
Switch No. 4: Selecting an Interface
The selected interface can be switched between SCSI and IEEE 1394 when the scanner is
connected to a computer. The SCSI and IEEE 1394 cannot be used simultaneously. Switch No. 4
is factory preset to SCSI.
Bekijk gratis de handleiding van Minolta DiMAGE Scan Multi PRO, stel vragen en lees de antwoorden op veelvoorkomende problemen, of gebruik onze assistent om sneller informatie in de handleiding te vinden of uitleg te krijgen over specifieke functies.
Productinformatie
| Merk | Minolta |
| Model | DiMAGE Scan Multi PRO |
| Categorie | Niet gecategoriseerd |
| Taal | Nederlands |
| Grootte | 14099 MB |


