Milwaukee M12 3150-20 handleiding
Handleiding
Je bekijkt pagina 4 van 16
4
To turn on:
1. Press and hold the power button .
2. Release the power button when the screen
turns on.
To turn o:
1. Press and hold the power button .
2. Release the power button when the screen
turns o.
Camera LED Brightness
Once the tool is turned on, press the power button
to cycle through the levels of brightness or turn it o.
The level of brightness is displayed on the LCD.
Zoom Button
Press the zoom button to cycle through the 3 zoom
levels. The level of zoom is displayed on the LCD.
Camera View Button
Press the button to show the side view. Push the
button again to return the image to the front cam-
era view.
Save Photo Button
Press the button to save a photo of the current
view of the LCD screen.
Record Video Button
Press the button to start recording the current
view of the LCD screen. Press the button again
to stop recording.
Taking Photos/Videos
1. Adjust the cable to best t the opening. After
checking the workspace for hazards, insert the
cable.
2. Use the button to zoom in or out on the image.
3. Use the button to change the camera view.
4. Use the power button to increase/decrease the
camera LED brightness.
5. To save a photo, press the button.
6. To record a video, press the button.
NOTE: During a video recording, REC displays
on the LCD and the time code starts counting up.
7. To end the video, press .
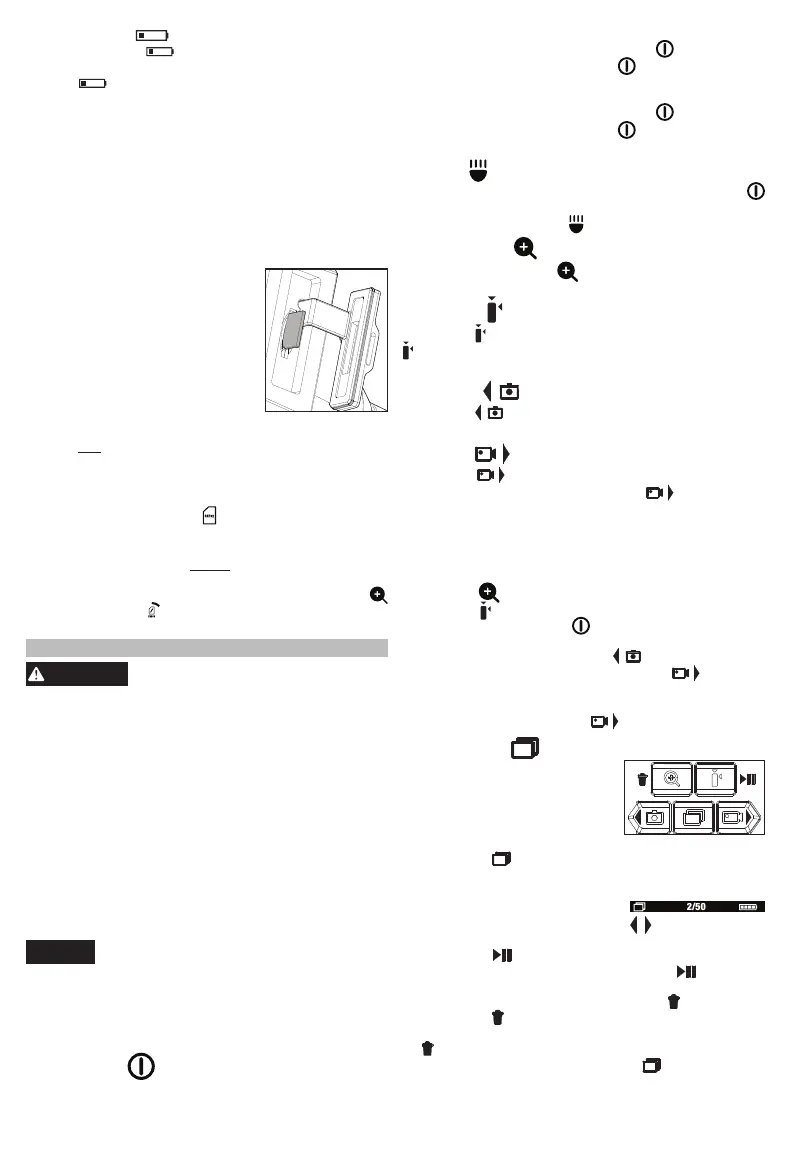
Gallery Mode
NOTE: When in gallery mode,
button actions change to their
secondary functions to allow for
navigation, playback, pause,
and deletion purposes.
1. Press the button to enter gallery mode to view
photos and videos saved on the SD card.
2. The number of saved photos/videos is displayed
on the top of the LCD screen.
2/50
3. While in gallery mode, use the buttons to move
through the stored photos/videos.
4. Press the button to play a saved video.
5. While a video is playing, press the button to
pause.
6. To delete a photo/video, press the button then
press the button again to conrm the deletion.
7. To cancel a deletion, press any button other than
button.
8. To exit gallery mode, press the button.
Sleep Mode
The tool will shut o automatically if unused for
30 minutes.
Low Battery
The low battery red indicator will ash in the
upper right corner. Once the battery dies, the low
battery indicator will appear in the center of the
screen, and the tool will shut o. See "Removing/
Inserting the Battery" section.
Installing/Removing the Cable
To install the cable, line up the groove on top and
push into the tool. Twist the cover until secure.
To remove the cable, reverse the procedure.
Inserting/Removing the Memory Card
The number of photos/videos that can be saved is
based on the size of the memory card.
1. Open the protective cover to access the memory
card slot.
2. Slide the memory card into the
slot, the top of the card should
face away from the LCD screen.
Press in the card securely. It
should click in place.
3. Close the protective cover.
4. To remove the memory card,
press it in and release. It will
pop out.
NOTE: To save photos/videos to the memory card,
it must not be "locked" with the write-protection tab
in the lower position.
Formatting a New Memory Card
The camera comes preinstalled with a memory card
formatted to FAT32. The indicator will display if a
memory card is inserted that is not formatted to
FAT32. Memory cards must be formatted to FAT32.
NOTE: Formatting will erase all photos and videos
contained on that memory card.
To format a memory card to FAT32, press the
button twice. The indicator will display until format-
ting is completed and the tool will turn o.
OPERATION
WARNING
To reduce the risk of injury, always
wear proper eye protection marked
to comply with ANSI Z87.1.
To reduce the risk of explosion, electric shock
and property damage, always check the work
area before beginning a job. Do not allow cable to
contact electrical, chemical, or moving hazards.
Behind walls: Shut o circuit breakers to the
entire area.
Inside pipes: Ensure there is no electrical
charge to the pipes before beginning inspec-
tion. Do not allow liquid to ow down cable
and into tool.
Vehicle use: Turn off the engine and allow
to cool before beginning inspection to avoid
burns. Do not use in fuel or oil tanks that have
not been properly ushed and cleaned.
NOTICE
To reduce the risk of damage to the tool,
do not use excessive force or "kink"
the cable. Do not use in areas where camera and
cable will contact gas, corrosive, or oily sub-
stances.
Do not use the cable to clear clogs or move ob-
structions. This is not a drain cleaner!
Turning On/O
When the inspection camera is turned on and the
camera is pointed at an object, the LCD screen will
show the image the lens is pointing at.
Bekijk gratis de handleiding van Milwaukee M12 3150-20, stel vragen en lees de antwoorden op veelvoorkomende problemen, of gebruik onze assistent om sneller informatie in de handleiding te vinden of uitleg te krijgen over specifieke functies.
Productinformatie
| Merk | Milwaukee |
| Model | M12 3150-20 |
| Categorie | Niet gecategoriseerd |
| Taal | Nederlands |
| Grootte | 2946 MB |


