Handleiding
Je bekijkt pagina 13 van 44
13
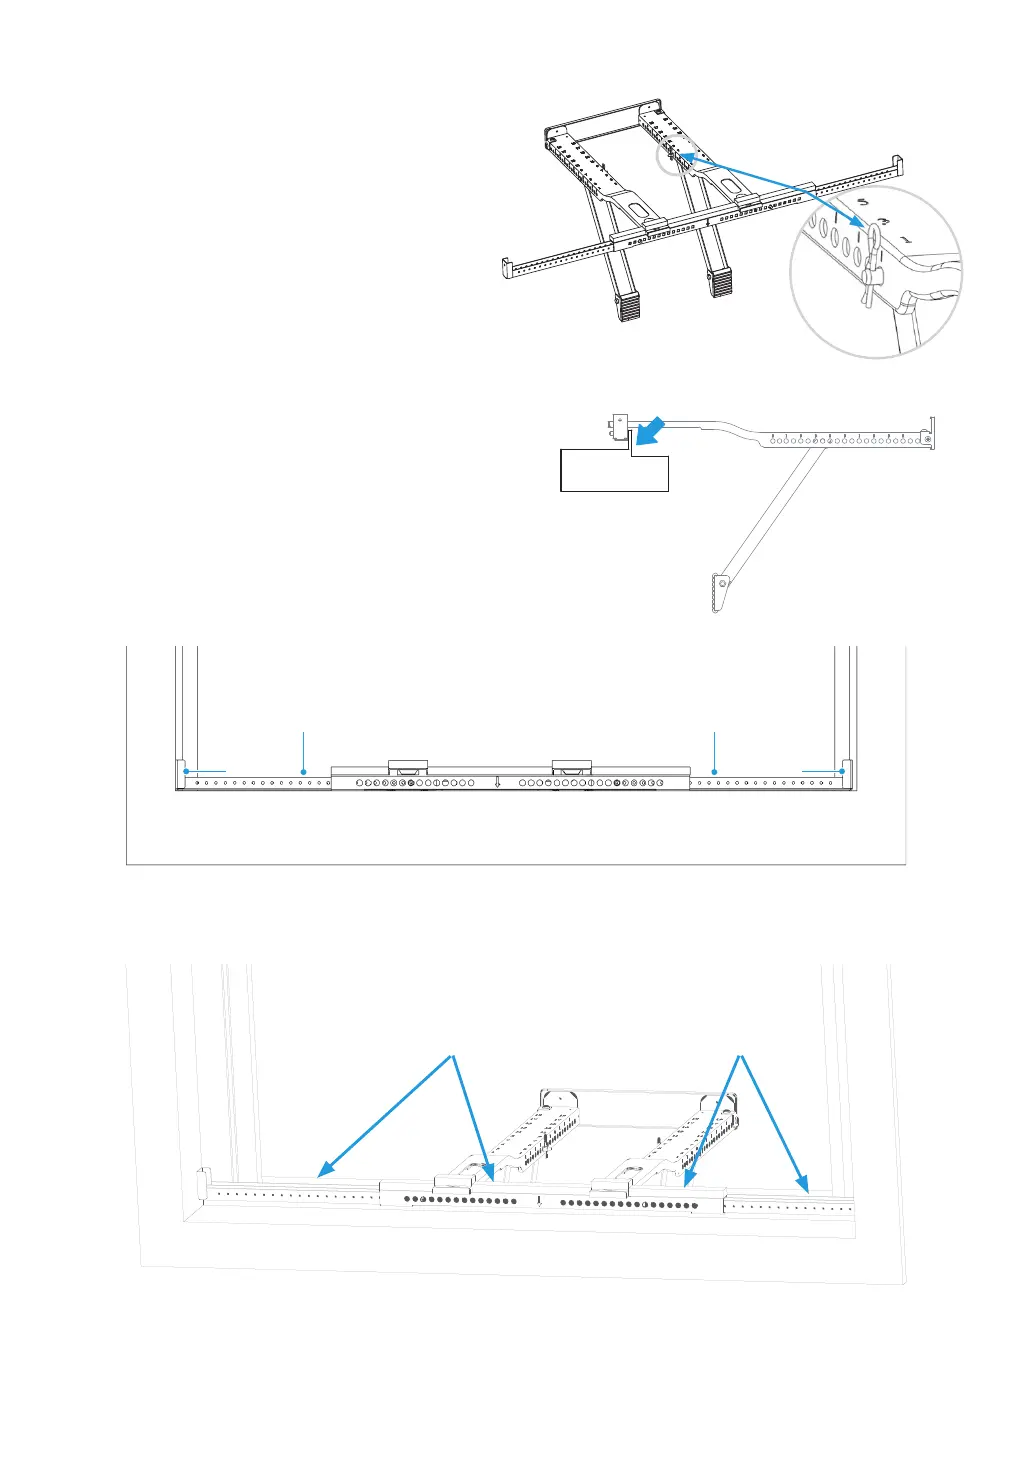
D. Check the level again and ensure the bracket
feels secure. After making any necessary
adjustments, insert the cotter pins into the
Main Support Pins.
E. If necessary, cover the holes on the front of the bracket with the Bracket Sealing Foam.
Fig. 7
Fig. 10
Fig. 9
1/2”
Type A
1/2”
Type A
1” Type A
(Flat Sill)
1” Type A
(Flat Sill)
If your window has a lip, make sure the bracket is
placed as shown in Fig. 8.
Secure the bracket to the windowsill by drilling
1/8” pilot holes and installing the 1/2” Type A
screws as shown in Fig. 9.
If your window does not have a lipped sill, be sure
to drill 1/8” pilot holes and install the 1” Type A
(Flat Sill) screws as shown in Fig. 9 below.
Fig. 8
Cotter Pin
Vinyl Lip
OUTSIDEINSIDE
Cover holes with
Bracket Sealing Foam
Cover holes with
Bracket Sealing Foam
Bekijk gratis de handleiding van Midea MAW08U2QWT, stel vragen en lees de antwoorden op veelvoorkomende problemen, of gebruik onze assistent om sneller informatie in de handleiding te vinden of uitleg te krijgen over specifieke functies.
Productinformatie
| Merk | Midea |
| Model | MAW08U2QWT |
| Categorie | Airco |
| Taal | Nederlands |
| Grootte | 5221 MB |


